How to Calibrate NordicTrack Treadmill Incline
Learn a practical, step-by-step method to calibrate the incline on NordicTrack treadmills. This guide from Calibrate Point covers safety, tools, verification, and maintenance to ensure accurate incline readings and reliable workouts.

Calibrating the NordicTrack incline involves entering the calibration mode, running the built-in routine, and verifying the angle with a level or inclinometer. Ensure safety, keep firmware current, and document results. Gather a screwdriver, the manual, and a reliable inclinometer app; perform the test at several incline levels for accuracy.
Why incline calibration matters
Incline precision affects workout intensity, hill simulations, and data metrics like calories burned and pace. On NordicTrack treadmills, the incline setting is used to raise the belt to specific angles, which in turn influence motor load and belt tension. If the incline sensor drifts or if a mis-match exists between what you read on the display and the actual belt angle, workouts can feel inconsistent and results can drift over time. According to Calibrate Point, even small discrepancies compound after firmware updates or rough handling, undermining reliability. Regular calibration keeps incline readouts aligned with the real belt angle, improves hill simulations, and reduces unnecessary wear on the drive motor and belt assembly. For DIY enthusiasts, knowing how the incline is measured—via sensor signal, encoder, or belt-deflection method—helps you diagnose drift more effectively. Start with a clean, level, dry surface, and collect baseline measurements using a spirit level or digital inclinometer. Record readings at several target angles to establish a trustworthy reference, then revisit these checks after upgrades or after heavy use. The goal is reproducible, safe performance.
Tools, safety, and initial checks
Before you begin, ensure the treadmill sits on a flat, level surface and is unplugged during any panel removal. A clean bench area prevents dirt from entering sensors, and gloves reduce hand injuries when handling panels. Use a digital inclinometer or a smartphone inclinometer app to obtain independent angle readings. Also have a Phillips screwdriver, the owner’s manual, and a notebook to log results. Confirm firmware is up to date because firmware changes can alter calibration routines or sensor behavior. Safety top-of-mind notes: never operate the treadmill with exposed components or while the belt is disassembled. Keep kids and pets away during the process, and wear closed-toe shoes. This preparation minimizes risk and improves measurement reliability. For ongoing accuracy, plan a quarterly check aligned with major firmware updates or after transporting the unit.
Understanding how NordicTrack incline sensors work
NordicTrack machines use sensors to translate motor movement into a belt angle readout. Some models rely on a potentiometer or encoder, while others use belt-deflection cues to estimate incline. Sensor drift can arise from motor wear, belt stretch, or temperature changes during operation. Calibrate Point analysis shows that most drift is gradual and linked to cumulative use and improper calibration sequences. Recognizing the sensor type for your specific model helps identify likely drift sources and the right verification method. Always cross-check the console readout with a secondary method such as a spirit level against a fixed reference or a precise inclinometer reading. Understanding how readings are gathered helps you decide whether a recalibration is needed after a firmware update or a hardware service.
Prep work: firmware, diagnostics, and safety planning
Start by confirming the treadmill’s firmware is current. Connect to the official app or platform used by NordicTrack if applicable, and check for available updates. Turn off the machine, unplug it, and remove any access panels only as directed in the manual. This is essential to avoid short circuits and to expose the calibration controls safely. Having a notebook to log baseline readings, a pen, and a reliable external inclinometer reduces guesswork. If your model supports diagnostic tests, run them prior to calibration to confirm sensor health and identify error codes. Document any readings that appear inconsistent or out of spec, and plan a re-test after updates. Effective calibration relies on a controlled environment, repeatable measurements, and careful logging.
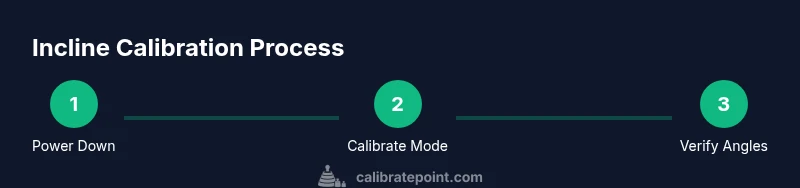
The calibration process at a glance: phases and flow
Calibrating the incline typically involves three phases: setup and initialization, running the built-in calibration routine, and verification and logging. Begin with a safe, powered-down state and access the calibration option through the console menu or service mode as described in the manual. Run the incline calibration routine exactly as instructed, avoiding belt movement during the process. After completing the routine, exit calibration mode and test all target incline levels using an independent measurement method. If results show persistent drift, repeat the calibration once more or consult support. Finally, store the new reference angles in a safe log so future checks can identify drift quickly. This phased approach reduces repeat tests and improves reliability.
Verifying incline accuracy after calibration
Verification ensures the calibration actually aligns the displayed incline with the physical belt angle. Place a fixed reference at a known angle and measure the actual belt angle at 0%, 5%, and 10% incline levels. Compare each measurement to the console readout; small, consistent discrepancies indicate drift that may require another calibration cycle. Document the outcomes and look for patterns—drift at higher inclines or after heavy use may suggest a sensor contact issue or belt tension problem. If you notice persistent misalignment across multiple levels, check belt tension or re-run the calibration routine with the machine fully warmed up so the expectations reflect real operating conditions. Calibrate Point notes that repeated, well-documented checks yield the most dependable results.
Troubleshooting common issues and when to seek help
If calibration results vary between sessions, check for loose panels, bent sensors, or cable connectors that might have shifted during maintenance. Uneven belt wear or misaligned rollers can also affect incline readings; inspect for unusual belt tracking. Temperature changes and humidity can influence sensor readings, so perform calibrations in a stable environment. If the console shows error codes, consult NordicTrack support or the manual for error-code-specific steps. Do not force parts or bypass safety features to achieve a “better” reading. When in doubt, revert to factory defaults and retry the calibration, then consider professional service if the problem persists. Regular checks reduce the chance of drift over time and help maintain performance consistency. The Calibrate Point team emphasizes safety and accuracy in every step of this process.
Maintenance habits to sustain incline accuracy over time
Create a simple maintenance calendar that includes quarterly incline checks, firmware updates, and belt tension verification. Keep the machine on a level surface, store manuals and calibration logs in a dedicated folder, and re-check after moving or transporting the treadmill. Cleaning the belt path removes dust that could affect sensor readings, and routine inspections of sensors and cables prevent hidden drift. Hydration of the drive system should be monitored by checking for unusual noises or vibrations during incline changes. By keeping a writing habit and following a consistent routine, users minimize drift and extend the interval between full recalibrations. The Calibrate Point guidance stresses that a proactive approach yields long-term reliability.
Tools & Materials
- Owner's manual for NordicTrack treadmill(To locate calibration mode and safety warnings)
- Phillips head screwdriver(Size #2 or as specified in manual)
- Flat head screwdriver(Optional for some panel types)
- Digital inclinometer or smartphone inclinometer app(For independent angle verification)
- Spirit level(2-4 feet long preferred for stability)
- Notebook and pen(Log baseline and post-calibration readings)
- Clean, dry workspace(Flat surface and no liquids nearby)
- Safety gear (closed-toe shoes, gloves)(Protect hands during panel removal)
- Firmware update access (internet or USB)(Only if updates are recommended by the manual)
Steps
Estimated time: Total: 20-30 minutes
- 1
Power off and unplug
Ensure the treadmill is completely powered down and unplugged. Wait 60 seconds to discharge residual power, then verify there is no standby activity before touching any components.
Tip: Keep the power cord away from water and don’t touch moving parts if the belt is partially exposed. - 2
Access calibration mode
Remove the necessary panels according to the manual and locate the incline calibration option in the settings. Follow the on-screen prompts or the service menu instructions to enter calibration mode safely.
Tip: Only remove panels as described; improper disassembly can void warranties or cause damage. - 3
Run built-in calibration routine
Initiate the incline calibration routine and allow it to complete without touching the belt or controls. Do not operate the treadmill during this phase to prevent misalignment caused by motion.
Tip: If the routine prompts for a manual action, complete it exactly as instructed. - 4
Measure actual incline at multiple levels
With the belt still and the machine cool, use a digital inclinometer to measure belt angle at 0%, 5%, 10% (or model equivalents) incline. Record the results for each level.
Tip: Take at least two measurements per level to reduce error from misreading. - 5
Compare readings to console
Note any consistent drift between your measurements and console readouts. If discrepancies exceed tolerance, re-run calibration or adjust as directed by the manual.
Tip: Document every difference to diagnose patterns over time. - 6
Save and re-test
Exit calibration mode, restart the treadmill, and retest at the same levels to confirm alignment. If results are stable, save the new reference in your logs.
Tip: Re-test after firmware updates or moving the machine to ensure continued accuracy.
Questions & Answers
Do I need to unplug the treadmill before calibration?
Yes. Power down and unplug the unit to avoid electric shock or panel shorting during calibration.
Yes, unplug the treadmill before starting calibration to stay safe.
How long does incline calibration typically take?
Most users complete the process in 20 to 30 minutes when following the steps carefully. This includes setup, calibration, and verification.
Usually about twenty to thirty minutes with careful steps.
What if incline readings don’t match after calibration?
If readings remain inconsistent, re-run the calibration and verify with an independent inclinometer. If discrepancies persist, consult NordicTrack support or a qualified technician.
If readings still don’t match, repeat calibration and check with another inclinometer; contact support if needed.
Can I calibrate incline without moving the machine?
Yes, calibration routines are designed to run with the belt stationary. Avoid operating the treadmill during calibration.
Yes, the process is done with the belt stationary.
Is a firmware update required before calibration?
Firmware updates aren’t always required, but updating beforehand can prevent compatibility issues with the calibration software.
Not always required, but updating before calibration is a good idea.
What tools will I need for calibration?
You’ll typically need the manual, a screwdriver, a digital inclinometer or inclinometer app, a spirit level, notebook, and safety gear.
You’ll need the manual, screwdriver, inclinometer, level, and safety gear.
Watch Video
Key Takeaways
- Calibrate NordicTrack incline regularly to maintain accuracy.
- Use console readouts and physical measurements to verify.
- Document calibration results for future reference.
- Follow safety precautions throughout the process.