Calibrate PS4 Controller: A Step-by-Step Guide
Learn how to calibrate your PS4 controller to reduce drift and improve accuracy. This practical guide covers built-in options, Steam-based PC calibration, and safe maintenance tips for reliable input across games and tasks.

Learn how to calibrate a PS4 controller to improve accuracy and reduce drift. This guide covers built-in PS4 steps (and why they’re limited), Steam-based calibration on PC, and safe fixes like resetting the controller and cleaning the sticks. You’ll learn when to calibrate, what tools you’ll need, and how to test results for reliable input.
Why calibrating a PS4 controller matters
According to Calibrate Point, accurate input is essential for both gaming and professional applications that rely on precise control. A PS4 controller’s analog sticks and triggers can develop drift, dead zones, or inconsistent responses over time, especially after heavy use or hardware wear. Calibration aligns the controller’s raw sensor data with the expected output, so when you push a stick to the edge, the game responds predictably. Without calibration, you may notice small but persistent drift that only worsens under pressure, like during a timed challenge or a motion-based game. Regular calibration is part of responsible device maintenance, ensuring your tool remains reliable across titles, levels, and testing scenarios. In this section, we’ll distinguish between “drift” caused by hardware wear and “calibration error” caused by software interpretation, so you can decide when a fix is likely to come from calibration rather than replacement. We’ll also set expectations: calibration can improve consistency, but it won’t repair broken hardware or mis-routed inputs caused by worn sticks.
Understanding drift, dead zones, and input lag
Drift occurs when a stick gently drifts away from the center even when you aren’t touching it. Dead zones are small areas around the center where minor movements aren’t registered, which can feel like the controller is “napping” during precise tasks. Input lag is the delay between moving the stick and the on-screen response; even a few milliseconds can affect competitive play or fine-tuned calibration work. Recognizing these issues helps you decide whether calibration is the right remedy. Remember that some drift is normal with aging hardware, but severe drift combined with inconsistent button mapping often signals a need for calibration, cleaning, or eventual replacement.
Built-in options vs third-party solutions
The PS4 ecosystem has limited built-in calibration options for the DualShock 4. Most users find better results with third-party or PC-based tools. If you use a PC, Steam’s controller configuration features (under Big Picture mode) can guide you through joystick calibration and button remapping. There are also third-party utilities like DS4Windows that expose more detailed calibration controls. When using these tools, ensure you’re connected via USB for the most reliable data transfer and avoid wireless interference during calibration. If you can’t access a PC, a clean reset and firmware check on the PS4 can still improve input stability, though it may not fully eliminate drift.
Preparing your workspace and tools
A clean, distraction-free workspace helps you focus on calibration quality. Gather a powered USB connection, a USB cable compatible with your DS4 (micro-USB or USB-C, depending on model), and a small reset tool (such as a paperclip) to press the controller’s reset hole. Have a PC or a PS4 nearby for testing, plus access to Steam if you plan to use Steam’s controller calibration. Keep isopropyl alcohol wipes handy for gentle cleaning around the analog sticks—dust and oil can affect sensor readings. Optional but helpful: a second controller for side-by-side comparison during testing. By organizing your tools, you reduce the chance of missed steps or accidental resets.
Step-by-step: calibrating with Steam on PC
If you’re using a PC, Steam offers a practical calibration workflow for the DualShock 4. Connect the DS4 via USB, then open Steam in Big Picture mode. Go to Settings > Controller Settings and enable PlayStation Configuration Support. In Controller Configuration, select the DS4 and look for calibration options for the sticks and triggers. Follow the on-screen prompts to center sticks and test responses in the built-in tester. If Steam doesn’t offer a direct calibration function for a particular aspect, you can still use Steam’s testing environment to verify that inputs map consistently to on-screen actions and adjust through remapping as needed. Finish by testing in a game or a controlled test scene to confirm stability.
Step-by-step: calibrating using PS4 with USB reset and firmware
Power down the PS4 and locate the tiny reset hole on the back of the DualShock 4. Use a pin or paperclip to press and hold the button for a few seconds to re-sync with the console. Connect the DS4 via USB and navigate to Settings > Devices > Controllers to check for firmware updates. If an update is available, install it to ensure the latest sensor readings are supported. After updating, run a practical in-game test focusing on stick centering and trigger response. If drift persists, combine the reset with a manual cleaning of the analog sticks (gently lift and wipe the area around the sticks with alcohol wipes) to remove oils that can affect readings.
Step-by-step: testing and validating calibration
With calibration completed, it’s time to validate. Use a game that requires precise control, a calibration testing scene, or Steam’s tester if available. Move sticks through their full range, return to center, and observe whether the input matches the on-screen action smoothly. Check both sticks and the triggers for consistent response across directions and ranges. If you notice residual drift, re-run the calibration steps focusing on the axis that misbehaves the most. Record measurements or screenshots of test results to track improvements over time. Regular, repeated validation helps maintain reliability as hardware ages.
Common pitfalls and how to avoid them
Avoid relying solely on a single configuration. Calibration can fix minor drift, but significant wear may requireHardware replacement. Do not use liquids on the DS4’s sensitive sensors; use dry or minimally damp wipes instead. Over-cleaning can cause mechanical looseness; be gentle around the joysticks and avoid disassembling the controller. Ensure cables and adapters are high quality to prevent noise from contaminating readings. Finally, back up any remapping profiles before performing resets or firmware updates so you can restore preferred layouts quickly.
Maintenance and when to calibrate again
Treat calibration as routine maintenance. Consider calibrating after new games that demand precision, after cleaning the sticks, or if you notice any new drift or inconsistency. For intensive use in professional contexts, schedule quarterly checks or align them with device inspection routines. A well-tuned DS4 can extend its useful life and improve reliability across diverse tasks, from esports-style play to precise data collection in testing environments.
Tools & Materials
- DualShock 4 Controller (PS4)(Original DS4 or compatible model)
- USB cable (micro-USB or USB-C depending on DS4 model)(Use a reliable cable to avoid data noise)
- Reset tool (pin or paperclip)(For re-syncing the controller with the console or PC)
- PC with Steam installed(Only needed if you plan Steam calibration)
- Calibration software (Steam or DS4Windows)(Optional, use if available and comfortable)
- Isopropyl alcohol wipes(Gently clean around sticks; avoid excess liquid)
- Clean, dust-free workspace(Prevents debris from entering stick mechanisms)
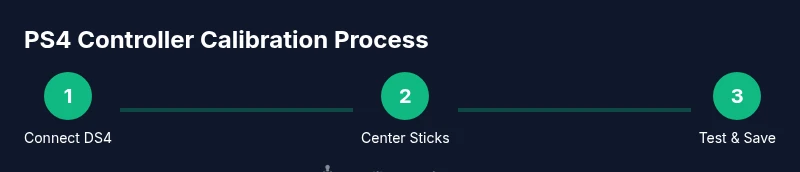
Steps
Estimated time: 60-90 minutes
- 1
Connect DS4 to testing device
Use the USB cable to connect the PS4 controller to your PC or PS4 console. This ensures a stable data stream for calibration and avoids wireless interference during the process.
Tip: Prefer a wired connection to minimize input jitter during centering tests. - 2
Open calibration tool
Launch Steam in Big Picture mode and enable PlayStation Configuration Support, then navigate to the controller configuration area where calibration options may appear.
Tip: If the calibration option isn’t visible, use the tester to validate current inputs and note any axis that drift. - 3
Center the sticks
Follow the on-screen prompts to center both analog sticks. Move each stick through its full range to confirm centering is stable when released.
Tip: Pause briefly at center to ensure the sensor settles before testing again. - 4
Test triggers and buttons
Calibrate or test the L2/R2 triggers and face buttons to ensure consistent readings and repeatability across presses.
Tip: Record any inconsistent response times and map them back to calibration steps if needed. - 5
Save and apply changes
Apply the calibration profile and save it as a default or per-game profile as needed.
Tip: Keep a backup of previous profiles before overwriting. - 6
PS4 firmware check
On PS4, go to Settings > Devices > Controllers and check for firmware updates to ensure sensor data aligns with current software expectations.
Tip: Update only when a stable internet connection is available to avoid partial installs. - 7
Reset if issues persist
If persistent drift remains, perform a small reset of the DS4 to re-sync with the console or PC.
Tip: Do not reset repeatedly in quick succession; allow a short pause between attempts. - 8
Re-test in-game
Launch a demanding game or testing scene and verify that aim, strafing, and button timing feel consistent.
Tip: Compare with a baseline test to confirm improvements. - 9
Document results
Record test results, noting drift levels and calibration profiles used, to track long-term stability.
Tip: A simple before/after log helps justify future calibration decisions.
Questions & Answers
Can PS4 controllers be fully calibrated without a PC?
While you can perform a basic reset and firmware check on PS4, most precise calibration workflows rely on a PC or dedicated calibration tools. If you don’t have a PC, rely on the PS4 reset and in-game testing to improve stability.
You can reset the PS4 controller and test on the console, but for the most accurate calibration, a PC-based tool is recommended.
Does calibration fix all drift issues?
Calibration can substantially reduce drift and improve centering, but severe wear or damaged joints may require hardware replacement. Use calibration as a maintenance step before considering replacement.
Calibration greatly helps, but if the hardware is worn, drift may persist despite calibration.
Should I calibrate the sticks separately from triggers?
Yes, calibrate sticks and triggers separately if your tools offer granular control. This helps isolate which axis is contributing to misreads.
Yes—calibrate sticks and triggers separately to identify the exact source of the issue.
How often should I calibrate my PS4 controller?
Calibrate when you notice drift, reduced accuracy, or after cleaning the sticks. For heavy use, quarterly checks can help maintain performance.
Calibrate when you notice drift or after maintenance; consider quarterly checks for heavy use.
Will calibration affect other connected controllers?
Calibration settings are typically per device. If you share a console, ensure you apply the correct profile to the intended controller.
Profiles are usually per controller, so calibrate the right one for the device you’re using.
What tests should I run to verify success?
Run a mix of precise aiming, quick-turn maneuvers, and long-range movements in a test scene or game to confirm consistent responses.
Test with precise aiming and quick moves to confirm accuracy.
Watch Video
Key Takeaways
- Calibrate PS4 controller to improve accuracy and reduce drift
- Use a wired connection for reliable calibration testing
- Steam or DS4Windows can provide robust calibration options
- Test across games to verify improved responsiveness
- Maintain profiles and perform periodic checks