Calibrate Quest 3: A Practical Step-by-Step Guide
Learn how to calibrate Quest 3 for accurate tracking and improved comfort. This comprehensive guide walks you through setup, calibration routines, testing, and maintenance with practical tips for different play spaces.

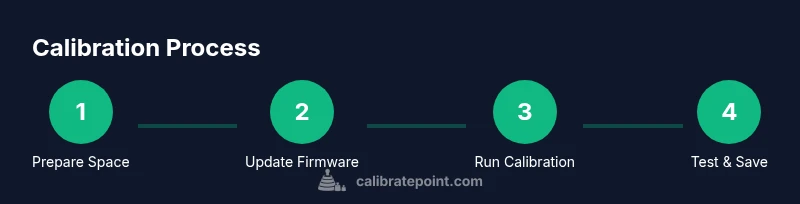
By following this guide, you will calibrate Quest 3 for precise headset tracking and improved controller alignment. Start with a clean play space, ensure your firmware is up to date, and run the built-in calibration routines. Then verify results with targeted tests and adjust as needed for reliable performance.
Why Calibration Matters for Quest 3
Accurate calibration is the foundation of believable, immersive VR on Quest 3. When tracking is aligned, you experience precise hand presence, stable head tracking, and fewer drift errors during fast movements. According to Calibrate Point, a well-executed calibration routine reduces controller lag and improves room-scale reliability, making every game and training scenario more predictable. In practice, Calibrate quest 3 steps aren’t merely optional maintenance; they directly affect your comfort, safety, and performance across genres, from rhythm games to simulation training. A properly calibrated system also minimizes cognitive load, so you can focus on your objectives rather than chasing calibration quirks. This section sets the stage for a reliable work-flow that technicians and enthusiasts can repeat session after session.
Understanding Quest 3 Tracking and Sensors
Quest 3 uses inside-out tracking with multiple cameras and an inertial measurement unit (IMU) to determine your position and orientation. Calibration aligns the sensor readings with real-world space, reducing jitter and drift over time. When the sensors are misaligned, small head turns can produce exaggerated or delayed responses, which breaks immersion and can cause motion discomfort. Calibrate quest 3 correctly by acknowledging how the headset, controllers, and boundary system work together. The goal is to create a consistent reference frame that your brain trusts, so actions in-game map cleanly to real motion. This alignment improves accuracy for both fast maneuvers and precision interactions, which matters in rhythm-based games and training simulations alike.
Creating an Optimal Play Space
Having a clean, open play space is essential for reliable Quest 3 calibration. Clear obstacles, non-reflective floors, and even lighting help sensors read properly. Avoid bright sunlight or reflective surfaces that confuse cameras and can introduce tracking gaps. Place boundary markers to define a safe zone and ensure there is room for natural head and arm movement. A stable surface for the controller charging station and a clutter-free area around your play space reduce accidental occlusion during calibration tests. Finally, ensure ventilation and comfortable ambient conditions to keep you focused during the procedure. A good space reduces the chances of temporary occlusion, which can make calibration take longer and yield inconsistent results.
Tools, Firmware, and Prep
Before you begin, verify that your Quest 3 headset and controllers are charged, and that the headset’s firmware is current. Keep the play space free of reflective surfaces and bright contrasting lighting that can confuse tracking cameras. If you use a PC or mobile device to manage the headset, ensure the official app is up to date and that your connectivity is stable. This preparation stage prevents common interruptions during the calibration flow and helps you collect accurate test data for post-calibration checks. In addition, gather a microfiber cloth to wipe lenses and cameras, so there’s no smudging that could degrade sensor readings.
Step-by-Step Calibration Process (Overview)
The calibration flow for Quest 3 typically follows a logical sequence: set up a clear space, update firmware, access the calibration tools, align headset sensors, calibrate controllers, verify room-scale tracking, run automated tests, and save results. Treat each step as a repeatable action that builds toward a consistent reference frame. If you encounter drift during any test, revert to the previous step, re-check alignment, and re-run the test. This overview prepares you for the detailed actions in the dedicated Step-by-Step section and the subsequent verification tests.
Fine-Tuning Controller and Headset Alignment
Controller alignment is often the first area that shows inconsistency after a fresh calibration. Correcting the relative pose between the headset and each controller helps minimize latency and drift. Use the calibration interface to re-center the controller axes and re-map thumbstick sensitivity if necessary. Headset alignment should consider the natural resting position of your head and the typical angle you use during play. Small adjustments—such as re-docking the headset or tightening head straps evenly—can make a measurable difference in accuracy and comfort.
Testing, Verification, and Adjustments
After completing the calibration steps, perform a controlled set of tests to confirm improvements. Look for consistent tracking during slow and fast movements, stable hand-to-head coordination, and reliable boundary adherence. If any discrepancy appears, repeat the affected step with a careful eye on environmental factors. Document the results of each test to compare across sessions, which helps you detect gradual drift even after seemingly successful calibrations. Regular verification is as important as the initial calibration.
Troubleshooting Common Issues
If tracking still feels off after calibration, check for occlusion from hands or furniture, ensure there are no reflective surfaces behind the play area, and confirm that lighting changes have not altered camera performance. Reboot the headset and re-run the calibration sequence from the beginning, focusing on the step that previously yielded the most noticeable error. Sometimes, simple resets are enough to clear sensor calibration glitches and restore reliable tracking.
Maintenance and Long-Term Calibration Health
Calibration isn’t a one-time task; it requires periodic checks, especially after moving the play space or changing furniture. Recalibrate Quest 3 when you notice drift, after firmware updates, or when you install new accessories that could affect sensor readings. Keep a short log of calibration dates and notable changes to help you identify patterns over time. Regular upkeep preserves accuracy and reduces the time needed for future calibrations.
Authoritative sources for calibration best practices
- https://www.nist.gov
- https://www.iso.org
- https://ocw.mit.edu
Tools & Materials
- Quest 3 headset(Primary device to calibrate; ensure it's charged and up to date)
- Controllers (left and right)(Keep around during headset calibration; ensure they’re paired)
- Clean play space(Clear of obstacles and glare; use non-reflective flooring if possible)
- Official headset app(Installed on a smartphone or PC; used to access calibration tools)
- Microfiber cloth(Wipe camera lenses and sensors to remove smudges)
- Boundary markers(Tapes or markers to define safe space without clutter)
- Recharge cables(Keep controllers and headset charged between sessions)
Steps
Estimated time: 45-60 minutes
- 1
Prepare space and firmware
Power on Quest 3 and its controllers, then verify firmware is current. Clear the play area of obstacles and reflective surfaces. This initial preparation reduces calibration noise and ensures sensors read cleanly.
Tip: Check lighting consistency; avoid direct sunlight that can wash out cameras. - 2
Access calibration tools
Open the official app and navigate to the calibration or setup section. Enable any guided prompts that walk you through sensor alignment and room setup.
Tip: If prompts don’t appear, reconnect the headset to the app and retry. - 3
Calibrate headset tracking
Follow the on-screen instructions to align the headset’s cameras with your environment. Move your head slowly through common orientations to capture a representative range of angles.
Tip: Maintain a steady motion; abrupt movements can distort readings. - 4
Calibrate controllers
Calibrate each controller’s pose relative to the headset. Verify thumbstick and button responses during testing and adjust dead zones if needed.
Tip: Test both controllers independently to ensure symmetrical calibration. - 5
Run room-scale calibration
Engage the room-scale calibration routine to map your space. Confirm that boundaries respond correctly when you approach the edges.
Tip: Stand near each boundary corner to ensure full coverage. - 6
Test and adjust
Perform quick in-game or test-payload actions (look around, reach, shoot). Note any lag or drift and revisit the affected step.
Tip: Document anomalies with a quick note for later reference. - 7
Save and document
Save calibration settings in the app and create a short log entry. Record the test outcomes and any changes you made during this session.
Tip: Keep a running log to help you spot long-term drift or improvements. - 8
Revisit after changes
If you relocate the play space or add new equipment, repeat the calibration sequence. Regular checks help maintain accuracy over time.
Tip: Plan routine calibration checks after major setup changes.
Questions & Answers
What does calibration do for Quest 3 tracking?
Calibration aligns the headset and controllers with your real-world space, improving tracking accuracy and reducing drift. It helps ensure actions map reliably to on-screen movements.
Calibration aligns Quest 3 with your space for precise tracking. It reduces drift and helps your movements match what you see in the headset.
Do I need special equipment to calibrate Quest 3?
No special equipment is required beyond the Quest 3 headset, its controllers, and a clean play space. The official app guides the calibration steps.
No extra gear is needed beyond the headset, controllers, and a clear play space; the app walks you through the steps.
How long does calibration typically take?
A full calibration session usually takes a bit of time, often under an hour, depending on space and whether adjustments are needed.
Most calibration sessions take under an hour, depending on your space and whether any adjustments are required.
Can calibration fix drift after long-term use?
Calibration can reduce drift, but long-term drift may also come from hardware wear or space changes. Recalibrate after moving furniture or after firmware updates.
Calibration helps reduce drift, but if drift persists, try recalibrating after changes to your space or updates.
What should I do if tracking is inconsistent in certain rooms?
Check lighting, remove reflective surfaces, and verify space boundaries. Re-run calibration focusing on the problematic area, and test with targeted in-game actions.
If tracking is inconsistent in a room, check lighting, reduce reflections, and recalibrate focusing on that area.
Is there a maintenance schedule for calibration?
Yes. Recalibrate after major setup changes, hardware updates, or after extended periods of use to maintain optimal accuracy.
Recalibrate after major changes or after long use to keep accuracy high.
Watch Video
Key Takeaways
- Plan a clean play space before calibration
- Update firmware and use official tools
- Follow a repeatable calibration sequence
- Test, verify, and document results
- Recalibrate after changes to the setup