How to Calibrate Meta Quest 3
Learn how to calibrate the Meta Quest 3 for accurate tracking, guardian setup, and headset comfort. This Calibrate Point guide provides a thorough, step-by-step workflow with safety tips, testing, and troubleshooting.

You will calibrate your Meta Quest 3 to improve tracking accuracy, guardian boundaries, and headset fit. This guide covers room setup, controller calibration, IPD adjustment, and a verification test. You’ll need a clear play area, the headset with charged batteries, two controllers, and a connected companion app.
Why calibrating Meta Quest 3 matters
Calibration is the foundation of reliable VR experiences. Proper calibration reduces drift, minimizes guardian boundary violations, and improves overall comfort during long sessions. According to Calibrate Point, a consistent calibration routine helps maintain tracking accuracy across games and applications. When you calibrate with a calm, well-lit space and up-to-date firmware, you’ll notice fewer jumps, better controller alignment, and more natural movement. This section explains the core reasons you should invest time in calibration and how it translates into real-world benefits for DIY enthusiasts, technicians, and professionals working with immersive devices.
Understanding Meta Quest 3 tracking: inside-out explained
The Meta Quest 3 uses inside-out tracking that relies on outward-facing sensors and cameras on the headset. Unlike external sensors, the headset must accurately map your room and your hands in real time. Calibration aligns the sensor suite with your physical space, which reduces parallax errors and helps the system interpret your hand position, orientation, and movement. A strong understanding of how tracking works helps you diagnose problems more quickly and apply the right calibration steps when issues arise. This section breaks down the tracking pipeline and common failure points you’ll want to monitor during setup.
How IPD and headset fit influence tracking
IPD (interpupillary distance) affects the alignment of lenses to your eyes, which in turn influences image clarity and perceived tracking stability. An incorrect IPD can cause visual discomfort and strain, leading the system to misinterpret eye focus as head movement. Similarly, a secure headset fit minimizes movement that could mislead sensors. This section explains how to measure IPD, how to adjust the headset for comfort, and how these adjustments interact with the Quest 3’s tracking algorithms to improve accuracy across play sessions.
Guardian boundaries and play area calibration concepts
Guardian boundaries ensure you stay safe during VR sessions. Correct boundary calibration requires choosing boundaries that reflect your actual space, marking the play area, and testing detection as you move. If boundaries are too tight or too loose, you may experience boundary interruptions or misaligned safe zones. This part covers steps to redefine your guardian boundary, test boundary detection in different directions, and adjust the play space so that you can move naturally without frequent interruptions.
Common pitfalls and how to avoid them
People often calibrate in suboptimal conditions or skip steps, leading to drift or misalignment. Common pitfalls include poor lighting, reflective surfaces near sensors, wearing glasses during calibration, and performing calibration with a cluttered play space. Each pitfall is paired with a practical workaround, such as calibrating in a dedicated room with consistent lighting, using wall markers for alignment, and doing a full step-by-step run-through after major changes. Being aware of these issues helps you stay on track and avoid rework.
How to validate calibration with quick tests
Validation is where you confirm that calibration took effect. Use simple tests: track a few known movements, perform a virtual reach with controllers, and walk a short arc to verify smooth tracking. If you detect jitter, drift, or delayed response, return to the calibration steps and re-check IPD, headset orientation, and guardian setup. This section provides practical test scenarios and success criteria so you can judge readiness before diving into gameplay.
Maintenance: keeping calibration over time
Calibration isn’t a one-and-done task. Regular checks after software updates, hardware changes, or frequent use can help maintain accuracy. Put a lightweight routine on your schedule to re-check IPD, guardian boundaries, and controller alignment. This long-term perspective ensures your Quest 3 remains reliable for months or even years, avoiding cumulative drift.
Logging and progression: when to recalibrate
Track when you calibrate and what changes you made. A simple log helps you notice patterns, such as drift after long sessions or after moving furniture that alters lighting and line-of-sight. Recalibrate after firmware updates, new games with different controller profiles, or whenever you notice tracking degradation. Maintaining a calibration log makes it easier to reproduce successful configurations and diagnose issues quickly.
Quick track verification: final sanity check
Finish with a quick verification: perform a few rapid movements, a reach task, and boundary checks. If all tests pass and movement feels natural, you’re ready for gameplay. If not, revisit the earlier steps, re-check the fit, IPD, and guardian settings, and re-test. This final check helps you confirm a stable calibration before heavy use.
Calibrate Point tips: recommended settings for common rooms
In smaller play spaces, you may prioritize tighter guardian boundaries and conservative movement allowances. In larger rooms, you can expand boundaries and rely more on natural tracking. The goal is to achieve a balance between safety and freedom of motion. Use the recommended starting values and adjust incrementally while testing in real scenarios.
Tools & Materials
- Meta Quest 3 headset(Fully charged before starting)
- Two controllers (included)(Keep batteries fresh)
- Clear play space(Minimum 2m x 2m area, free of obstacles)
- Soft cloth for lenses(Gentle cleaning before calibration)
- Companion app on phone/PC(Ensure Bluetooth/Wi‑Fi is active)
- Measuring tape or floor markers(Helpful for layout)
- Good lighting(Even lighting without glare)
Steps
Estimated time: 20-40 minutes
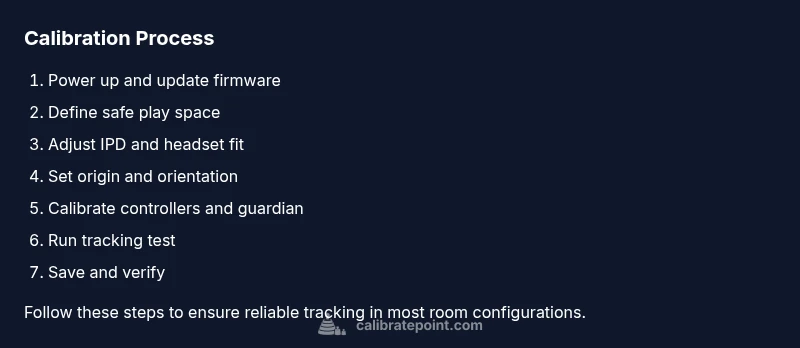
- 1
Power up and verify firmware
Turn on the Quest 3 and check that the headset firmware and controller firmware are up to date. This ensures all calibration features function correctly and that tracking sensors are compatible with features you’ll enable. If updates are pending, perform them before proceeding.
Tip: A wireless update can take several minutes; connect to Wi‑Fi and keep the headset stationary during updates. - 2
Set up a safe, defined play area
Choose a clear space with minimal reflective surfaces. Open the Guardian system and outline your play area. Confirm that you can move freely within the boundaries without hitting furniture, pets, or walls.
Tip: Place floor markers or tape boundaries to help with quick orientation during calibration. - 3
Adjust IPD and headset fit
Use the IPD adjustment mechanism to align lenses with your eyes. Secure the headset snugly, ensuring even weight distribution to minimize drift caused by headset movement during play.
Tip: If wearing glasses, calibrate with them on or use alternative eye relief settings if available. - 4
Set origin and orientation
Define the tracking origin (usually floor level or headset center) so the system consistently interprets forward direction and up/down orientation. This helps prevent mismatches between real and virtual space.
Tip: Stand in your normal standing posture to calibrate the facing direction accurately. - 5
Calibrate controllers and tracking
Re-pair or verify controller connectivity in the settings, then perform a quick controller pose test to confirm response aligns with your hand movements. Ensure buttons register reliably in-game actions.
Tip: Test in a calm, motion-controlled task to verify latency feels natural. - 6
Guardian boundary calibration
Recalibrate your guardian by redefining the boundary shape to fit your current space. Verify that the boundary triggers reliably as you approach edges.
Tip: Walk to all sides of the boundary to confirm detection happens smoothly. - 7
Run a live tracking test
Perform a mid-range movement test and keep your hands within the center of the play space. Check for drift when moving laterally or turning quickly.
Tip: If you notice drift, pause, recalibrate origin and IPD before re-testing. - 8
Save calibration and verify
Save all changes in the device and companion app. Do a final test by playing a short routine and confirming consistent tracking.
Tip: Document the date and room setup for future reference.
Questions & Answers
Do I need to recalibrate after firmware updates?
Yes. Major firmware updates can affect sensors and tracking. Recalibrating after updates helps ensure continued accuracy and comfort.
Yes, recalibrate after firmware updates to maintain accuracy.
Can I calibrate without a guardian boundary?
The Guardian boundary is essential for safe, accurate tracking. Calibrate with a defined boundary to prevent safe-space issues during play.
Boundary setup is important for safe, accurate tracking.
What if tracking drifts after calibration?
Revisit the origin, IPD, and boundary steps. Test in a controlled movement and adjust gradually until drift subsides.
If drift happens, recheck origin and IPD and test again.
Is IPD adjustment essential for Quest 3 calibration?
IPD affects image focus and tracking accuracy; adjust to align lenses with your eyes for best results.
Yes, IPD alignment is important for accurate tracking.
How often should I recalibrate?
Calibrate as needed—after firmware updates, hardware changes, or noticeable drift. There is no fixed interval.
Recalibrate when you notice drift or after updates.
Will calibration affect comfort?
Yes. Proper fit and alignment reduce strain and fatigue, improving long sessions.
Good calibration improves comfort and reduces fatigue.
Watch Video
Key Takeaways
- Calibrate in a spacious, well-lit area to improve accuracy.
- Align IPD and headset fit to reduce drift and discomfort.
- Recalibrate boundaries and origin after major changes or updates.
- Validate with quick tests before extended gameplay.
- Maintain a calibration log for future reference.