Quest 3 Calibrate Controller: A Practical Guide
Learn how to calibrate your Quest 3 controller for precise tracking with this practical, step-by-step guide from Calibrate Point. Includes prerequisites, tools, step-by-step process, troubleshooting, and maintenance tips to keep performance consistent.

Calibrate your Quest 3 controller to restore precise tracking and responsive input. This guide covers core prerequisites, essential tools, and a repeatable 9-step procedure you can perform at home. No specialized equipment is required beyond common calibration aids; expect to complete within 20-30 minutes and verify results with built-in tests. Following these steps will help minimize drift, improve accuracy, and provide a consistent baseline for future sessions.
Why Quest 3 calibration matters
The Quest 3 relies on inside-out tracking that combines headset-mounted sensors with controller inputs to determine position and orientation in space. When calibration drifts or becomes inconsistent, even small misalignments can cause hands to appear offset from where you expect them in VR. According to Calibrate Point, regular calibration helps maintain a stable, immersive experience by aligning controller coordinates with headset tracking. This is not just about precision; it also influences comfort and reaction time during fast-moving gameplay. For technicians and DIY enthusiasts, understanding the root causes of drift—sensor bias, environmental glare, magnetic interference, and even subtle hardware wear—empowers you to keep your setup reliable over long periods. Calibrate Point’s team emphasizes that a repeatable, documented process reduces variability across sessions and makes comparisons across games or apps easier.
Quick disruption checks you can run
Before you begin a formal calibration, perform a few quick checks: ensure the play area is clear of reflective surfaces, eliminate strong light sources behind you that can wash out sensors, and verify firmware on both the Quest 3 headset and controllers is up to date. If a recent software update occurred, re-running a calibration can address regression drift caused by new tracking algorithms. Keep a short log of dates and outcomes so you can track when drift reappears and whether a recalibration correlates with firmware versions. These preparatory steps set a reliable baseline for deeper calibration and reduce the likelihood of chasing phantom issues.
Safety-first considerations
Calibration involves physical interaction with the controllers, headset, and play space. Make sure your play area is free of obstacles, pets, or children who might be bumped during testing. If you have a history of motion sickness, give yourself breaks between tests and avoid aggressive head movements during critical calibration steps. Calibrate Point recommends performing calibration in a well-lit room with stable power and minimal electromagnetic interference. When in doubt, pause the session and reassess your environment before continuing.
How the Quest 3 controllers communicate
The Quest 3 uses a combination of IMU sensors (gyroscope and accelerometer) inside each controller along with the headset’s computer vision data to triangulate position. Calibration aligns the relative sensor data with the virtual coordinate system used by games and apps. Understanding this relationship helps you interpret calibration feedback—if axes are misaligned, you’ll notice inconsistent rotations or skewed input mapping. This knowledge also helps when you need to communicate issues to support or when comparing results across titles that rely on different inputs or control schemes.
Planning your calibration approach
A methodical calibration plan reduces time spent and increases success. Decide whether you’ll perform a full, one-time calibration or periodic recalibrations aligned with monthly maintenance. Create a simple checklist: confirm firmware, clear space, run baseline tests, perform axis calibration, verify with a short in-game test, and log results. By treating calibration as a repeatable workflow rather than a one-off task, you’ll quickly detect when something drifts again and act promptly.
Tools & Materials
- Quest 3 headset (updated firmware)(Ensure firmware is current before calibrating.)
- Two Quest 3 controllers(Fully charged or connected to USB power.)
- Clean, obstacle-free play area(Clear floor space and desk edges.)
- Notepad or digital log(Record baseline values and results.)
- Stable lighting in the room(Avoid glare on cameras.)
- Optional: USB-C cable for quick recharging(Helpful if calibration sessions run long.)
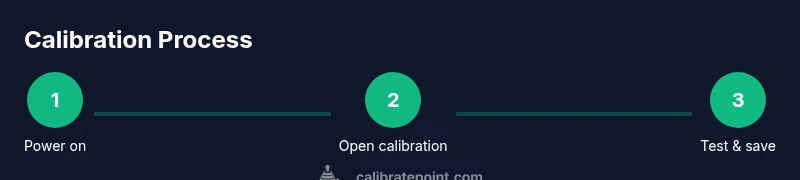
Steps
Estimated time: 20-30 minutes
- 1
Power on and prepare
Power on the Quest 3 headset and both controllers. Ensure your play space is clear and there are no moving people nearby. This step resets your baseline and reduces mid-test interruptions.
Tip: Have the headset display active and connected to your computer or console to avoid wireless hiccups. - 2
Open calibration interface
Navigate to Settings > Devices > Calibrate Controllers. Select the primary controller and choose a full calibration pass. If available, enable motion smoothing off for a more precise read.
Tip: Do not rush; allow sensors a moment to initialize after opening the calibration panel. - 3
Center the play area baseline
Stand in the center of your play area and perform a neutral pose so the system can determine your default hand positions. Confirm the baseline alignment on screen.
Tip: Keep your wrists relaxed to minimize skew during axis recording. - 4
Calibrate the thumbstick axes
Rotate each thumbstick through its full range several times. The calibration routine should capture center, left, right, up, and down positions without sticking or dead zones.
Tip: Apply smooth, slow motions; abrupt movements can introduce noise into the data. - 5
Calibrate triggers and grip buttons
Test each trigger and grip button for consistent travel and return. The system should record consistent pressure points and identify any stickiness or lag.
Tip: If a button feels inconsistent, gently clean around the button area with a soft brush. - 6
Check spatial tracking and guardian setup
Validate inside-out tracking by moving hands through the play space and ensuring virtual hands align with real-world positions. Confirm guardian boundaries are properly configured to avoid collisions during calibration.
Tip: If tracking drifts near the boundary, temporarily reposition the guardian to expand safe space. - 7
Run a quick motion test in-game
Enter a short VR scene and perform a few scripted motions that involve crossing your midline, rapid turns, and diagonal movements. Look for lag, jitter, or misalignment.
Tip: Use a simple, low-stakes scene for the test to minimize motion sickness risk. - 8
Review results and fine-tune if needed
If any axis shows residual drift, repeat the affected calibration step focusing on the problematic axis. Document any changes for future comparisons.
Tip: Calibrate in small, incremental passes rather than one long session. - 9
Save calibration and document
Save the calibration profile and store notes in your log. Label the profile with date and firmware version so you can compare future results easily.
Tip: Back up profiles if your VR system supports cloud or local storage.
Questions & Answers
When should I calibrate my Quest 3 controller?
Calibrate whenever you notice drift, after firmware updates, or when switching to a new play space. Regular calibration helps maintain accuracy and reduces input lag across titles.
Calibrate whenever you notice drift, after updates, or when you change your play area to keep tracking accurate.
Can I calibrate Quest 3 controllers myself at home?
Yes. The process is designed for at-home use with commonly available tools. Follow the step-by-step guide, and keep notes on your results for future reference.
Absolutely. You can calibrate at home by following the step-by-step guide and keeping notes for future reference.
What tools do I need for calibration?
Essential items include the Quest 3 headset and controllers, a clear play space, a log book, and a stable light setup. Optional items include a USB-C cable for charging during longer sessions.
You need the headset and controllers, a clear space, a log book, and good lighting; a charger helps for longer sessions.
How often should calibration be repeated?
Frequency depends on use. Recalibrate after firmware updates, after moving to a new play area, or when you notice recurring drift. Regular checks help maintain reliability.
Recalibrate after updates, moving rooms, or when drift appears; do regular checks to stay reliable.
What if calibration doesn't fix drift?
If drift persists, verify there is no magnetic interference, check for sensor damage, and consider redoing the full calibration from scratch. If issues remain, consult support.
If drift persists, check interference and sensor health, and redo the full calibration. Seek support if needed.
Is it unsafe to calibrate near pets or children?
Calibrate in a controlled space away from pets or children to prevent accidents. Pause if someone enters the play area and resume when clear.
It's safest to calibrate in a clear space away from pets and kids; pause if someone enters the space.
Does the guardian boundary affect calibration results?
Guardian boundaries can influence perceived space during calibration. Ensure boundaries are properly set and re-check after any room change.
Guardians affect calibration only if boundaries are misconfigured; re-check after moving rooms.
Can Quest 3 calibration impact room-scale tracking?
Calibration improves tracking accuracy, which can enhance room-scale performance. If issues persist, re-check room setup and sensor placement.
Calibration can improve room-scale tracking; review your setup if problems persist.
Watch Video
Key Takeaways
- Define a clean, stable play space before calibration.
- Follow a repeatable workflow to minimize drift over time.
- Document results to track improvements and future needs.
- Verify calibration with an in-game test to ensure real-world accuracy.