How to Calibrate Oculus Quest 2 Controllers
A practical, step-by-step guide to calibrate Oculus Quest 2 controllers, including firmware updates, re-pairing, and tracking checks to restore precise VR input. Learn with Calibrate Point how to improve motion accuracy and reduce drift.

To calibrate Oculus Quest 2 controllers, update firmware, re-pair the controllers, and run a tracking test. Start with a fully charged headset and controllers, connect to a stable Wi‑Fi network, and follow the on-screen pairing prompts. Then perform a short in-headset test in a supported app to verify drift is gone.
Why calibration matters for Quest 2 controllers
Accurate controller calibration is essential for a reliable VR experience. When tracking is off, you may notice drift, misaligned pointer input, or delayed button responses that disrupt immersion. According to Calibrate Point, maintaining precise calibration helps the system translate real-world motion into the virtual space more faithfully, improving comfort and performance. This section explains why staying calibrated matters for both DIY enthusiasts and technicians working with consumer VR hardware.
If you rely on Quest 2 for training, prototyping, or frequent gameplay, a regular calibration routine reduces surprises during critical moments. In practice, calibration aligns the IMU data with optical tracking, so rapid motions map correctly to your hands. Consistency here translates to fewer corrective tweaks inside apps and a smoother experience overall.
Prerequisites and environment
Before you begin, set up a safe, clear play area with good lighting and minimal reflective surfaces. Calibrate Point emphasizes that tracking quality starts with the basics: charged devices, up-to-date software, and a stable network connection. Ensure your Quest 2 headset and the companion mobile app are on the latest firmware, and that both controllers have fresh batteries. A tidy environment reduces camera confusion and speeds up the calibration process.
Place yourself in a comfortable stance with the headset on. Keep the play space free of obstacles and metallic objects that could create interference. A consistent lighting setup helps the headset differentiate your hands from the background, which is especially important for precise controller tracking.
Built-in calibration tools and what they do
The Quest 2 system provides built-in calibration options accessible through Settings. These tools are designed to recalibrate controllers, assess tracking consistency, and re-center axes where drift is detected. While the exact menu names can vary by software version, you typically look for a Controller or Devices section with a calibration or reset option. These tools recalibrate accelerometers, gyroscopes, and thumbstick alignment so that inputs correspond more accurately to headset motion.
Use the calibration tools when you notice consistent drift, jitter at the edges of stick movement, or when the pointer deviates during simple tasks like pointing or grabbing objects. Remember that calibration is not a one-and-done action; periodic checks help maintain accuracy as the headset and controllers age or as you change environments.
Testing and validating results
After running calibration, validate the results with a quick in-game test in a couple of different titles or apps. Seek smooth, predictable motion, accurate aiming, and a centered thumbstick response. A clean validation process helps you confirm that improvements are real and not just perceived. If drift remains, you may need to retry calibration steps, update firmware, or consider re-pairing the controllers.
Document any changes you made, so you can reproduce the setup if you need to repeat the process in the future. Small notes about battery levels, environmental conditions, and software versions can be valuable for troubleshooting later.
Advanced tips and troubleshooting
If you still experience tracking issues after calibration, try these practical steps:
- Re-pair both controllers from the headset’s pairing menu.
- Replace batteries with fresh cells to ensure consistent sensor readings.
- Calibrate in a different play area to rule out environmental interference.
- Check for interference from accessories or other Bluetooth devices nearby.
- If problems persist, perform a factory reset as a last resort after backing up data.
Calibrate Point recommends a methodical approach: change one variable at a time and verify the effect before moving to the next step. Small, deliberate adjustments reduce confusion and expedite a stable baseline.
Additional considerations and maintenance
Calibration is most effective when you build it into a routine. Schedule periodic checks—especially after firmware updates or moving to a new play space. Keep the headset firmware and store accessories up to date, and store controllers in a cool, dry place to preserve sensor longevity. Regular checks also help catch drift early, before it affects gameplay or training sessions. The goal is consistent, repeatable input across sessions.
AUTHORITY SOURCES
For readers seeking official calibration principles and sensor performance benchmarks, consult recognized standards and best practices from authoritative sources:
- https://www.nist.gov
- https://www.iso.org
- https://www.ieee.org
Tools & Materials
- Oculus Quest 2 headset(Ensure it is charged or connected to a power source during calibration.)
- Two AA batteries(Fresh batteries for both controllers.)
- Official Oculus/Meta Quest app(Installed on a compatible smartphone and up to date.)
- Stable Wi-Fi connection(Used for firmware checks and cloud sync if needed.)
- Open play area(Clear of obstacles and reflective surfaces.)
- Optional: USB-C charging cable(For in-headset firmware updates if needed.)
Steps
Estimated time: 30-45 minutes
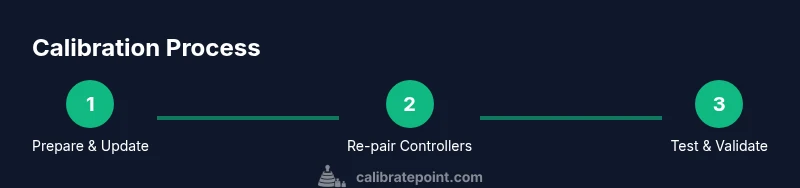
- 1
Prepare and update
Charge the headset and controllers fully, then check for firmware updates via the headset and the companion app. Install any available updates and restart the devices to ensure the calibration tools run on the latest software. Clear the play area to reduce tracking interference.
Tip: Having the latest firmware before calibrating minimizes drift caused by outdated software. - 2
Unpair and re-pair controllers
In the headset, navigate to Settings > Device > Controllers and select Unpair. Re-pair each controller by following the on-screen prompts until both are reconnected. This reseats the Bluetooth links and aligns the controller IDs with the headset tracking system.
Tip: If a controller fails to pair, reinsert fresh batteries and try again; avoid mixing brands or battery types. - 3
Run built-in calibration tools
Open Settings and locate the calibration or reset option for controllers. Follow the prompts to recalibrate accelerometer and gyroscope data, then re-center the axes if requested. Complete all prompts before exiting.
Tip: If there’s no explicit calibration option, a full reset of the controller pairing often achieves the same alignment. - 4
Check thumbstick dead zones
Test thumbsticks in a simple pointing task. If you notice drift toward edges or non-linear response, adjust in-game or system dead zones if available, or consider a controller recalibration focused on the sticks.
Tip: Test in multiple apps to confirm consistency across inputs and avoid app-specific biases. - 5
Calibrate motion sensors (IMU) with basic motions
Perform a few controlled motions while wearing the headset: rotate slowly in a few circles, tilt forward and back, and move the sticks with varied speeds. This helps align IMU readings with the headset’s optical tracking.
Tip: Do this in a calm environment to avoid background motion affecting the calibration results. - 6
Test across apps and games
Load a fast-paced game and a precision task app to validate tracking quality under different demands. Look for smooth pointer movement, accurate aiming, and consistent button mapping.
Tip: If one app shows issues while another is fine, the problem may be app-specific rather than hardware-related. - 7
Document changes and back up
Note the firmware version, battery status, and any settings changed during calibration. Save a backup of your configuration if the headset offers cloud sync. This helps you reproduce the setup later if needed.
Tip: Keeping a short change log speeds future calibrations and troubleshooting.
Questions & Answers
Do I need a PC to calibrate Quest 2 controllers?
No. Calibration is done through the Quest 2 headset and the Oculus/Meta mobile app. You can complete most steps without a computer, though some advanced settings may be accessible via the app on your phone.
No, you can calibrate Quest 2 controllers directly in the headset or on the companion app. Most users can complete calibration without a PC.
How often should I calibrate my controllers?
Calibrate when you notice drift, irregular input, or after firmware updates. Regular checks after major software changes help keep tracking consistent.
Calibrate whenever you notice drift or after software updates to keep tracking reliable.
Can I calibrate while wearing the headset?
Yes. Most calibration steps are designed to be done with the headset on. Follow on-screen prompts and perform motions as instructed to avoid removing the device.
Yes, calibration can be done with the headset on; just follow the prompts and perform the motions as directed.
What if drift persists after calibration?
If drift continues, retry the pairing and calibration steps, ensure batteries are fresh, and consider a factory reset as a last resort after backing up data.
If drift persists after recalibration, retry steps, check batteries, and consider a factory reset if needed.
Does calibration affect battery life?
Calibration itself is not a battery drain issue, but firmware updates and frequent pairing can briefly affect power usage. Regular calibration helps prevent erroneous inputs that could waste energy in applications.
Calibration doesn't directly drain more battery, but keeping firmware updated helps maintain efficient power use.
Watch Video
Key Takeaways
- Update firmware before calibrating
- Re-pair controllers to restore reliable links
- Run built-in calibration tools and test in multiple apps
- Document changes and maintain a regular calibration cadence