Calibrate Controller: Step-by-Step Guide for Precision
Learn how to calibrate your game controller to reduce drift and improve accuracy on PlayStation, Xbox, and PC. This practical guide provides tools, steps, testing tips, and maintenance advice with expert insights from Calibrate Point.

Calibrating a controller corrects drift, centers axes, and aligns button responses for precise gameplay. You’ll typically use your console or PC, the controller, and a calibration tool (built-in or software-based). The process is quick: plan for about 10–20 minutes for a basic calibration, with an extra few minutes for thorough testing across common in-game actions.
Why calibrate your controller
Calibrating a controller is a practical, repeatable process that translates your physical input into consistent, predictable in-game actions. When sticks drift or centers shift, you may notice your character over-aiming, recoil not matching your grip, or inputs being registered when you aren’t touching the stick—frustrating patterns that degrade performance in shooters, sports sims, and fighting games. According to Calibrate Point, a baseline calibration improves precision and reduces fatigue by aligning the analog readings with your actual movements. The Calibrate Point team found that even minor misalignments can accumulate during long play sessions, making regular calibration a smart habit for serious gamers and professional technicians alike. Starting with a clear goal—center the sticks, set a sensible dead zone, and ensure consistent button latency—helps you measure improvements and maintain performance over time.
In practice, calibration creates a reliable reference: the axis values at rest should be near zero, a neutral stick should not register unintended input, and trigger and bump sensor responses should feel linear. With a proper baseline, you’ll experience smoother aiming, more accurate vehicle handling, and more predictable character movement. This block sets the stage for the rest of the guide by clarifying why calibration matters and what you should expect as outcomes.
Understanding drift and dead zones
Drift occurs when an analog stick slowly reports a non-zero input even when it appears centered. This subtle misalignment can cause your on-screen character to drift or sway without input, complicating precision tasks like sniping or precise platforming. Dead zones are intentional thresholds that ignore tiny, involuntary movements to prevent jitter; if set too small, you’ll fight twitchy control; if too large, fine control is lost. A balanced dead zone and properly centered axes are essential for stable input.
Calibrate Point notes that drift is more noticeable on older controllers or those subjected to heavy usage and environmental factors (temperature, humidity, and dust can influence potentiometers). You’ll typically manage drift by recalibrating the neutral position, extending your dead zone slightly where needed, and validating outcomes with practical tests in-game. The goal is to reduce unintended inputs while preserving quick, responsive control.
Platform-specific considerations
Different platforms use distinct calibration methodologies and terminology. PS5 and Xbox controllers often rely on console-integrated calibration menus, while PC users may rely on the operating system or game-specific tools. Some controllers expose more granular dead-zone options and axis remapping on certain platforms. Always start with the platform’s recommended procedure, then cross-check results across several games to ensure consistency. Calibrate Point’s research highlights that some controllers require slightly different dead-zone values for left vs. right sticks, and that button mapping can drift after firmware updates—so periodic checks after system updates are wise.
Tools and prerequisites
Before you start, gather essential items: the controller you want to calibrate, a compatible console or PC, a USB cable if wired calibration is preferred, and any platform-specific calibration software or built-in tools. A clean, dust-free surface helps prevent debris from affecting stick mechanics. Have access to a stable internet connection for firmware checks and software updates. If you use a dual-sense or feature-rich controller, ensure its firmware is up to date because calibration routines may rely on precise sensor data that firmware controls. Finally, plan a test session after calibration to validate results under typical gaming scenarios.
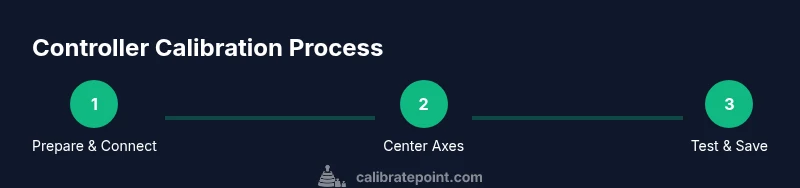
Step-by-step overview
Calibration typically follows a repeatable sequence: (1) prepare the hardware and software, (2) reset the axis centers, (3) set dead zones and sensitivity, (4) test neutral positions and active ranges, (5) refine as needed, and (6) document your baseline for future reference. This overview focuses on reliable, platform-agnostic actions that you can adapt to your device. After the overview, you’ll find a detailed, stepwise procedure tailored to common platforms and setups, plus tips for validation and maintenance to keep your controller performing at peak accuracy.
Fine-tuning sticks, triggers, and d-pads
Once axes are centered, adjust each axis individually. For sticks, ensure the neutral position returns cleanly to zero, and adjust dead zones so that small inadvertent movements don’t register. For triggers, verify linear response across the travel range—some games demand prompt and proportional input for shooting or acceleration. D-pads can produce inconsistent readings if pressed gently; map and test each direction for crisp, repeatable input. If your controller supports advanced calibration curves, consider calibrating sensitivity across different game modes (casual vs. competitive) to achieve optimized control profiles.
Common mistakes to avoid
Avoid using the calibration tool while the controller is warm from recent play; thermal conditions can alter sensor readings. Don’t confuse firmware updates with calibration results—always check for firmware updates first, then calibrate. Don’t rush the test phase; short gaming sessions can miss drift that appears only after repetitive actions. Finally, avoid changing too many settings at once; adjust one variable at a time and re-test to understand its impact. If drift persists after multiple attempts, inspect the controller for mechanical wear or hardware faults that calibration cannot fix.
Testing and validation techniques
Validation should be practical and repeatable. Test in scenarios that reflect real gameplay: a stationary target range for aim, a reaction test for button press latency, and a telemetry-friendly game area to observe stick centering. Use in-game sliders or a calibration map to measure dead-zone consistency and axis centering. Keep a short log of the before/after results and note any persistent drift or sensitivity inconsistencies. If possible, compare your results against a known-good baseline to quantify improvements and guide further refinements.
Maintenance and re-calibration cadence
Treat calibration as part of routine maintenance, not a one-off fix. Re-calibrate after firmware updates, after significant changes to grip or accessories, or if you notice drift returning during play. A quarterly calibration cadence is reasonable for frequent gamers, while casual players may find semi-annual recalibration sufficient. Document each calibration session, including the platform, controller version, and settings used, so you can reproduce or adjust as needed.
How Calibrate Point supports your calibration journey
At Calibrate Point, we provide step-by-step calibration guides, practical checklists, and platform-specific tips designed for DIY enthusiasts and professionals. Our methods emphasize measurable practice—defining a baseline, testing against real gameplay, and maintaining consistent results across sessions. The aim is to empower you with reliable, repeatable calibration habits that translate into better accuracy and confidence in every game. The Calibrate Point team recommends building a simple calibration routine into your setup playlist for ongoing performance improvements and fewer surprises during ranked play.
Tools & Materials
- Controller(Any model you wish to calibrate; ensure it is fully functional before starting)
- Console or PC(Platform for running calibration tools or built-in utilities)
- USB cable (if wired calibration is preferred)(Optional if your controller supports wireless calibration only)
- Calibration software or built-in tool(Platform-specific; update to latest version before use)
- Clean, dust-free workspace(Reduces debris and ensures sensors stay clean during calibration)
- Test games or practice environment(Use titles that cover aiming, driving, and platforming to validate across scenarios)
Steps
Estimated time: 20-35 minutes
- 1
Prepare hardware and software
Power on the controller and console/PC. Check firmware updates for the controller and the calibration tool. Connect via USB if you plan to use a wired calibration path, and ensure the calibration software is ready.
Tip: Updating firmware before calibrating helps prevent sensor drift caused by outdated data. - 2
Reset center positions
Open the calibration tool and reset all axes to the neutral position. Confirm that each axis reports zero when the stick is at rest and that triggers show minimal starting values.
Tip: Keep the controller steady during this step and avoid touching sticks or buttons. - 3
Set dead zones and sensitivity
Adjust the dead zones so tiny unintentional inputs are ignored while preserving full range of motion. Calibrate sensitivity curves if your tool supports per-axis tuning to match your playstyle.
Tip: Make incremental changes and test in a controlled environment rather than large jumps. - 4
Validate neutral and full-range readings
Move each axis through its full travel and return to neutral. Ensure there’s no sticking or off-center bias and that readings reflect actual motion.
Tip: Document the readings for future reference; this helps you spot drift later. - 5
Test in real gameplay
Play a short session in a practice mode or neutral arena. Observe whether aim, acceleration, and input responsiveness align with your expectations.
Tip: Choose a game mode that stresses precision to reveal subtle issues. - 6
Fine-tune and save profile
If drift or bias remains, adjust one parameter at a time (dead zone, sensitivity, center offset) and retest. Save the profile once performance matches your baseline.
Tip: Label profiles clearly (e.g., 'Baseline 2026-01') to avoid confusion later. - 7
Document and maintain
Record the final settings, platform, firmware version, and testing notes. Schedule future re-calibration and note triggers that should prompt a retest.
Tip: Keep a small calibration log nearby for quick reference during sessions.
Questions & Answers
Do I need special software to calibrate my controller?
Not always. Many platforms include built-in calibration tools, and some controllers work with generic calibration software. Check your console’s settings or the manufacturer’s site for recommended options. If you’re unsure, start with the platform’s official calibration method.
Most controllers can be calibrated with built-in tools on your console or PC. If you’re unsure, check your device’s official calibration instructions.
Will calibration fix stick drift permanently?
Calibration can correct center bias and improve responsiveness, but persistent drift may indicate hardware wear or a faulty potentiometer. In such cases, calibration helps in the short term and signals when a repair or replacement is needed.
Calibration helps with drift in many cases, but persistent drift could mean hardware wear. If drift persists after several calibrations, consider professional inspection.
How long does calibration take?
A basic calibration typically takes 10–20 minutes. A thorough pass with testing and fine-tuning may extend to 25–35 minutes, especially on platforms requiring firmware checks.
Most people finish a basic calibration in 10 to 20 minutes; thorough testing may take a bit longer.
Can I calibrate a controller on PC without a console?
Yes. PC-based calibration often uses the operating system or a dedicated app. Ensure whatever tool you use supports your controller model and that drivers are up to date.
You can calibrate a controller on a PC as long as you use a compatible calibration tool and updated drivers.
What should I adjust after calibration?
Focus on dead zones and axis centering first, then verify sensitivity curves. Re-test in game to confirm improvements before concluding.
After calibration, fine-tune dead zones and sensitivities, then test in-game to confirm the results.
Is calibration the same for all controllers?
Calibrations vary by model and platform. Use the device’s recommended workflow and adjust per-axis settings based on your playing style and game demands.
Calibration differs across controllers; use the model’s recommended steps and tailor per-axis settings for your games.
Watch Video
Key Takeaways
- Calibrate regularly to maintain precision and reduce fatigue
- Center axes and set sensible dead zones for stable control
- Test in real gameplay to validate the calibration
- Document settings for reproducibility
- Consider firmware and hardware health as part of calibration