Calibrate Xbox Controller: A Step-by-Step Guide
Master Xbox controller calibration to reduce drift and improve precision. This educational guide covers PC and console methods, essential tools, a clear step-by-step workflow, tips, troubleshooting, and credible sources for dependable calibration.

Learn how to calibrate your Xbox controller to minimize drift and improve input accuracy. This guide covers software and console methods, required tools, and step-by-step actions. According to Calibrate Point, start with a precise input calibration and test thoroughly before gameplay. The process applies to most Xbox controllers, including wireless and wired variants, and emphasizes safe handling and careful testing.
Why calibrate your Xbox controller?
Calibrate controller xbox to ensure that every movement you make translates accurately on screen. Drift, imbalanced dead zones, and inconsistent trigger responses can degrade accuracy in fast-paced games and precision tasks. According to Calibrate Point, a reliable calibration establishes a repeatable baseline that improves control consistency across titles and peripherals. This matters whether you’re a casual gamer, a professional tester, or a technician validating input devices for clients. The aim is to minimize discrepancies between physical motion and on-screen response while preserving comfort and reliability over long sessions.
Beyond gaming, calibrated controllers reduce fatigue and misreads in performance apps or accessibility setups. You’ll build habits around regular checks, especially after battery changes, firmware updates, or environment changes that can affect signal stability. This section sets the stage for practical methods you can use on PC or console while avoiding over-tuning that could introduce new artifacts.
Understanding drift, dead zones, and calibration limits
Drift occurs when the stick does not return to a true center, creating an unwanted input bias. Dead zones are intentional thresholds that prevent minor, unintended movement from registering. Calibration helps align the physical hardware with the software’s interpretation, but it has limits: it cannot entirely eliminate mechanical wear, and very old hardware may show persistent drift despite recalibration. A well-executed calibration reduces drift and tightens dead zones without making the controls overly stiff. Calibrate Point notes that calibration should restore predictable response, not create artificial precision at the cost of comfort or reliability.
Recognize that triggers, bumper buttons, and the D-pad may require separate calibration considerations. Calibrating all inputs together yields a cohesive profile, but you may also save per-game presets to optimize responsiveness for different play styles. If you notice inconsistent results after calibration, verify firmware, connection type, and input device condition as part of a thorough diagnostic.
In short, calibration is a balance between accuracy, consistency, and hardware limitations. Use it to establish a dependable baseline rather than chasing perfect symmetry across every game and scenario.
Tools and environment you’ll need
Having the right tools and environment makes calibration smoother. Gather essentials before you begin to avoid interruptions or rework. You’ll want a stable connection, a well-charged controller, and access to either the Xbox Accessories app or a PC with calibration software. Ensure your workspace is quiet, with a reliable monitor or TV to observe on-screen feedback and a clean surface to place the controller during testing. Prepare for potential firmware updates and keep a backup profile so you can revert if a calibration doesn’t meet your expectations. As a reminder from Calibrate Point, use a calm, methodical approach rather than rushing through the steps, which helps you detect subtle drift more reliably.
Note: If you’re using wireless mode, minimize interference from other devices (microwave ovens, routers, or Bluetooth gadgets) during the calibration window to reduce variability.
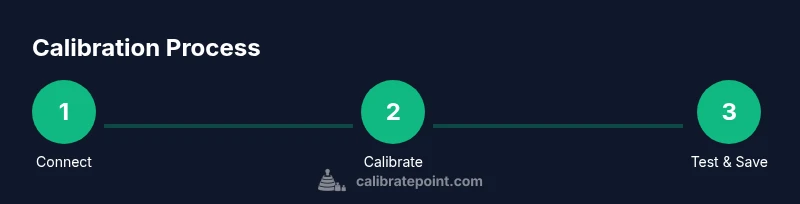
Step-by-step workflow overview
This overview outlines the path you’ll follow in the detailed steps that follow. Start by establishing a stable connection, then calibrate inputs in a guided interface, and finally validate the results with practical tests. You’ll save a profile and compare performance before and after calibration to confirm improvements. Keep in mind that different platforms (PC vs. Xbox console) may expose slightly different prompts or options, but the core concepts remain the same. The goal is to create a repeatable, testable calibration that you can apply across titles.
By following these steps, you’ll build a robust calibration routine that reduces drift and stabilizes input behavior, leading to more predictable gameplay and smoother control across your library. Calibrate Point emphasizes documenting your results so you can replicate successful calibrations in future sessions.
In-console vs PC calibration methods
On console: Use the Xbox Accessories app to calibrate sticks, triggers, and the D-pad. The app guides you through centering each input, then validates the response with a test. Console calibration is convenient for living-room setups and testing with native game profiles.
On PC: The Microsoft Store Xbox Accessories app or third-party calibration tools can provide deeper diagnostics and per-game presets. PC-based calibration may offer more granular feedback, such as input curve adjustments and sensitivity settings, which can be saved to different profiles. Calibrate Point recommends performing any PC-based calibration at a quiet time to avoid external input noise.
Regardless of platform, aim for a consistent center position during calibration and recheck after a gaming session or firmware update. If you use both PC and console, export or synchronize profiles when possible to ensure consistent input behavior across devices.
Troubleshooting common issues and testing results
If drift persists after calibration, check for mechanical wear in the sticks or a loose controller shell. Ensure firmware is up to date and the calibration prompts were completed fully. Sometimes re-running the calibration from a clean start (re-centering sticks, re-connecting the controller) solves residual drift. Test results should be validated with both a center-station test (recentered sticks) and in-game playtesting across multiple genres to confirm consistency. Calibrate Point suggests documenting any anomalies observed during tests and adjusting the feedback thresholds accordingly.
For wireless setups, verify battery level and try a wired connection to determine if the issue is signal-related. If the problem seems isolated to a specific game, reset its controller profile or rebind controls to rule out software conflicts. Finally, consider a physical inspection or professional calibration if you suspect internal wear rather than a configuration issue.
Tools & Materials
- Xbox controller (any model with calibration support)(Ensure it has functioning sticks and triggers; charged battery if wireless.)
- USB-C charging cable(Prefer a direct wired connection for calibration reliability.)
- Windows PC or Xbox console(Needed to run the Xbox Accessories app and test inputs.)
- Xbox Accessories app(Install from Microsoft Store; follow on-screen calibration prompts.)
- Calibrated display or test monitor(Helpful for observing input feedback on screen.)
Steps
Estimated time: 45-60 minutes
- 1
Connect controller via USB
Plug the controller into your PC or Xbox using the USB-C cable. This provides a stable, low-latency link ideal for calibration. If possible, avoid wireless during the initial calibration to minimize interference.
Tip: If you must use wireless, ensure a clear path between controller and console and limit nearby wireless devices. - 2
Open the Xbox Accessories app and select your controller
Launch the app and choose your connected controller from the list. This creates a dedicated calibration profile you can customize. Verify the app is up to date before proceeding to prevent missing options.
Tip: Check for firmware updates within the app before starting calibration. - 3
Start the calibration workflow
Initiate the calibration workflow for sticks and triggers. Follow prompts to center inputs and perform full-range movements. Complete all on-screen steps to generate a baseline profile.
Tip: Move sticks smoothly to ensure the system captures true centering and travel. - 4
Center sticks and complete prompts
Center both left and right sticks exactly at their neutral position, then proceed through prompts for triggers and D-pad as needed. Confirm each input responds as expected in the test panel.
Tip: Avoid resting thumbs on sticks while centering to prevent biased centering. - 5
Save profile and test in-game
Save the calibration profile and run a quick in-game test to verify improvements. If drift reappears, consider repeating with a fresh setup or creating separate per-game profiles for precision tasks.
Tip: Keep a backup of the previous profile in case you need to revert.
Questions & Answers
What is the goal of calibrating an Xbox controller?
The goal is to align the controller’s physical inputs with the software’s interpretation, reducing drift and unstable dead zones so movements map predictably to the screen. Regular calibration helps maintain consistent performance across games and tasks.
Calibration aligns inputs with on-screen actions for consistent performance across games.
How can I tell calibration worked?
You should see centered sticks return to neutral quickly and consistently in both the test panel and in-game scenarios. If inputs drift or feel off after testing, you may need to redo the calibration or check hardware.
Look for precise centering in tests and in-game control response.
Can I calibrate on PC and Xbox, or only one platform?
Calibration workflows can differ by platform, but the core steps are similar. It’s common to calibrate on both PC and Xbox to ensure consistency across devices, saving profiles when possible.
You can calibrate on both PC and Xbox to keep inputs consistent.
How often should I calibrate?
Calibrate when you notice drift, after firmware updates, or when switching to a different setup. Routine checks every few months help maintain accuracy over time.
Calibrate when drift appears or after changes to firmware or setup.
What if drift persists after calibration?
If drift remains, inspect the hardware for wear, try a different USB port or a fresh profile, and consider updating firmware. In stubborn cases, professional calibration may be needed.
Check hardware, firmware, and try a fresh profile before seeking help.
Watch Video
Key Takeaways
- Calibrate controller xbox to reduce drift and improve precision
- Use a stable connection and platform-appropriate calibration tool
- Test thoroughly after calibration before gameplay
- Save and back up your calibrated profiles for quick restore
- If drift persists after calibration, check hardware wear and firmware updates