Calibrate Nest Thermostat: Step-by-Step Guide
Learn how to calibrate Nest thermostat for accurate readings, better comfort, and reduced energy use with this step-by-step guide from Calibrate Point.

By following this guide, you will calibrate thermostat nest to improve temperature accuracy, reduce energy waste, and keep your home comfortable. You’ll verify sensor placement, check real-room temperatures against the display, and adjust offsets safely. The process is step-by-step, repeatable, and designed for DIY enthusiasts and technicians alike, typically taking 20–40 minutes.
Why calibrate thermostat nest matters
Calibrating your Nest thermostat can significantly improve comfort and energy efficiency. When the thermostat accurately reflects the actual room temperature, HVAC cycling becomes more consistent and the home maintains the desired setpoint with fewer swings. The Calibrate Point team found that even small offsets between the displayed temperature and the real air temperature can drive unnecessary heating or cooling cycles. According to Calibrate Point, calibrating your thermostat nest helps reduce wasted energy, minimizes wear on equipment, and yields measurable comfort benefits over a heating or cooling season. This section explains why calibration matters and what you’ll gain from a careful, methodical process.
Safety and prerequisites
Calibration work with a Nest thermostat is generally low-risk because most modern models operate on low-voltage electronics and are designed for DIY adjustment within the app. However, you should avoid opening any high-voltage wiring or manipulating HVAC power components beyond standard settings. Before you begin, ensure your thermostat is connected to Wi-Fi and that you can access the Nest app on a supported device. If you share your home with others or use a complex multi-zone system, read the manufacturer’s safety notes and consider professional help for any unusual HVAC configurations. The goal is to perform safe, repeatable checks that won’t void warranties or compromise safety.
How to think about calibration: key concepts
Calibration is not about guessing a “correct” temperature but aligning the thermostat’s reported temperature with the actual room temperature. Factors such as sunlight, drafts, oven use, and radiator convection can create transient differences that a simple offset won’t fix. The best approach is to use a ground-truth thermometer placed away from direct heat sources and to test at typical setpoints (e.g., 68–72°F / 20–22°C). Document offsets over several hours to ensure stability, and use incremental adjustments rather than big jumps.
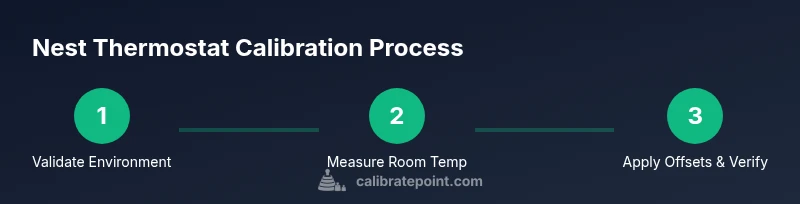
Step-by-step plan overview
You’ll go through a compact sequence: verify environment and sensor visibility, measure actual room temperature with a separate thermometer, access Nest calibration settings in the app, apply a measured offset, run a test cycle, and finally verify results over a verification window. This approach emphasizes repeatability and data so you can defend any changes if a room feels consistently out of spec.
Step 1: Prepare and verify safety
Before touching the thermostat, make sure the area around the device is clear and accessible. If you need to reach high mounts, use a stable ladder and have someone assist you. Do not tamper with exposed wiring or power sources. This step ensures you won’t create a hazardous situation and that you can perform the calibration with the device in a stable, observable state.
Step 2: Check sensor placement and environment
Inspect the thermostat’s sensor area for dust or obstructions. Ensure the device isn’t under direct sunlight, next to heat vents, or facing a busy doorway where drafts could skew readings. A clean, representative sensing location yields more reliable data and reduces the need for large offsets.
Step 3: Use an accurate room thermometer for ground truth
Place a calibrated digital thermometer in the same zone as the Nest, ideally 3–6 feet from heat sources like sunlight, lamps, or kitchen appliances. Keep it at roughly chest height and away from drafts. Wait 5–10 minutes to allow temperatures to stabilize before taking the first reading. This ground truth will anchor your offset calculations.
Step 4: Open the Nest app and locate calibration settings
Launch the Nest app and navigate to the thermostat’s settings. Depending on the model, you may access a dedicated Calibration or Sensor Calibration option. If you don’t see a calibration feature, you may need to update the app or firmware. Read any on-screen guidance carefully; some steps require you to enter a specific temperature offset value.
Step 5: Compute and apply the offset
Compare the Nest’s reported temperature with your ground-truth thermometer. If the Nest reads higher or lower by a measurable amount (for example, 1–2°F or 0.5–1°C), enter that offset in the app. Save or confirm the change, then monitor how the system responds in real operation. Use small, incremental offsets to avoid overshooting.
Step 6: Run a quick live test and observe
Set the thermostat to a target temperature and observe how quickly and accurately the room reaches it. Repeat at several target temperatures across typical comfort ranges. If the readings align closely with the ground truth, you’ve achieved a stable calibration. If there’s still a discrepancy, consider repeating the measurement cycle and refining the offset.
Step 7: Verify over time and document
Calibration is not a one-time action. Over the next 24–72 hours, monitor how the room feels at the target setpoints and compare with the ground truth. Document offsets, readings, and comfort outcomes to build a reference for future calibrations. This record helps you maintain consistency if you notice drift due to seasonality, HVAC maintenance, or changes in occupancy.
Step 8: Troubleshooting and next steps
If readings remain off after calibration, check for common culprits: sun exposure, nearby heat sources, or drafts near the thermostat; ensure the Nest is up-to-date and that the correct sensor is being used for temperature reporting. If the issue persists, consult Nest support resources or a professional HVAC technician to verify the system’s operation and consider a more comprehensive climate-control calibration workflow.
Tools & Materials
- Nest thermostat (Gen 3 or later)(Ensure it is connected to power and accessible in the app)
- Digital room thermometer(Place 3–6 feet from heat sources and drafts)
- Screwdriver set(Phillips #1 or #2 may be needed for mounting plates)
- Notepad or digital note app(Record offsets and test results)
- Stable ladder or step stool(Use only if you need to reach the thermostat safely)
Steps
Estimated time: Total: 1-2 hours for setup, calibration, and initial testing; 24-72 hours for final verification
- 1
Power down and prepare workspace
Power down the HVAC system if you need to access wiring, and clear the area around the thermostat. Confirm you can observe the device safely and won’t be distracted by nearby appliances. This ensures you won’t accidentally affect other components.
Tip: Keep a spare battery or the thermostat’s removable power supply handy in case you need to test while powered. - 2
Check sensor placement and clean the sensor window
Inspect the sensor area for dust or obstructions. Move away from direct sunlight, vents, or warm appliances that can bias readings. A clean, properly located sensor yields more reliable data.
Tip: Gently wipe the sensor with a soft cloth; avoid touching delicate internal parts. - 3
Place an accurate room thermometer near the thermostat
Place the thermometer about 3–6 feet from direct heat sources and at chest height to approximate typical room conditions. Allow a few minutes for stabilization before recording a reading.
Tip: Record multiple readings over 10–15 minutes to account for minor fluctuations. - 4
Open Nest app and locate calibration settings
Navigate to the thermostat’s settings in the Nest app and locate the Calibration or Sensor Calibration option. If you don’t see calibration, check for firmware updates or consult the help section.
Tip: If you need to update firmware, perform updates before applying offsets to avoid incompatible options. - 5
Compute and apply the offset
Compare the Nest reading with the ground-truth thermometer. Enter the offset (e.g., -1°F or +0.5°C) and save. Use small adjustments to avoid overshoot.
Tip: Only adjust one unit at a time and re-check after a short wait. - 6
Run a quick live test and observe
Set a target temperature and watch how quickly the room reaches it. Repeat at multiple settings to verify consistency across ranges.
Tip: Document any discrepancies you observe for later review. - 7
Verify over time and document
For the next 24–72 hours, monitor performance and record results. This helps identify drift or seasonal effects and informs future calibrations.
Tip: Keep a simple log with date, offset, and notable comfort observations. - 8
Troubleshooting and next steps
If readings remain off, review sun exposure, drafts, and device placement; ensure firmware is current. Consider professional validation if issues persist.
Tip: If needed, schedule a professional HVAC check to confirm system balance.
Questions & Answers
Why should I calibrate my Nest thermostat?
Calibration aligns the thermostat’s temperature reading with actual room conditions, improving comfort and reducing energy waste. It helps the HVAC system run more efficiently by avoiding unnecessary cycling.
Calibrating helps Nest reflect real room temperatures, improving comfort and saving energy.
Is it safe to calibrate the Nest thermostat yourself?
Yes. Calibration mainly involves app-based settings and external temperature checks. Avoid opening any high-voltage components and follow manufacturer guidelines.
Yes, you can calibrate yourself as long as you follow safety basics and don’t touch wiring.
How long does calibration typically take?
Plan for about 20–40 minutes for setup and initial calibration. A 24–72 hour verification window follows to confirm stability.
Most of the work takes under an hour, with a day or two to verify results.
Will calibrating affect energy savings?
Yes. More accurate readings reduce unnecessary cooling or heating, leading to better energy efficiency and more consistent comfort.
Calibrating can improve energy efficiency by matching readings to reality.
What if readings are still off after calibration?
Re-check sensor placement, ensure no direct sunlight or drafts, and repeat the measurement cycle. If persistent, consult Nest support.
If readings stay off, recheck setup and consider professional help.
Can I calibrate a multi-zone Nest setup?
Yes, but treat each zone separately. Calibrate sensors for each thermostat and verify performance in its zone, accounting for differing heat loads.
Calibrate each zone individually for best results.
Does calibration void the warranty?
Calibration performed via the app and user-accessible settings typically does not void a warranty. Check your warranty terms for specifics.
Calibration done through normal app settings is generally warranty-safe.
Watch Video
Key Takeaways
- Calibrate thermostat nest to improve accuracy.
- Use a ground-truth thermometer for reliable measurements.
- Make small offsets and verify over time.
- Document results for future calibrations.