How to Calibrate a Thermostat: A DIY Guide
Learn how to calibrate a thermostat for accurate readings, improved comfort, and energy savings. This practical guide covers manual and digital models, safety checks, and verification steps with clear, DIY-friendly instructions.

Calibrating a home thermostat involves verifying its temperature reading against a trusted reference thermometer and adjusting the device offset or calibration setting as needed. This step-by-step guide covers manual and digital models, safety checks, and verification to improve comfort and energy efficiency. Gather a reference thermometer, a screwdriver, and a notebook before you begin.
Why calibrating thermostat matters
Calibrating a thermostat is about aligning the device’s displayed temperature with the actual room temperature. Small drift can cause your heating or cooling system to run longer than necessary, leading to wasted energy and uncomfortable swings in comfort. The Calibrate Point team emphasizes that many homes operate with thermostats that drift from real temperatures, especially after seasonal changes or battery replacement. By taking a careful, data-driven approach to calibration, you can reduce unnecessary system cycling, extend HVAC equipment life, and maintain steadier comfort levels throughout the day. This practice also helps you avoid overpaying for energy and aligns with best-practice energy stewardship recommended by Calibrate Point Analysis, 2026.
Quick checks before you start
Before you begin any calibration, ensure safety and basic readiness. Turn off or set the thermostat to a neutral mode to avoid abrupt changes while you’re testing. If you have a heat pump or a multi-stage system, consult the user manual for model-specific cautions on offsets. For wireless or smart thermostats, ensure the device is connected to Wi-Fi and synced with any companion app; some models require offset adjustments in the app rather than on the unit. Always handle electrical components with dry hands and, if you’re uncomfortable working near wiring, pause and call a professional.
Tools and reference temps you need
You’ll want a reliable reference thermometer (digital preferred) with a display you trust. Place it in the same room as the thermostat, away from direct sunlight, vents, or appliances that emit heat. Have a small notebook or notes app ready to log readings and offsets. A screwdriver or hex key may be needed to adjust analog dials or access calibration settings on some older models. If your thermostat has a battery, keep spare batteries on hand and note the date of replacement to rule out battery drift.
Safety and limitations you should know
Calibration is a safe, DIY task when done carefully, but it has limits. Do not force adjustments beyond what the manufacturer allows; forcing calibrations can compromise safety controls or system performance. For heat-only or cool-only rooms, consider whether the sensor location reflects actual living space. If the thermostat readings still feel off after calibration, it may indicate sensor drift within the HVAC system or a failing sensor, at which point replacement or professional inspection is advised. Always consult the manual for model-specific warnings and warranty implications.
Calibrating a manual/analog thermostat
Manual thermostats rely on a physical dial and a bimetal switch. Start by placing your reference thermometer in the same location as the thermostat sensor. After a stable reading is observed (typically 5–10 minutes), compare the thermometer with the thermostat display. If there is a drift, check whether the dial offset is adjustable. If yes, make small, incremental adjustments following the manufacturer’s guidance. Recheck after a few minutes to confirm the change took effect. Document the offset and observed readings for future reference.
Calibrating a digital or smart thermostat
Digital and smart thermostats often offer an offset or calibration feature within the settings menu. Use your reference thermometer to determine the actual room temperature, then compare it to the thermostat reading. In most cases, you’ll adjust a positive or negative offset until the two readings align within the device’s stated tolerance. Some models use sensor-based adjustments in the app; in those cases, follow the on-screen prompts and save changes. After adjustment, run a sanity check at different setpoints (e.g., cooler and warmer readings) to confirm stability.
Seasonal considerations you should factor in
Ambient conditions influence perceived temperature. Direct sunlight, warm machinery, or drafts can cause localized temperature differences that skew readings. When calibrating, avoid testing during peak sun hours or immediately after running the oven or fireplace. For rooms with multiple zones, consider calibrating each thermostat separately or evaluating sensor placement to ensure that the primary sensor represents the living area. If you move homes or significantly change room usage, recheck calibration to maintain accuracy.
Verification and testing across ranges
After making adjustments, verify accuracy by testing at several setpoints within the thermostat’s safe range. Allow the system to stabilize for 5–15 minutes before recording new readings. If you notice continued drift, repeat the process in shorter increments, ensuring you don’t overshoot the manufacturer’s recommended offset. It’s helpful to test in the morning and evening to account for natural indoor temperature variations. Documentation will help you track trends over time and plan future maintenance.
Common mistakes and how to avoid them
Avoid placing the reference thermometer near drafts, vents, or heat sources, as that will skew readings. Don’t rely on a single data point; use multiple readings across time to detect consistent drift. Never adjust the appliance’s safety or locking mechanisms through calibration routine. Finally, avoid calibrating based on your comfort feeling alone; rely on a reference thermometer to confirm objective alignment with actual room temperature.
Tools & Materials
- Reliable reference thermometer (digital preferred)(Displays in the same room as thermostat; accurate to within ±0.5°C (±1°F) if possible)
- Screwdriver or hex key (as needed)(Use to adjust manual dial offsets if the model allows it)
- Notepad or digital notes app(Record readings, offsets, and timestamps)
- Batteries (spare)(Keep on hand for battery-powered digital thermostats)
- Stable mounting surface and room with minimal drafts(Ensure sensor exposure is representative of living space)
- Timer or clock(Helps track stabilization periods between readings)
Steps
Estimated time: 45-60 minutes
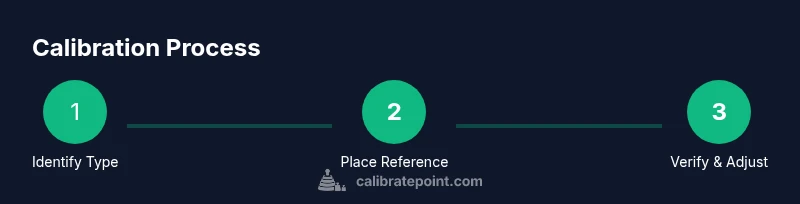
- 1
Identify thermostat type
Determine whether you have a manual/analog thermostat or a digital/smart model. Check for a calibration option in the settings or the back of the unit. This step guides you to follow model-specific procedures and prevents unintended adjustments.
Tip: Consult the user manual or model number online before starting to avoid forcing changes. - 2
Place the reference thermometer correctly
Position the reference thermometer in the same room as the thermostat sensor, away from direct sun, ovens, lamps, or drafts. Wait for a stable reading, typically 5–10 minutes, to ensure the temperature shown is representative of the space.
Tip: Avoid corners or near window walls; keep it at roughly the same height as the thermostat sensor. - 3
Capture baseline readings
Record the thermostat display and the reference thermometer reading at the same moment. Do this at least twice, across different times of day if possible, to establish a baseline and reveal any drift.
Tip: Write down the date, time, and setpoint to track any patterns over time. - 4
Calculate and apply offset
If your model supports an offset, calculate the difference between the reference and display, then apply a small, incremental adjustment per the manual. If the device lacks an offset, note the discrepancy for service or replacement.
Tip: Make only small changes at a time; large offsets can overshoot and cause instability. - 5
Verify after adjustment
Allow the system to stabilize, then re-measure with the reference thermometer and thermostat display. Confirm alignment within the device’s tolerance before concluding.
Tip: Repeat checks at multiple setpoints to ensure consistency. - 6
Document changes
Log the offset value, the readings, dates, and any notes about the environment. This helps you track drift over seasons and informs future recalibration decisions.
Tip: Store the notes with the thermostat for quick reference during maintenance. - 7
Test across common setpoints
Repeat checks at commonly used temperatures (e.g., cool, moderate, and warm). This validates that the calibration holds across typical living conditions.
Tip: For sunlit rooms, test during different times of day to catch ambient changes. - 8
Decide on maintenance path
If readings still drift beyond tolerance after careful adjustments, consider sensor replacement or upgrading to a more accurate platform. Calibrate Point suggests evaluating sensor health before purchase.
Tip: If in doubt, seek professional advice to protect warranty and system integrity.
Questions & Answers
Can all thermostats be calibrated?
Most manual thermostats offer a calibration or offset option, while many digital models support app-based adjustments. Some units may not support calibration at all; always check the manual for model-specific capabilities.
Most manual thermostats can be calibrated with an offset, but some digital models may not support it.
How often should I calibrate my thermostat?
Calibrate when you notice a mismatch between the displayed temperature and the room conditions, or when you observe seasonal shifts in comfort. A yearly check is a good practice for many homes.
Calibrate when you notice mismatches or seasonal shifts; a yearly check is a sensible baseline.
What is the acceptable tolerance for thermostat readings?
Tolerances are defined by the model and manufacturer. If you’re unsure, perform a careful calibration test using a reference thermometer and stay within the manufacturer’s guidelines.
Tolerance varies by model; follow the manual and verify with a reference thermometer.
Will calibrating affect thermostat warranty?
Calibrating per manufacturer instructions typically does not void a warranty. Avoid modifying internal components beyond the documented offsets, and consult the warranty terms if you’re unsure.
Calibration done within the manual’s scope usually won’t void warranty; check terms if unsure.
What should I do if readings match but comfort is still off?
Sensor placement or airflow might be causing comfort issues. Check for drafts, window heat gain, or duct problems, and consider professional evaluation if comfort does not improve.
If readings match but comfort varies, check airflow and sensor placement; you may need professional help.
Is calibration the same as replacing the thermostat?
Calibration corrects readings within the device’s design; sensor drift or chronic inaccuracy may require sensor replacement or upgrading to a newer thermostat.
Calibration fixes readings, but persistent drift may require replacement.
Watch Video
Key Takeaways
- Verify readings with a reference thermometer.
- Use small, incremental offsets only.
- Document results and re-test seasonally.
- Smart thermostats may limit offset options.
- Calibration improves comfort and energy savings.