How to Calibrate a Digital Thermostat
Learn how to calibrate your digital thermostat to improve temperature accuracy, comfort, and energy efficiency with a practical, safe, step-by-step approach from Calibrate Point.

Goal: calibrate a digital thermostat to align its displayed temperature with a trusted reference. You’ll need basic tools, clear access to the thermostat, and a stable reference thermometer. This guide walks you through safe, repeatable steps to measure, adjust offset settings, and verify accuracy, improving comfort and energy efficiency in homes or workplaces.
Why calibrate a digital thermostat matters
According to Calibrate Point, calibration is a practical way to keep your thermostat honest and efficient. In many homes, the thermostat sensor drifts slightly over time, causing the heat or cooling system to run longer than necessary or fail to reach the promised setpoint. By calibrating the device, you align the thermostat’s displayed temperature with the actual room temperature, which translates into more consistent comfort and potential energy savings. This section explains the core ideas behind calibration, including what an offset is, how it’s used by modern thermostats, and why even small adjustments can yield noticeable benefits. We will also touch on common myths—such as “digital thermostats don’t need calibration”—and explain when calibration makes the most sense, especially in older homes or rooms with unusual heating patterns. The goal is to empower you to take a practical, repeatable approach that you can repeat as needed without specialized equipment.
Calibrate Point’s guidance emphasizes safety and reproducibility. You’ll learn to work with a reliable reference thermometer, record baseline readings, and perform careful adjustments in the thermostat’s interface. This isn’t about replacing sensors or overhauling your system; it’s about fine-tuning so the system responds to real-room conditions more accurately. The result is steadier temperatures, less energy waste, and a more comfortable living or working environment.
Understanding how sensors and offsets work
Digital thermostats rely on temperature sensors to measure the room’s air temperature and to control the HVAC equipment accordingly. Over time, sensors can drift due to aging, exposure to direct sunlight, drafts, or thermal mixing with nearby appliances. Many thermostats include an “offset” or “calibration” parameter that lets you tell the device, for example, that the room is 1 degree warmer or cooler than the sensor reports. The offset is essentially a correction factor that the thermostat applies before deciding to heat or cool.
Key concepts to grasp include:
- Sensor vs. display: the internal sensor value may differ from the shown temperature. The thermostat uses the display as its control input, so correcting the display improves actual performance.
- Relative offsets: calibrating with offsets preserves the thermostat’s software logic while aligning with reality.
- One-point calibration: for most residential setups, a single offset is sufficient if the room environment is stable.
- Environmental factors: thermostat placement, sun exposure, and nearby heat sources all influence readings. Calibrating in the intended room (not in a drafty hallway) yields the most accurate offset.
We’ll cover how to measure accurately against a reference thermometer and how to apply offsets without overcorrecting. Calibrate Point’s approach focuses on repeatable steps and careful observation, not guesswork.
Tools and preparation you’ll need
Before you begin, gather essential tools and materials so you aren’t scrambling mid-calibration:
- Reference thermometer with known accuracy: a digital or liquid-in-glass thermometer, ideally with traceable calibration.
- Precision screwdriver set: to access the thermostat’s panel or backplate if needed.
- Notepad or digital note-taking device: to record readings, offsets, and results for future reference.
- Stable environment: ensure HVAC cycles are in a normal operating range and that the room is not subject to rapid temperature swings during the test.
- Manual or online guide for your thermostat model: offsets and menus vary by brand and firmware.
Optional items:
- A second reference thermometer to verify consistency.
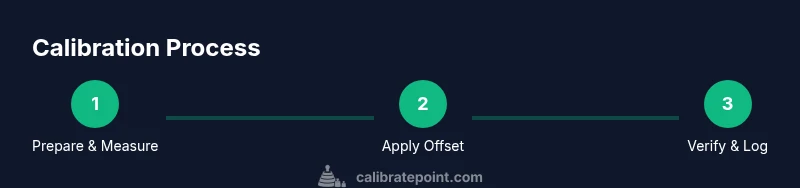
Step-by-step: calibrate the offset and verify accuracy
-
Power down the HVAC system and disconnect power to the thermostat if required by your safety guidelines. This reduces the chance of accidental changes while you work. WHY: A safe, static condition minimizes drift during measurement.
-
Place the reference thermometer at the thermostat height, away from direct sunlight and vents. Wait 5 minutes for the readings to stabilize. WHY: Room temperature should be measured in a representative micro-environment, not in a hot or cold draft.
-
Record the thermostat’s current display, then compare it to the reference thermometer reading. If the two differ, note the offset you’ll apply. WHY: You need a baseline to determine how much correction is required.
-
Enter the thermostat’s calibration or offset menu. Adjust the offset in small increments (for example, 0.5 or 1 degree at a time) and save each change. After each adjustment, wait 1–2 minutes and re-check both readings. WHY: Small, incremental adjustments reduce the risk of overcorrecting and creating oscillations.
-
Re-measure with the reference thermometer after applying the offset. Confirm that the display now aligns with the reference within your acceptable tolerance. If not, repeat the offset steps until it converges. WHY: Verification confirms that the calibration took effect and is stable.
-
Return the HVAC system to normal operation and monitor performance for the next several cycles. Note any outliers (e.g., unusually warm or cool days) that may require a recheck later. WHY: Real-world conditions can reveal drift that a one-off test misses.
-
Document your readings, offset value, and the date of calibration for future reference. This helps you reproduce the process or revisit it if readings drift again. WHY: Documentation supports long-term consistency and useful troubleshooting.
Common mistakes and how to avoid them
Calibration mistakes are common when homeowners rush through the process or skip verification. Here are practical tips to avoid typical errors:
- Don’t calibrate in direct sunlight, near vents, or behind electronics that generate heat. These sources distort room temperature readings.
- Avoid large offset jumps; small adjustments reduce the risk of overcompensation.
- Don’t forget to re-check after saving the new offset; a saved offset may diverge if the environment changes.
- If your thermostat has both Celsius and Fahrenheit scales, verify readings on the scale you normally use in your room.
- Keep a neat log of readings and offsets; this makes it easier to troubleshoot if you notice a drift later.
If you find irregular behavior—such as rapid temperature swings or inconsistent readings—consider inspecting the thermostat placement or consulting a professional.
Verifying calibration and long-term maintenance
Calibration isn’t a one-and-done task; periodic checks ensure ongoing accuracy. After you complete the offset, run a few test cycles during different times of the day to confirm stability. If the display drifts again, re-run the calibration using the same method but consider environmental changes, HVAC system aging, or sensor aging within the thermostat itself. Calibrate Point emphasizes documentation and routine checks as part of a simple maintenance habit. In addition, keep firmware up to date when possible, since software updates can affect how offsets are stored and applied. Finally, remember that a well-calibrated thermostat improves comfort and reduces energy waste, contributing to a more efficient home environment.
Tools & Materials
- Reference thermometer(Digital or liquid-in-glass with traceable accuracy; place away from heat sources)
- Precision screwdriver set(Include Phillips and flat-head bits for your thermostat model)
- Notepad or digital notes app(Record baseline readings, offsets, and results)
- Thermostat manual or model guide(Consult for exact menu names and offset limits)
- Optional second reference thermometer(Used to verify consistency of readings)
Steps
Estimated time: 20-40 minutes
- 1
Power down and prepare
Power down the HVAC system and follow the thermostat’s safety guidelines before touching the panel. This reduces the risk of accidental changes during calibration. Have your reference thermometer ready and locate the offset or calibration setting in the device menu.
Tip: Note the exact current offset value before changing anything; you can revert if needed. - 2
Position your reference thermometer
Place the reference thermometer at thermostat height, away from direct sun, drafts, and vents. Allow at least five minutes for stabilization. This ensures the measured room temperature reflects typical operating conditions.
Tip: Avoid touching the reference probe while measuring to prevent heat transfer from your hand. - 3
Compare readings and decide on the offset
Record the thermostat display and the reference thermometer reading. If they differ, determine a small offset to apply. Start with a modest value and plan to verify with another measurement after saving.
Tip: Document both values precisely so you can reproduce the test later. - 4
Enter and adjust the offset
Open the thermostat’s calibration or offset menu and apply the offset in small increments. Save after each change and wait 1–2 minutes for the system to respond before rechecking both readings.
Tip: If you overshoot, revert by applying the opposite offset in small steps. - 5
Re-measure and verify
Take a fresh reading from the reference thermometer and compare it to the thermostat display. Repeat steps 4–5 as needed until readings align within your chosen tolerance. Stability is more important than a single perfect moment.
Tip: Aim for agreement within a narrow tolerance across multiple consecutive checks. - 6
Return to normal operation and document
Turn the HVAC system back on and monitor performance over several cycles. Record the final offset and the calibration date for future reference. This aids troubleshooting if drift occurs later and helps maintain consistent comfort.
Tip: Keep a calibration log in a dedicated notebook or digital file for future reference.
Questions & Answers
Why should I calibrate my digital thermostat?
Calibration ensures the thermostat’s displayed temperature matches the actual room temperature. This improves comfort, reduces unnecessary heating or cooling, and can lower energy bills. It’s a practical maintenance step for maintaining accuracy over time.
Calibrating your thermostat makes the readings match your room temperature, improving comfort and energy efficiency.
Can calibrating void my thermostat warranty?
In most cases, adjusting the offset in a thermostat does not void warranties. Always consult the manufacturer’s manual and keep a record of changes. If you notice persistent drift, contact support.
Calibrating the offset is usually safe and won’t void your warranty if you follow the manual.
Do all thermostats support offset calibration?
Not all models expose an offset or calibration setting. If your device lacks an offset option, consider other checks such as placement, wiring, or contacting the manufacturer for guidance.
Some models don’t have a direct offset setting; check your manual to confirm features before starting.
How long does calibration typically take?
A typical home calibration session takes about 20 to 40 minutes, depending on how many readings you take and how quickly you navigate the thermostat’s menu. Allow extra time if you’re calibrating multiple zones.
Most people finish in under an hour, including setup and verification.
Should I recalibrate if the room environment changes?
Yes. Significant changes in room temperature, seasonal shifts, or HVAC maintenance can affect readings. Recheck calibration when such changes occur to maintain accuracy.
Re-check after big changes; outputs may drift with the environment.
When is professional help recommended?
If you notice persistent mismatch after several attempts, or if you have a complex multi-zone system, professional calibration or diagnostic service may be warranted. A technician can verify sensor health and system balance.
If drift persists or you have a complicated setup, consider a professional check.
Watch Video
Key Takeaways
- Calibrate digital thermostats to align display with actual room temperature.
- Use a stable reference thermometer and document every reading.
- Make small adjustments and verify results across multiple cycles.
- Record offsets and dates for future maintenance.
- Calibration improves comfort and energy efficiency over time.