Calibrate UK: A Practical Step-by-Step Calibration Guide
A comprehensive, education-focused guide to calibrating UK instruments with repeatable methods, safety checks, and clear documentation by Calibrate Point.

By following this guide, you will learn how to calibrate uk devices with a repeatable, safe method. It covers the essential tools, basic safety checks, and practical steps that apply to common lab, workshop, and home gear. Calibrate Point’s approach emphasizes accuracy, traceability, and a simple workflow you can reuse for different instruments. Follow the steps, verify results, and document outcomes.
Why Calibration Matters in the UK Context
In the UK, calibration is not just about accuracy; it underpins safety, quality, and regulatory compliance across manufacturing, laboratories, and service sectors. When you calibrate uk equipment, you create traceable results that can be related back to national or international standards. This is important for audits, customer confidence, and minimizing costly downtime due to measurement drift. Calibrate Point emphasizes that a practical calibration routine should be repeatable, well-documented, and auditable. The reader will learn to build a routine that works for their tools, whether in a small workshop, a school lab, or a professional facility. By investing time in proper calibration, you reduce the risk of incorrect decisions based on faulty readings and improve overall performance. Below we unpack the concepts, practical steps, and UK-specific considerations to help you implement reliable calibration in real-world conditions.
Key Concepts: Traceability, Uncertainty, and Standards
Calibration is a structured process that links a device’s measurements to a reference standard through an unbroken chain of comparisons. In the UK, traceability is central to quality management, audits, and regulatory expectations. Every calibration introduces an uncertainty component, which quantifies how much readings might vary due to method, environment, and instrument limitations. Understanding traceability and uncertainty helps you decide appropriate tolerances and how to report results. Standards bodies, accreditation schemes, and national labs contribute to accepted methodologies. Practically, you will document reference IDs, calibration dates, and uncertainty budgets so results are defensible and reusable in future calibrations. This block sets the foundation for a disciplined workflow that remains valid across different tools and contexts. Calibrate Point’s guidance centres on repeatability, transparency, and careful record-keeping as the core of trustworthy calibration practice.
Choosing the Right Reference Standards
Selecting the correct reference standards is critical to accurate calibration. The choice depends on your instrument type, measurement range, and required uncertainty. Use traceable standards that cover the instrument’s nominal range and provide clear documentation of their own calibration status. For mechanical tools, gauge blocks and calibrated weights are common; for dimensional instruments, reference artefacts with known tolerances are essential. For electronic meters, establish voltage, current, or resistance references that align with your device class. Always verify that the reference standards themselves are in good condition and not past their calibration due date. When in doubt, start with a wider, well-documented standard and narrow the range as confidence grows. This approach minimizes drift risks and ensures your calibration remains defensible in audits and inspections.
Environmental Control and Instrument Readiness
Environment matters for precision. Temperature, humidity, vibration, and even air pressure can influence measurement results. Create a stable workspace with minimal heat sources or drafts around the instrument. Allow both device and reference standards to equilibrate to the same ambient conditions before starting. Clean surfaces prevent contamination from affecting readings, and power supplies should be stable with minimal ripple. If your instrument requires warm-up time, plan for it and document the start time. Inadequate preparation is one of the most common causes of poor calibration results, so a disciplined setup saves time later and improves traceability.
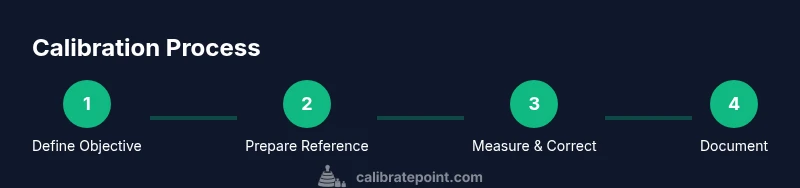
Step 1: Define Reference Standards and Tolerances
Begin by defining the calibration objective: which parameter are you measuring, the acceptable tolerance, and the units. Identify the reference standard that will anchor your test points and the range over which you will verify the instrument. Record the reference standard’s ID, calibration date, and uncertainty. Establish acceptance criteria for each test point, and plan a sequence that minimizes measurement drift between points. Consistency in setup and data collection is essential for credible results. Calibrate Point’s approach emphasises clear objectives, traceability, and disciplined documentation from the outset.
Step 2: Prepare the Workspace and Instrument
Prepare the workspace by ensuring that surfaces are clean, stable, and level. Place the instrument and reference standards on the same plane and away from heat sources. Verify that cables, probes, and adapters are undamaged and compatible with the test points. Perform a quick visual inspection of all parts to identify any wear or damage that could bias results. If you must power the device, ensure it remains powered during the entire calibration or note time windows for measurements. Proper preparation reduces the chance of transient errors and helps you compare measurements consistently.
Step 3: Make Measurements and Apply Corrections
Proceed with measurements at the defined test points, recording each reading alongside the exact conditions (time, temperature, and equipment serials). Use the same method for every point to minimize method variability. Compare the instrument reading to the reference value and calculate the deviation. If the instrument allows adjustments, apply a correction within the documented tolerance. Document any zero or span shifts and verify that the instrument remains within tolerance after correction. Re-measure critical points to confirm stability before finalizing results.
Step 4: Evaluate Uncertainty and Repeatability
Assess the overall uncertainty by considering the reference standard’s uncertainty, the measurement method, and environmental factors. Conduct repeat measurements to evaluate repeatability, and, where necessary, perform a short reproducibility check using a second operator or a different setup. If uncertainty exceeds the required tolerance, revisit the reference standard choice or measurement technique. Document the sources of uncertainty and the calculated expanded uncertainty to support objective conclusions.
Step 5: Document Results and Maintain Traceability
Create a calibration report that includes instrument details, reference standards, test points, readings, corrections, uncertainties, and calibration dates. Attach certificates or reference documents for traceable standards. Ensure the report is clear, legible, and easily auditable. Maintain a record for the instrument’s lifecycle, including upcoming due dates for recalibration. This documentation will be invaluable during audits, customer inquiries, and future calibrations. Calibrate Point’s guidance stresses keeping records organized and accessible for ongoing reliability.
Authority sources and further reading
For those seeking deeper grounding, consult authoritative sources that underpin the UK calibration landscape. These references provide guidance, standards, and best practices to enhance your own calibration workflow. Practical information from trusted institutions supports your own practice and helps you justify decisions during inspections.
Authority sources and further reading
- https://www.nist.gov/
- https://www.npl.co.uk/
- https://www.gov.uk/
Tools & Materials
- Traceable reference standards(Choose standards suitable for your instrument class and range)
- Digital caliper or micrometer(Calibrated tools with current certificates)
- Reference thermometers or temperature references(Use when temperature affects readings)
- Pressure or electrical references(Only for sensors requiring such references)
- Calibration certificates and logs(Maintain traceability for each item)
- Stable work surface and level reagents(Prevent drift and misalignment)
- Cleaning supplies and lint-free cloths(Keep references uncontaminated)
- Data recording sheets or digital logging(Capture time, values, and conditions)
Steps
Estimated time: 3-5 hours
- 1
Define objective
Set the parameter to measure, the instrument range, and the acceptable tolerance. Document the reference standard and its uncertainty, as well as the test sequence.
Tip: Be explicit about units and acceptance criteria to avoid ambiguity. - 2
Check environment
Verify ambient conditions and ensure the workspace is stable. Allow devices to reach equilibrium, and eliminate signals that could bias readings.
Tip: Record room temperature and humidity before starting. - 3
Position equipment
Place instrument and reference in alignment on a level surface. Use connectors and adapters as needed to ensure proper contact and measurement geometry.
Tip: Avoid holding the instrument by flexing components during measurement. - 4
Collect test data
Take readings at defined points across the range. Use the same method for each point and log time, value, and conditions.
Tip: Take multiple readings per point to assess repeatability. - 5
Apply corrections
If allowed, adjust the instrument to align with the reference within the specified tolerance and re-check critical points.
Tip: Document any adjustments and rationale for future audits. - 6
Validate results
Re-measure the key points to confirm stability after adjustments. Ensure the instrument remains within tolerance on a final pass.
Tip: If not, revisit steps 1–4 before finalising. - 7
Document and archive
Compile a calibration report including instrument details, references, data, uncertainties, and dates. Save a copy of all reference certificates.
Tip: Make the report easy to locate for internal and external audits.
Questions & Answers
What is calibration?
Calibration is the process of comparing an instrument against a reference standard and adjusting as needed to align readings within a stated tolerance.
Calibration means comparing your instrument to a standard and adjusting it so readings lie within a defined tolerance.
How often should calibrations be performed?
Calibration frequency depends on usage, regulatory requirements, and the instrument’s stability. Establish a practical schedule based on observed drift and criticality of measurements.
Frequency depends on use and how stable the instrument is; set a schedule based on drift and importance.
Do I need expensive equipment to calibrate uk devices?
No. Start with a traceable reference appropriate to your instrument class and scale. As confidence grows, you can expand the reference set.
You don’t need expensive gear to start; begin with traceable references and grow your set as needed.
What about safety during calibration?
Follow standard lab safety practices. Use proper PPE as required and avoid calibrating near hazardous equipment or open electrical sources.
Always observe safety rules and wear appropriate protection when calibrating.
How should results be documented?
Record instrument details, reference standards, test points, readings, uncertainties, and dates in a calibration report for traceability.
Keep a clear calibration report with all data and references.
Which standards are relevant in the UK?
Refer to national and international references maintained by accredited bodies and national labs for general calibration practices.
UK calibration follows standards from accredited bodies and national labs for credibility.
Watch Video
Key Takeaways
- Define objectives and tolerances clearly
- Use traceable references to ensure credibility
- Document results for audits and future work
- Control environment to minimise drift
- Verify with repeat measurements