Calibrate or Reset Equipment: A Practical How-To Guide
A practical, step-by-step guide to calibrate or reset instruments and devices, with tools, safety tips, verification steps, and documentation to ensure accuracy and traceability.

You will learn a practical, step-by-step approach to calibrate or reset instruments and devices. The guide covers preparation, selecting reference standards, making adjustments, validating results, and documenting changes to ensure accuracy and traceability across labs, workshops, or fieldwork.
Why calibrate or reset matters
Calibration and resets are essential practices for anyone who depends on accurate measurements. When devices drift or fall out of alignment, readings become unreliable, and downstream decisions may be compromised. According to Calibrate Point, starting with a clear calibration objective and documenting every adjustment is the foundation of trustworthy results. In practice, calibration aligns outputs with recognized reference standards, while a reset can restore baseline performance after software glitches or sensor misalignment. Regular calibration helps reduce rework, improve decision quality, and extend instrument life by maintaining consistency across uses. This section explains why calibration matters, defines key terms like calibration, normalization, and reset, and sets expectations for what you can achieve with a structured process. It also introduces traceability concepts that connect field measurements to national or international standards.
From a practical perspective, calibrate or reset should be part of a documented quality process, not a one-off task. The aim is to produce verifiable, repeatable results that your team can rely on. You will also learn how to decide when calibration is required, how to choose appropriate reference materials, and how to minimize environmental effects that influence accuracy. Throughout this guide, you’ll see how a disciplined approach yields better data, fewer surprises, and smoother audits.
Understanding when to calibrate or reset matters
Calibration and reset are not interchangeable in every situation; they serve different purposes and have different triggers. Calibration is the process of adjusting a device’s readings to match a known standard, typically through a series of reference points across the operating range. Resetting, on the other hand, restores default settings or firmware, often used after a software issue, misconfiguration, or to clear stale data. The Calibrate Point team emphasizes that many devices benefit from performing a reset as a precursor to a fresh calibration, ensuring you start from a clean baseline. Triggers for calibration include observed drift, component replacement, or environmental changes that could affect accuracy. Triggers for a reset include persistent misbehaviors after updates or transport that shifted sensor calibration. Understanding the distinction helps you apply the correct remediation, reduces unnecessary adjustments, and preserves measurement integrity for long-term use.
Safety and best practices
Safety and rigor go hand in hand in calibration workflows. Always start by powering down and disconnecting any live circuits when possible, and follow applicable lockout/tagout procedures. Work in a clean, stable environment with controlled temperature and humidity to minimize drift during the process. Use proper PPE and handle reference standards with care to avoid contamination or damage. Inspect tools and references for wear or damage before starting; never use compromised standards. Document any safety incidents, and never exceed device specifications during adjustments. A well-defined procedure reduces risk and improves repeatability across technicians and shifts. If you’re calibrating hazardous equipment, consult the manufacturer’s safety manual and seek expert supervision when needed. A disciplined approach minimizes risk and builds confidence in your results.
Tools and reference standards
Before you begin, assemble the essential tools and reference materials needed for a smooth workflow. The core items include: Reference standards (preferably NIST-traceable) for your parameter of interest; calibration weights or other certified references appropriate to the device; a digital multimeter or sensor simulator for electrical or signal-based instruments; dimensional tools like calipers or a micrometer for length measurements; a temperature/humidity monitor to track environmental conditions; calibration software or data loggers for recording results; and a clean workspace with appropriate PPE. Depending on the device, you may also need manufacturer-supplied fixtures or adapters. Always verify the standards’ validity (certificate, lot number, expiry) before use. Proper storage and handling of references are essential to maintain accuracy over time.
Calibration methods by device type
Different instruments require different calibration approaches. Common categories include:
- Dimensional instruments (calipers, micrometers, height gauges): use certified gauge blocks or master pins and perform checks at multiple points across the range to confirm linearity.
- Electrical instruments (voltmeter, current meter): apply known references, perform zero and span adjustments, and validate with a stable input source.
- Temperature sensors: use a calibrated bath or reference thermometer to align readings across a temperature range; adjust offset and slope as needed.
- Pressure and force devices: apply known pressures or forces using dead-weight testers and verify linearity and repeatability.
- Software-driven devices: ensure firmware has up-to-date calibration routines and re-run the calibration after any reset or software changes.
The key is to select the appropriate reference standard and ensure the method covers the device’s full operating range. This section helps you map device type to a practical calibration strategy.
Validating results after calibration
Validation confirms that your calibrations actually improve accuracy. After adjustments, test against multiple reference points and independent measurements to verify that readings stay within defined tolerance bands. Compare results to the instrument’s specification, SOP, or quality manual, and document any deviations, acceptance criteria, and action taken. If results fall outside the allowed range, recheck references, allow stabilization time, and repeat the steps. In some cases, you may need a warm-up period to reach stable readings. Keeping a clear log of validation outcomes supports traceability and future audits.
Documentation and traceability
Traceability is the backbone of reliable calibrations. Create a calibration certificate or log that includes instrument ID, serial number, calibration date, operator, reference standards used (with lot numbers and expiry), environmental conditions, adjustments made, acceptance criteria, results, and next due date. Store certificates digitally and physically in a controlled repository, and use consistent formats for easy retrieval. Maintain versioned SOPs and ensure all calibrations reference the same standards to support audits and customer requirements. Proper documentation makes it possible to verify calibration history, analyze trends, and demonstrate compliance across teams and sites.
Common pitfalls and how to avoid them
Calibration work is detail-intensive. Common mistakes include rushing through steps, using incorrect references, neglecting environmental stabilization, or failing to document results. Other frequent issues are applying excessive force during adjustments, skipping validation checks, or assuming a single calibration point suffices for multi-parameter instruments. To avoid these, follow a structured SOP, use multiple reference points, and validate under stable environmental conditions. Always re-check after any reset, update, or component change. Finally, keep a transparent, searchable log of all calibrations to support audits and future calibrations.
Tools & Materials
- Reference standards (NIST-traceable preferred)(Choose standards appropriate to the device parameter; record lot numbers and expiry dates)
- Calibration weights or certified references(Use the correct mass/force ranges and calibration certificates)
- Digital multimeter or sensor simulator(For electrical or signal-based devices; ensure equipment is within calibration window)
- Calipers, micrometer, gauge blocks(Essential for dimensional devices; select appropriate ranges)
- Temperature/humidity monitor(Record environmental conditions; some calibrations are environment-sensitive)
- Calibration software or data logger(Useful for recording, plotting, and tracking calibration history)
- Screwdrivers (Phillips & flat) and small tools(For mechanical adjustments and fixture setup)
- Clean workspace materials(Lint-free cloths, safe cleaning solutions; avoid contaminating references)
- Personal protective equipment (PPE)(Gloves, safety glasses as appropriate to the device and environment)
Steps
Estimated time: 60-90 minutes
- 1
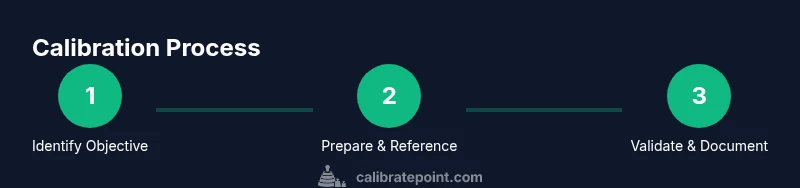
Identify calibration objective
Define the purpose of the calibration, the parameter to be aligned, and the acceptable tolerance. Confirm reference standards and any regulatory requirements. Document the objective so every participant understands the target outcome.
Tip: Clear objectives prevent scope creep and ensure alignment with SOPs. - 2
Prepare device and workspace
Power down and isolate the device; remove any accessories that could affect readings. Set up in a stable environment with controlled temperature and minimal vibrations. Have all tools and references within arm’s reach.
Tip: Stabilize temperature for at least 15 minutes before starting measurements. - 3
Connect reference standards
Place reference standards in the proper location and connect to the device if required. Verify certificates and entry points before starting; ensure readings are traceable to the standard.
Tip: Double-check units and ranges match the device input range. - 4
Make adjustments to align readings
Apply adjustments to align the device output with the reference values across multiple points. Record the adjusted values and any offsets or scale changes made during the process.
Tip: Make small, incremental changes and re-check after each adjustment. - 5
Validate with test measurements
Run independent tests at several references to confirm stability and linearity. Compare results to the acceptance criteria; if necessary, repeat steps to improve consistency.
Tip: Include at least three reference points to verify linearity. - 6
Document results and determine recheck needs
Record final calibrated values, tolerance bands, certificates, and next due date. Note any anomalies and plan the next recheck schedule according to policy.
Tip: Maintain a digital and physical file with every calibration event.
Questions & Answers
What is the difference between calibrating and resetting an instrument?
Calibration adjusts readings to align with a known standard, while a reset restores default settings. In many cases, a reset clears configurations and is followed by a new calibration to ensure accuracy.
Calibration aligns measurements with standards, while a reset restores defaults and may require recalibration.
When should I calibrate versus when should I reset?
Calibrate when readings drift, after component changes, or environmental shifts. Reset when software issues or misconfigurations occur; re-check calibration afterward.
Calibrate for drift or changes, reset for software or configuration problems, then recalibrate.
How often should calibration be performed?
Calibration frequency depends on device usage, criticality, and environmental conditions. Follow your organization’s SOP and manufacturer recommendations to set intervals.
Follow SOPs and manufacturer guidance to set calibration intervals.
Do I need specialized equipment to calibrate every device?
Not every device requires specialized tools, but many do. Use appropriate reference standards and measurement fixtures to ensure accuracy and traceability.
Often you’ll need reference standards and proper fixtures; check the device manual.
What documentation should accompany a calibration?
Record instrument ID, date, operator, references used, environmental conditions, adjustments, results, and the next due date. Include any calibration certificate issued.
Keep records of all references, results, and next due dates.
What if results are outside tolerance after calibration?
Recheck references, ensure environment is stable, and repeat calibration. If still out of range, consider service or replacement and revisit the SOP.
If out of tolerance, recheck and repeat; seek service if needed.
Watch Video
Key Takeaways
- Define clear calibration objectives before starting.
- Use traceable reference standards for accuracy.
- Document every step and maintain audit trails.
- Validate results with multiple reference points.
- Keep SOPs up to date and review calibration intervals.