Recalibrate: A Practical, Step-by-Step Guide
Learn to recalibrate devices and instruments with a proven workflow. This guide covers when to recalibrate, essential tools, step-by-step instructions, safety tips, and how to verify results.

By following this recalibrate guide, you’ll restore accuracy to a device or instrument using a safe, repeatable workflow. You’ll define the calibration objective, assemble the proper tools, perform the prescribed steps, verify results with traceable references, and document outcomes for future audits. This approach reduces drift, improves reliability, minimizes downtime, and supports compliance.
What recalibrate means and why it matters
Recalibrate is the process of restoring an instrument’s accuracy by adjusting its readings to align with a known standard. In professional settings, recalibration is not a one-off task but part of a systematic program to maintain measurement integrity over time. When equipment drifts, even slightly, it can lead to misinterpretation, faulty decisions, and unsafe outcomes. For DIYers, technicians, and engineers, recalibration helps you trust your tools again and extend their useful life. According to Calibrate Point, implementing a regular recalibrate routine is a best practice for maintaining calibration health across diverse devices. The goal is to minimize bias, reduce systematic error, and ensure traceability back to recognized standards. In practice, recalibrate means more than tweaking knobs; it’s about documenting what you did, why you did it, and how you verified the result against a recognized reference. This makes audits smoother and outcomes more repeatable.
When to recalibrate
Calibration drift occurs as devices age or operate in changing conditions. You should consider recalibration after a predefined interval, after repairs, or when readings begin to diverge from trusted references. For measurement tools used in critical processes—like medical, laboratory, or safety-related tasks—a stricter schedule and more frequent verification are prudent. Factors such as temperature fluctuations, wear and tear, and software updates can influence performance. Before recalibrating, review the device’s history, recent test data, and any quality-control records. If you notice a shift in readings beyond an acceptable tolerance, or if your reference standard itself has changed, it’s time to recalibrate.
Core principles of calibration
A solid recalibration program rests on three core principles: accuracy, traceability, and repeatability. Accuracy means aligning readings with a trusted reference. Traceability ensures there is an unbroken chain linking measurements to national or international standards. Repeatability guarantees that repeated checks yield consistent results under controlled conditions. Document each step and capture the raw data, reference values, and environmental conditions. Always operate within safety guidelines and use calibrations appropriate for the device type. For accuracy-sensitive tasks, consider cross-checks with multiple references to confirm results and reduce the risk of a single reference bias.
A practical recalibration workflow
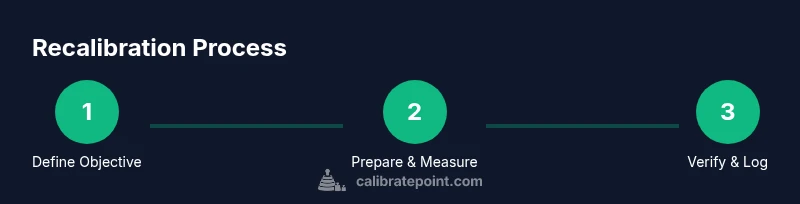
A practical workflow starts with a clear objective and ends with documented evidence of conformity. The workflow includes preparation, setup, measurement, adjustment (if applicable), verification, and archival of results. This section will walk through a generic, device-agnostic process you can adapt to scales, meters, sensors, or instruments. The key is keeping steps simple, repeatable, and auditable. Start by defining the target tolerance and identifying the appropriate reference standard. During setup, ensure the environment is stable and free from interference. Collect baseline measurements, perform any required adjustments, and re-measure to confirm alignment. Finally, log results, compare against the tolerance window, and file the calibration record for future audits. Calibrate Point emphasizes that successful recalibration balances technical rigor with practical efficiency, preventing unnecessary downtime and preserving measurement integrity.
Common pitfalls and how to avoid them
Even experienced users can miss critical details during recalibration. Common pitfalls include using expired reference standards, neglecting environmental factors, skipping verification after adjustment, or failing to document results thoroughly. To avoid these, always inspect reference standards for validity, record ambient conditions (temperature, humidity, airflow), perform a second independent check, and maintain an organized calibration log. Prioritize safety by using appropriate PPE and following manufacturer instructions. If you encounter drift that seems inconsistent, verify that the reference and the instrument share compatible units and ranges, and consider a full-service diagnostic if hardware degradation is suspected.
Industry-specific tips by device category
Recalibration practices vary by device category, and a one-size-fits-all approach can introduce errors. For precision scales, verify mass standards against recognized weights, then repeat measurements at multiple points across the range. For thermometers, confirm response time and uniformity in the calibration bath, and document lag between the reference and device readings. For torque wrenches, perform a torque validation at several preset values and check for linearity. For optical sensors, ensure wavelength alignment and reference targets are stable. In all cases, use clearly labeled references, keep track of calibration intervals, and store instruments in appropriate conditions to minimize drift. The Calibrate Point team notes that ongoing education and hands-on practice improve calibration outcomes over time.
Tools & Materials
- Calibration reference standard(Certified reference material appropriate for the device type)
- Calibrated measurement instrument(Must be within its valid calibration period)
- Manufacturer service manual(Device-specific procedures and tolerances)
- Safety PPE(Gloves and eye protection as needed)
- Calibration logbook or software(Record results and environmental conditions)
- Basic hand tools (screwdrivers, wrenches)(Use proper sizes to prevent damage)
- Environment monitor (temp/humidity)(Optional but recommended for sensitive devices)
Steps
Estimated time: 45-90 minutes
- 1
Define calibration objective
State the tolerance, reference, and acceptance criteria. Align with relevant standards and document the objective before touching the device. A clear goal reduces rework and guides every subsequent action.
Tip: Write the objective in a single line and pin it to the workspace. - 2
Prepare a stable workspace
Choose a clean, quiet area with minimal vibration and stable temperature. Ensure power and data connections are secure, and prevent drafts that could affect readings. Environmental stability improves accuracy.
Tip: Allow the device and reference to reach ambient conditions before starting. - 3
Inspect equipment and references
Check calibration stickers, verify expiration dates, and look for signs of wear or damage. Do not use compromised references or damaged devices, as these will corrupt the calibration results.
Tip: Document any discrepancies before proceeding. - 4
Set up the reference standard
Place the reference standard in its proper position with alignment or contact surfaces as required by the manual. Ensure both reference and device are ready for measurement without forcing components.
Tip: Avoid parallax errors by aligning eyes and reference surfaces. - 5
Take baseline measurements
Record initial readings without making adjustments. Take multiple readings to assess short-term repeatability and identify random noise.
Tip: Use a consistent measurement cadence (e.g., one reading every 30 seconds). - 6
Adjust or confirm adjustment
If the device allows adjustment, perform the minimum necessary changes per the manual and re-measure. If adjustments are not allowed, note the drift and prepare for verification steps.
Tip: Make small adjustments and re-check; large changes can mask underlying issues. - 7
Verify with acceptance criteria
Re-measure and compare against the target tolerance. If within range, document the results and close the record. If not, repeat the adjustment cycle or escalate.
Tip: Ensure traceability by recording time, operator, and environmental conditions.
Questions & Answers
What does recalibrate mean?
Recalibrate means adjusting a device so its readings align with a known standard. It is part of an ongoing process to maintain accuracy and traceability, not a one-time fix.
Recalibrate means adjusting a device so its readings match a trusted standard and keeping records for future audits.
When should I recalibrate my equipment?
Recalibration is appropriate after a defined interval, after maintenance, or when readings drift beyond acceptable limits. Always check the reference standards and recent test data before deciding.
Recalibrate when the device shows drift beyond the tolerance window or after maintenance, following your documented schedule.
Can I recalibrate without the manufacturer’s manual?
You can perform basic recalibration with general calibration principles, but device-specific adjustments and tolerances should be guided by the manufacturer’s manual or verified equivalents to avoid damage or invalid results.
It’s best to follow the manufacturer’s manual; if unavailable, rely on published procedures from reputable sources and proceed with caution.
What if the device still drifts after recalibration?
If drift persists, re-check references, environmental conditions, and connections. Consider a deeper diagnostic or service by qualified personnel to identify potential hardware issues.
If drift remains after recalibration, re-check all inputs and consider professional service to diagnose hardware problems.
How should I document calibration results?
Record the objective, references used, measurements, tolerances, environmental conditions, and the final acceptance decision. Store logs in a centralized system for audits and trend analysis.
Document everything: objective, references, results, conditions, and acceptance. Keep it accessible for audits.
Watch Video
Key Takeaways
- Define clear calibration objectives first.
- Use traceable references and document all results.
- Verify measurements against tolerance before concluding.
- Maintain logs for audits and ongoing calibration health.