How to calibrate vernier caliper: a practical guide
Learn to calibrate vernier caliper with a practical, step-by-step method. This guide covers zeroing, gauge-block checks, error types, documentation, and best practices for accurate, traceable measurements in the workshop.

According to Calibrate Point, you can reliably calibrate vernier caliper by zeroing the instrument, verifying external and internal measurements with gauge blocks, and documenting any deviations. This practical guide walks you through a repeatable procedure, notes temperature and cleanliness considerations, and provides a clear record for traceability. Follow these steps to improve measurement confidence across workshops and labs.
How to calibrate vernier caliper for accurate measurements
Calibrating a vernier caliper is a foundational skill for anyone who relies on precise dimensions. The vernier scale adds a secondary reading to the main scale, enabling fine discrimination of lengths. However, small errors can creep in from zero offsets, misalignment, or temperature effects. In practice, calibrating vernier caliper means verifying that the instrument reads zero when jaws are closed, and confirming that measurements on known standards align with the nominal values. The Calibrate Point team emphasizes a systematic approach: check both external and internal dimensions, consider the depth rod for end-to-end checks, and keep a concise calibration log to ensure repeatability across tasks. In labs and workshops, maintain a clean workspace, stable temperature, and minimal parallax during readings to reduce uncertainty. The keyword calibrate vernier caliper should appear in every practical discussion because consistency in procedure underpins credible results.
The value of standard conditions
Calibration is most reliable when performed under stable environmental conditions. Temperature fluctuations can cause materials to expand or contract, which affects readings. A controlled bench or table, plus clean, dry gauge blocks, helps ensure that measurements reflect instrument accuracy rather than ambient changes. Always use the same reference blocks for consistency, and wipe faces gently with a lint-free cloth before reading. Adhering to a repeatable setup is more important than chasing perfect readings in a single session. Calibrate Point analysis, 2026, underscores the importance of stable setup for valid comparison across sessions.
Understanding common error sources
Zero error is the most frequent issue with vernier calipers. If the jaws do not read exactly zero when fully closed, every measurement inherits that offset. Backlash from worn sliding surfaces, or misalignment between the scale lines and the vernier scale, can also lead to systematic errors. Parallax—the eye not viewing the scale perpendicularly—remains a classic culprit for reading mistakes. By recognizing these errors, you can implement targeted checks to isolate their sources and prevent misreadings during critical work. This awareness helps technicians avoid chasing phantom problems and focus on real drift or offset.
How this guide balances external, internal, and depth measurements
A thorough calibration checks external dimensions (using gauge blocks of known lengths), internal dimensions (with appropriate pins or small gauge blocks), and, when available, depth measurements using the instrument’s depth rod. The vernier caliper’s external jaws primarily measure outer dimensions, while internal jaws handle inside diameters. Depth gauges extend the tool for measurements into grooves or recesses. Correct technique is essential: align the workpiece flat, apply consistent pressure, and read at the correct line where the lines meet. This holistic approach helps ensure the caliper remains trustworthy across a range of tasks.
Documentation and traceability basics
Each calibration should be logged with the date, operator, reference standards used, the measured values, any offsets, and the final conclusion on instrument status. Traceability means you can trace a measurement back to a certified reference, which is critical for QA, audits, and customer confidence. Use a simple template that includes the serial number of the caliper, gauge-block set IDs, ambient temperature, and a pass/fail verdict. In professional settings, a formal calibration report improves asset management and reduces the time needed for external inspections. The Calibrate Point team recommends keeping digital backups of all results for easy retrieval.
Summary of required checks and recommended cadence
While the exact cadence depends on usage, most teams benefit from a quick monthly check for high-use tools, with a full calibration quarterly or after any suspected drift. If the instrument shows any offset or inconsistency beyond your tolerance, document it, then either perform an adjustment (if the caliper model allows) or schedule service. Regular checks cultivate confidence in measurements and help you avoid costly rework.
Tools & Materials
- Vernier caliper (clean, functional)(Verify smooth sliding; include both external and internal jaws; check for a functioning depth rod if present)
- Gauge block set (e.g., 1, 2, 5, 10 mm blocks)(Flat, clean faces; traceable if possible; check a few representative sizes)
- Flat reference surface or granite plate(For repeatable external measurements and zeroing on a stable base)
- Lint-free cloth(Used to wipe blocks and caliper faces without leaving fibers)
- Caliper calibration log template(Record readings, dates, operators, and outcomes)
- Temperature meter or stable room thermometer(Optional but helpful to note ambient temperature during calibration)
- Calibrated reference standard certificate (if available)(Provides traceability for the gauge blocks or standards used)
- Marker or label printer(Label calibration records for easy retrieval)
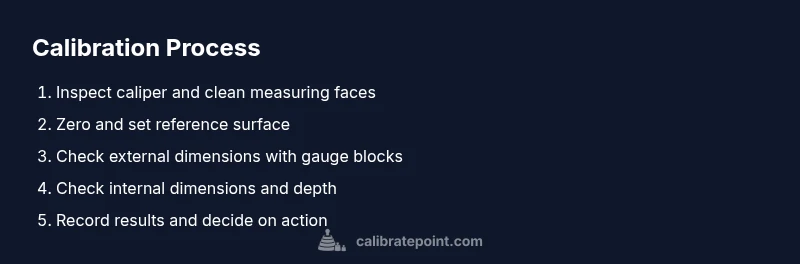
Steps
Estimated time: 25-40 minutes
- 1
Prepare workspace and tool set
Clear a clean, stable work surface. Ensure the caliper is clean and moves freely. Place gauge blocks and reference surfaces within easy reach, and set the ambient temperature to a comfortable range.
Tip: Handle gauge blocks with clean gloves or by edges to avoid oil transfer. - 2
Zero the caliper on a flat reference surface
Close the jaws gently on the reference surface and observe the reading. If your caliper has a zero-adjust feature, calibrate to zero. If not, document the offset for downstream corrections.
Tip: View the scale at eye level to minimize parallax error. - 3
Check external dimensions with gauge blocks
Place a gauge block between the external jaws and read the main scale plus the vernier. Use several block sizes to verify linearity across the range you use most.
Tip: Read from the line where the vernier aligns with the main scale to avoid misreading. - 4
Check internal dimensions and depth
Test internal jaws with small gauge pins or blocks; if your caliper has a depth rod, measure a known depth to confirm depth accuracy.
Tip: Ensure blocks are fully seated and parallel to the measuring faces. - 5
Assess consistency and tolerance
Compare captured values to nominal sizes within your tolerance. If results drift beyond limits, note the deviations and decide on adjustment or service.
Tip: Document every reading for traceability. - 6
Validate with a second standard and finalize
Repeat measurements with another reference or different block size to confirm consistency. Complete the calibration log and file results.
Tip: Store the caliper and standards in a clean, stable environment after calibration.
Questions & Answers
What is a vernier caliper and why should I calibrate it?
A vernier caliper is a precision instrument that combines a main scale with a sliding vernier scale to read measurements more accurately. Regular calibration ensures readings reflect true dimensions by checking zero, alignment, and scale accuracy.
A vernier caliper helps you read measurements more precisely, but it must be checked for zero and alignment to stay accurate.
How often should I calibrate my caliper?
Calibration frequency depends on usage, tolerance requirements, and environment. High-use or critical workflows typically benefit from monthly quick checks and a full calibration quarterly, or after any suspected drift.
For heavy use or critical work, check monthly and calibrate fully every quarter or after drift is suspected.
Can I adjust the caliper at home?
Some calipers have an adjustment mechanism, but many models do not. If adjustment is possible, follow the manufacturer’s instructions. Otherwise, document offset and plan service or replacement.
Some models let you adjust them; many do not. If you can, follow the manual; if not, log the offset and arrange service.
What standards should I use for calibration?
Use traceable gauge blocks or certified references with known lengths. Ensure they are clean, properly stored, and within their own tolerance limits for credible calibration.
Use traceable gauge blocks and keep them clean and properly stored for reliable calibration.
What should I do if measurements vary widely after calibration?
If readings vary beyond tolerance, recheck setup, confirm environmental stability, and verify both external and internal measurements. If the issue persists, schedule maintenance or replace the caliper.
If readings still vary beyond tolerance after checks, re-evaluate setup and environment, then consider service.
Watch Video
Key Takeaways
- Zero the caliper before measurements
- Use gauge blocks for external and internal checks
- Record and trace results for QA
- Document environmental conditions during calibration
- Calibrate vernier caliper regularly for accuracy