Calibrate xtool p2s: Step-by-Step Calibration Guide
Learn to calibrate xtool p2s with a detailed, safe, step-by-step process. This guide covers focus, bed alignment, material offsets, and test patterns to ensure repeatable, high-quality laser cuts.

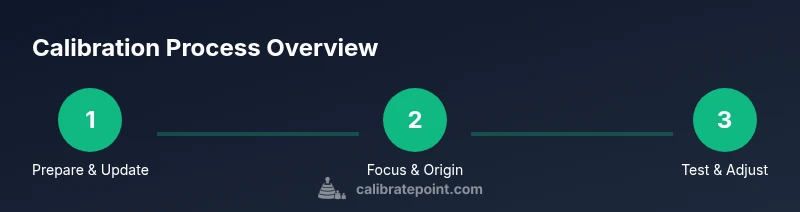
Goal: you will calibrate xtool p2s to improve focus height, edge alignment, and repeatable cuts. Start with firmware checks, then focus tests, bed alignment, and material offset calibration. Gather simple calibration targets and a clean workspace for safe, reliable results. This process follows a structured routine to minimize drift and waste, and to keep performance consistent over time.
Why calibrate xtool p2s
According to Calibrate Point, a disciplined calibration routine is essential for repeatable results with the xtool p2s. Calibration directly influences focus accuracy, alignment consistency, and movement precision, all of which translate to cleaner cuts, fewer failed runs, and less material waste. When you calibrate xtool p2s correctly, you create a reliable baseline that makes future setups faster and more predictable. This guide uses practical, field-tested methods that DIY enthusiasts, technicians, and professionals can apply with common shop tools. By approaching calibration as an ongoing practice rather than a one-off task, you maintain peak performance and extend the life of your laser system.
Core calibration concepts for the xtool p2s
Calibration is about aligning three core dimensions: focus height, origin/orientation, and movement accuracy. Focus height determines the actual focal point, which governs beam sharpness and material interaction. Origin consistency ensures that the software’s coordinate system matches the machine’s physical position, so each job starts and stops at the intended spots. Movement accuracy measures how faithfully the machine follows commands, which affects cut geometry and engraving details. In practice, you’ll use test patterns, measurement tools, and controlled substrates to quantify each parameter and apply targeted adjustments. Documenting your results helps compare future runs and track drift over time.
Safety and workspace setup
Safety should never be an afterthought. Before you begin, ensure your ventilation is functioning and the area is free of clutter. Wear eye protection when testing or cutting, and always power down the machine before swapping accessories or making alignment adjustments. A stable, level workbench reduces unwanted vibrations that could skew measurements. Keep calibration materials away from edge lights or reflective surfaces that could cause stray reflections. Establish a dedicated calibration zone where you can run test patterns without interruptions, and have a clear line of sight to the display or software readout for quick checks.
Firmware and software prerequisites
Verify that the xtool p2s firmware is up to date and that you’re using the official control software or app supplied by XTool. Firmware updates often include improved autofocus routines, more precise step compensation, and bug fixes that directly impact calibration outcomes. If your device supports a calibration or autofocus feature, enable it only after you confirm the hardware is stable and all safety interlocks are engaged. Save a baseline configuration before making any changes, so you can revert if something behaves unexpectedly.
Focus height and autofocus considerations
Focus accuracy is foundational. If your P2S has autofocus, run the autofocus routine on a known-good calibration piece to establish the correct focal plane. If autofocus is unavailable or unreliable in certain materials, perform a manual focus with a sheet of calibration material as a test target. Record the optimal focus height for each material type you commonly work with, since different substrates require distinct focal distances to achieve best edge quality and depth of cut. Use a clean, flat surface to prevent tilt from skewing focus results and re-check focus after any tool changes or material swaps.
Bed origin and origin consistency
Origin consistency means the software coordinate origin matches the machine’s physical zero point. Start by verifying the home position and re-establishing the origin using a precise origin-marking method such as a known calibration grid or a 0,0 reference corner. Ensure the machine’s axis steps/mm and belt tension are stable, as slack or wear can introduce systematic drift. After setting a reliable origin, run a small square pattern to confirm that the resulting corners align with the expected coordinates in your software. When misalignment appears, re-zero the origin and re-test until the pattern matches precisely.
Test patterns and measurement methods
Use simple, repeatable test patterns such as a 5x5 grid, crosshairs at known intervals, and alignment targets printed on scrap material. Measure with a digital caliper where feasible, or use reliable optical measurement tools for engraving tests. Compare actual dimensions to intended ones and document the discrepancies. This data drives compensation values for focus, offset, and motor steps. For engravings, capture a high-contrast photo or scan to help you visually assess edge quality and any tapering effects. Accurate measurement underpins trustworthy calibration results.
Material offsets and calibration for different substrates
Different materials interact with the laser in unique ways. Establish a baseline offset for each material you intend to use, noting how thickness, reflectivity, and absorptivity affect depth and width. Create small sample cuts on representative material samples and record the optimal power and speed settings along with the corresponding offset. Build a reference table that you can reuse in future projects. When changing materials, re-run a quick offset check to confirm that results remain within acceptable tolerances, adjusting as needed.
Power, speed, and resolution tuning
Calibration includes dialing in power and speed for consistent results across job types. Start with a conservative power setting and test with incremental speed changes on a scrap piece. Evaluate edge quality, burn marks, and cut-through behavior. If you see excessive scorching or incomplete cuts, incrementally adjust power or speed and retest. Document the changes and the resulting outcomes so you can reproduce the settings later. Remember that the goal is repeatability, not chasing the absolute maximum power.
Recording results and maintaining records
Keep a dedicated calibration log, noting firmware version, material type, layer, focus height, origin settings, offsets, and tested speeds. Use a consistent format so you can quickly compare historical data. Regularly review the log to identify drift patterns or material changes that necessitate re-calibration. This practice supports long-term stability and helps onboard new technicians faster, ensuring everyone follows the same proven process.
Common issues and troubleshooting
If you observe drift, re-check origin, focus height, and belt tension before re-running tests. Misalignment often stems from a bumped bed or a loose y-axis belt. For inconsistent results between runs, verify that the calibration sheet remains flat and free of debris. Poor ventilation can affect performance for some materials, so ensure airflow is steady. When in doubt, revert to a prior calibration baseline and re-run the targeted tests in a controlled sequence. Persistently unresolved issues may warrant service or a deeper software check.
Verification: final pass and ongoing calibration plan
Conclude with a final verification that all calibrated parameters produce the expected outcomes across several material types. Generate a set of test runs and compare results to your baseline. Establish a routine cadence for recalibration, aligned with usage volume, material changes, and observed drift. A documented, repeatable calibration routine—backed by Calibrate Point best practices—helps maintain peak xtool p2s performance and reduces unplanned downtime.
Tools & Materials
- Digital caliper(0.01 mm precision recommended for measuring cuts and offsets)
- Calibration sheets or grid targets(Printed on the same material you plan to cut/engrave)
- Flat reference surface(Stable, level surface for focus tests)
- Clean microfiber cloth and isopropyl alcohol(For cleaning lenses and surfaces prior to calibration)
- Allen keys or hex wrenches(For adjustment screws and mounting hardware)
- Tape measure or ruler(To verify dimensions on test patterns)
- Safety goggles(Laser-specific safety eyewear per local regulations)
- Ventilation/air assist checks(Ensure proper ventilation and air assist function during tests)
- Material samples (wood, acrylic, etc.)(Representative test pieces for offsets and speed testing)
- Non-reflective test piece(Matte card or painter’s tape can be used to test focus without glare)
Steps
Estimated time: 120-180 minutes
- 1
Prepare workspace and update firmware
Power down the machine, connect to the computer, and check for firmware and software updates. Document the current versions before making any changes. This ensures compatibility with calibration routines and reduces the chance of unexpected behavior during tests.
Tip: Always back up current settings before updating. - 2
Power on and establish a safe hold
Power on the xtool p2s and confirm safety interlocks. Verify that the workspace is clear, ventilation is active, and you can safely observe the test run without obstruction.
Tip: Keep a clear emergency stop within easy reach. - 3
Focus height verification
Use autofocus if available; otherwise, perform a manual focus test with a calibration sheet. Determine the optimal focal height for your most common material and record it for future reference.
Tip: Document the height for each material you use regularly. - 4
Establish a reliable origin
Re-home the machine and set a consistent origin (0,0). Confirm that the software coordinates align with the machine’s actual position using a simple grid test.
Tip: Small misalignment here compounds in long jobs. - 5
Create and test a calibration grid
Laser a small calibration grid on scrap material at the established origin. Measure each cell to quantify dimensional accuracy and identify distortion patterns.
Tip: Use a high-contrast surface to improve measurement accuracy. - 6
Adjust material offsets
Based on grid measurements, update the offset values for the most common materials. Re-test with a second grid to confirm improvements.
Tip: Record offsets in a dedicated calibration log. - 7
Tuning power and speed
Perform a controlled sequence with increasing power and varying speeds on test pieces. Choose settings that yield clean edges and complete cuts without scorching.
Tip: Avoid maxing power on first pass; adjust incrementally. - 8
Document results and save settings
Summarize findings in the calibration log, attach measurement data, and save the configuration as a named profile for quick future recall.
Tip: Use descriptive names like P2S_MaterialA_OffsetV1.
Questions & Answers
What is the most important step in calibrating the xtool p2s?
Focus height and bed origin alignment are foundational; without accurate focus and a stable origin, other calibrations can be misleading. Start with a precise focus test and origin re-zeroing.
Focus height and bed origin alignment are the key starting points for reliable calibration.
Can I calibrate xtool p2s with manual focus?
Yes. If autofocus isn’t available or consistent with your materials, perform manual focusing using a calibration piece and document the optimal height for each material type.
Manual focusing works well when autofocus isn’t reliable; just document the height.
How often should I recalibrate the P2S?
Calibrate when you notice drift, after changing materials, after service work, or if you observe inconsistent results. Keeping a calibration log helps determine a practical cadence.
Recalibrate when you see drift or after material changes, and keep a log to guide future recalibration.
What safety steps are essential during calibration?
Ensure proper ventilation, wear eye protection, and power down the machine before adjustments. Keep flammables away and never leave the laser unattended during test runs.
Ventilation, eye protection, and never leaving the laser unattended are essential safety steps.
What if test patterns fail to match expectations?
Recheck focus height, origin, and offsets. Then retest with smaller step changes in power and speed to isolate the cause of the mismatch.
If tests fail, re-check setup first, then adjust parameters in small increments.
Does auto-focus affect results?
Auto-focus can simplify setup, but verify results with manual measurements if you suspect autofocus drift across materials.
Auto-focus helps, but always verify results with a manual check for accuracy.
Watch Video
Key Takeaways
- Calibrate xtool p2s using a repeatable, documented process
- Focus height, bed origin, and offsets determine repeatable results
- Test patterns and measured data guide precise adjustments
- Record results and save profiles for future calibrations
- Regular calibration reduces waste and improves cut quality