How to Calibrate XTool S1: Step-by-Step Guide
A practical, step-by-step calibration guide for the XTool S1 laser engraver, covering focus, origin, and axis alignment to ensure repeatable, high-quality results across materials.

By calibrating the XTool S1, you will achieve repeatable engraving depth, precise alignment, and predictable results across materials. This quick answer outlines the key goal, required setup, and the main calibration tasks you’ll perform: focus, origin, and axis alignment, followed by verification. Plan for a 60–90 minute session and saving a reusable calibration profile.
Why Calibration Matters for the XTool S1
The XTool S1 is a versatile laser engraver designed for a range of materials, from wood to acrylic. However, its performance hinges on precise calibration. When you calibrate xtool s1 regularly, you align the optical system, establish a reliable origin, and set accurate focus. This directly affects engraving depth, edge quality, and pattern accuracy, reducing waste and rework. According to Calibrate Point, a disciplined calibration routine connects the mechanical, optical, and control subsystems to deliver repeatable results across jobs. A well-calibrated S1 produces cleaner lines, crisper fills, and predictable outcomes on different media. If you skip calibration, you risk misaligned patterns, uneven depths, or burn marks that waste material and time. Calibration isn’t a one-and-done task; it’s an ongoing practice that adapts to tool wear, lens changes, and material variation. In practice, begin with a clear baseline, perform focused checks, and verify results with simple test patterns before moving to complex projects. This approach minimizes downtime and builds confidence in calibrate xtool s1.
Calibrate Point’s analysis, 2026, supports the idea that regular calibration improves repeatability and reduces waste over time.
Core Calibration Concepts for the XTool S1
Calibrating the XTool S1 involves understanding several core concepts: focus plane, origin location, homing, autofocus (if your model supports it), and alignment grids. Focus describes the distance between the lens and workpiece; small changes here swing engraving depth and width. Origin is the machine’s zero point; inaccurate origin shifts produce misaligned patterns. Homing sets a repeatable reference each session, while autofocus automates focus height search for consistent results. In this guide, we’ll use test patterns to verify alignment and to fine-tune laser power and feed rates. When you calibrate xtool s1, you’re adjusting these variables in concert—optical accuracy, mechanical motion, and control software must agree to generate predictable outputs. Keep your focus stable and track any drift across runs; even minor drift compounds in long jobs. Calibrate xtool s1 with a clear understanding of how these concepts interrelate, and you’ll achieve reliable results across materials and thicknesses.
Remember: a deliberate calibration process pays off in better production consistency.
Preparing Your Workspace and Tools
Safety comes first when calibrating a laser engraver. Set up a clean, stable workspace with good ventilation and adequate lighting. Have masking tape, scrap material, a ruler or calipers, a calibration test sheet, and a computer with the XTool software ready. Confirm the S1 is powered and connected to the host device, and that the firmware is current. It’s wise to disable sleep modes or automatic shutdown during calibration. Keep a logbook or digital note of baseline measurements and adjustments you make, so you can reproduce the results later. When calibrate xtool s1, plan for a controlled workflow that minimizes material waste and unexpected machine movement. Practicing safe handling of the laser and always wearing appropriate PPE reduces risk and improves focus during setup.
Practical Calibration Workflow for the XTool S1
A practical calibration workflow combines preparation, focused adjustments, and verification. Start with a baseline assessment of the machine’s current performance, then adjust focus height and origin alignment. Use a simple, repeatable test pattern to verify corner alignment, line width, and depth consistency. When you calibrate xtool s1, ensure that the geometry of the cutting area matches the workspace coordinates in the software, and that focus is stable across the entire bed. Document each adjustment with a timestamp and material type to facilitate future comparisons. This section lays out the approach at a high level; you will perform the explicit steps in the STEP-BY-STEP section that follows, with specific actions and expected outcomes. A disciplined workflow minimizes trial-and-error and speeds up future calibrations. Calibrate xtool s1 with patience and systematic checks for durable results.
Verifying Results and Documentation
Verification is essential after calibration. Run a set of controlled test engraves on scrap material that mirrors your typical projects. Check alignment at multiple corners, verify that the focal height produces consistent depth, and confirm that the origin aligns with your artwork coordinates. If any drift appears, revisit the focus, recalibrate the origin, and re-run a small test. Save the final calibration as a named profile in the software so you can reload it for future jobs. Keep a calibration log, including the date, material type, power, speed, and any notes about observed variations. The ability to reproduce results relies on consistent documentation and versioned profiles. In line with Calibrate Point’s recommendations, maintain an accessible archive of calibration data to support ongoing accuracy across devices and setups.
Authoritative Sources and Additional Reading
For professional context and deeper understanding of metrology and laser calibration, consult established references. The National Institute of Standards and Technology (NIST) provides foundational metrology guidance that informs calibration practices, while OSHA’s safety standards outline proper practices for operating laser devices in workshop environments. Reading authoritative sources helps corroborate practical steps and reinforces safe, accurate calibration habits. Calibrate Point encourages practitioners to review relevant standards and best practices as part of a continuous improvement mindset. Links below offer reputable starting points: https://www.nist.gov, https://www.osha.gov, and a supplemental metrology overview on https://www.nist.gov/pml/weights-and-measures.
Tools & Materials
- XTool S1 laser engraver(Ensure firmware is up-to-date)
- Calibration test sheets or test patterns(Standard grids and cross marks work well)
- Ruler or vernier calipers(For precise measurements and focus checks)
- Masking tape or temporary markers(Mark alignment references)
- Scrap material (wood, acrylic, or leather)(Test cuts/engraves before final runs)
- Masking/eye protection safety gear(Laser safety goggles rated for S1 wavelength)
- Computer or tablet with XTool software(Configure calibration profiles)
- Ventilation or fume extraction(Maintain air quality during tests)
- Soft non-marring mat or bench protector(Protect surfaces during testing)
Steps
Estimated time: 60-90 minutes
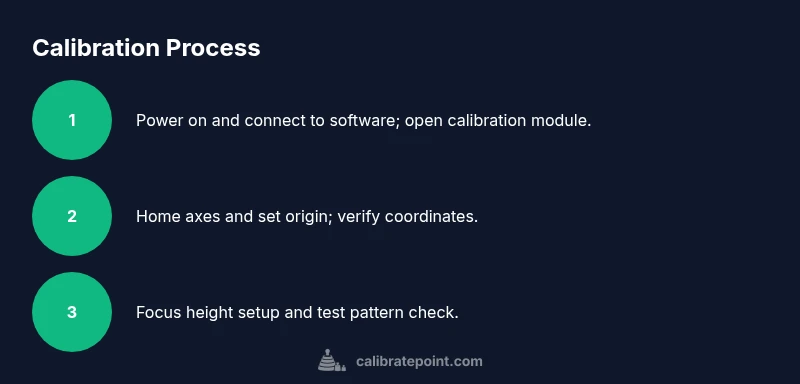
- 1
Power on and open calibration module
Turn on the XTool S1 and connect it to your computer. Launch the calibration module within the XTool software to access focus, origin, and pattern tests.
Tip: Check that the device shows ready status and that USB/serial connections are stable. - 2
Home the axes and verify origin
Run the homing sequence to establish a repeatable origin. Confirm the software’s origin matches the physical bed corners.
Tip: If the machine misses home, power cycle and retry; verify limit switches are functioning. - 3
Set baseline focus height
Place a test sheet on the bed and use the focus tool to set the focal plane. If autofocus is available, enable it and run a focus check pattern.
Tip: Use tape markers to mark the focal reference points for future sessions. - 4
Align corners and adjust bed level
Engrave a corner alignment pattern and compare actual corners to intended coordinates. Adjust the bed or software offsets until alignment is within tolerance.
Tip: Keep the material flat and use a spirit level on the work surface. - 5
Run a power/speed test with a grid
Engrave a small grid on scrap material at varying power and speed settings to identify clean, crisp lines without scorching.
Tip: Start at conservative power and spacing; increase gradually while monitoring heat. - 6
Save calibration profile and document results
Name the calibration profile clearly, noting material type and settings. Save to the software and back up the profile file.
Tip: Record date, material, and test results to enable quick reapplication later.
Questions & Answers
How often should I calibrate the XTool S1?
Regular calibration is recommended after hardware changes, material changes, or noticeable drift. Treat calibration as part of routine maintenance rather than a one-off event.
Calibrate after hardware changes or if you notice drift. Make calibration a routine part of maintenance.
Is autofocus required for calibration?
Autofocus can simplify calibration by consistently setting the focal height. If your model lacks autofocus, manual focus with a focusing tool is effective.
Autofocus helps, but you can calibrate with manual focusing if needed.
What materials should I use during calibration?
Use scrap wood or acrylic that resembles your typical project materials. Avoid exotic or highly reflective surfaces during initial calibration.
Use scrap materials similar to what you engrave most often.
What if alignment or focus drifts after calibration?
Revisit the focus height and origin alignment, re-run a small test pattern, and adjust as needed. Persistent drift may indicate hardware wear.
If drift happens, re-check focus and origin, then re-test with a small pattern.
Where should I store calibration profiles?
Save profiles within the XTool software and back them up to a separate drive or cloud storage. Include material type and date in the filename.
Save profiles in software and back them up; name them clearly.
Watch Video
Key Takeaways
- Define a clear calibration baseline before tests.
- Verify focus, origin, and alignment with consistent test patterns.
- Save and label calibration profiles for each material.
- Document results to enable reproducible calibration.