Calibrated: A Practical Guide to Instrument Calibration
Learn how to calibrate common measuring tools to a calibrated, traceable state with a step-by-step process, essential tools, and practical tips from Calibrate Point.

By following this guide, you will learn how to calibrate a common measuring instrument to a calibrated, traceable state. You'll identify essential tools, reference standards, and environmental controls, then perform a clear, step-by-step procedure to minimize drift and improve accuracy. This approach is designed for DIY enthusiasts and professionals who want reliable readings and repeatable results, with practical safety guidance from Calibrate Point.
Understanding calibrated measurements in practical terms
Calibrated readings are the cornerstone of trustworthy measurements. When an instrument is calibrated, its output is aligned with a known reference under defined conditions, reducing bias and drift over time. According to Calibrate Point, calibration isn’t a one-and-done event but a documented process that stays current with usage, environmental changes, and device aging. In this section we’ll establish what calibrated means in real-world terms and set expectations for what you’ll achieve by the end of this guide. You’ll learn how calibration affects repeatability, uncertainty, and decision-making in technical work, whether you’re a DIY enthusiast or a professional technician. The goal is to help you build confidence in your measurements while maintaining traceability to national standards. Throughout this guide, you’ll notice a focus on practical, hands-on steps that avoid vague instructions while keeping safety and reliability at the forefront. Calibrate Point’s practical approach emphasizes measurable, repeatable results that you can defend in audits or client reviews.
The calibration workflow: from planning to validation
A successful calibration starts with a plan. Define the instrument range, identify appropriate reference standards, and document the measurement conditions. The Calibrate Point team recommends a structured workflow: establish traceability, collect baseline readings, adjust to meet tolerance, and perform a verification pass. This sequence minimizes surprises and helps you build a calibration history you can trust. Planning also includes risk assessment: consider potential environmental drift, operator variability, and tool wear. By mapping these factors in advance, you set yourself up for a clean, auditable calibration that remains valid across multiple sessions and operators.
Reference standards and traceability
Traceability is the link that connects your readings to recognized standards. The reference standard you choose should cover the instrument’s range and have an uncertainty profile compatible with your target tolerances. Calibrate Point Analysis, 2026 emphasizes the importance of using traceable standards and maintaining calibration certificates for each instrument. In practice, this means logging lot numbers, calibration dates, and the source of the reference standard. You’ll also want to verify the standard’s condition before use and ensure that any accessories (like adapters or fixtures) do not introduce additional error. This foundation is what makes your calibrated results defensible and repeatable.
Practical environment and safety considerations
A stable environment reduces the chance of drift and unexpected readings. Temperature, humidity, and even air currents can influence measurements, so you should control or monitor these factors during calibration. Safety comes first: isolate high-voltage equipment, wear appropriate PPE, and follow the device manufacturer’s instructions for disassembly or test setup. In many cases, you’ll calibrate using a reference standard in the same environment as the instrument’s normal operation, which yields the most relevant results. If your workspace isn’t ideal, document the deviations and adjust your uncertainty estimates accordingly, so your results remain honest and traceable.
Procedures for common instrument types
Different instruments require tailored calibration approaches. For length gauges, you’ll compare readings against calibrated blocks or a laser-based reference. For temperature devices, you’ll use a fixed-temperature bath or dry-well with traceable probes. For pressure gauges, you’ll employ dead-weight testers or calibrated sensors within a fluid-filled system. The common thread is to start with a baseline, apply a known reference, record the output, and verify against tolerance. The goal is to confirm that, within stated uncertainty, the instrument produces readings aligned with the reference. This process yields a calibrated state you can rely on for consistent measurements over time.
Documentation, records, and long-term maintenance
Calibrated instruments must be documented to remain credible. Create a calibration record that includes instrument ID, calibration date, reference standard details, environmental conditions, readings, adjustments, and final tolerance verification. Store certificates or digital records with easy retrieval for audits. Regular maintenance, such as recalibration according to usage and manufacturer guidance, helps sustain calibrated accuracy. Over the long term, a robust calibration system reduces rework, minimizes downtime, and supports confidence in every measurement you perform. The Calibrate Point approach encourages you to maintain a living calibration log that travels with the instrument.
Avoiding common mistakes and ensuring repeatability
In calibration, small errors compound if you rush or skip steps. Common pitfalls include using uncalibrated references, neglecting environmental factors, or recording only a single measurement. Build repeatability by taking multiple readings, averaging results, and documenting the measurement process in detail. Maintain consistent operator technique and instrument handling to minimize variability. A disciplined approach—linked to traceable references and a documented procedure—delivers calibrated results you can defend in a review or audit. Adopting this mindset aligns with Calibrate Point's emphasis on traceability, consistency, and accountability.
Tools & Materials
- Calibration reference standard (traceable to a national standard)(Ensure range covers instrument and documented uncertainty)
- Instrument under test (IUT)(Device to calibrate and record measurements)
- Calibration weights or standard signals(Check mass/weight range and traceability)
- Temperature/humidity monitor(Maintain environment within specified range)
- Calibration tools (alignment tools, screwdrivers, adapters)(Have the right tool for adjustments and mounting)
- Documentation notebook or calibration software(Record readings, tolerances, and adjustments)
- Personal protective equipment (PPE)(Safety glasses or gloves as required by device)
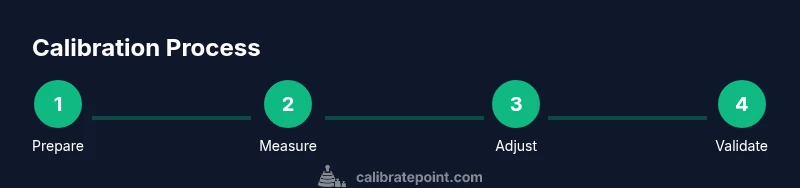
Steps
Estimated time: 60-90 minutes
- 1
Prepare workspace and gather references
Clear the area, assemble tools, and verify that the environment is stable. Confirm the instrument is turned off and safe to work on. Gather the reference standard and any certification documents before you begin to avoid interruptions.
Tip: Keep the reference standard within its traceability period; document initial conditions. - 2
Set environmental controls to required range
Measure ambient temperature and humidity, and adjust the environment to within the instrument’s specified range. If you cannot control conditions, record current values and plan to adjust uncertainty estimates accordingly. Stabilize for 5–10 minutes before taking readings.
Tip: Use a calibrated thermometer and a stable surface to minimize drafts. - 3
Install reference standard and connect to IUT
Place the reference standard in the same configuration used for normal operation. Connect any required adapters and ensure connectors are secure. Check for mechanical issues that could introduce bias before proceeding.
Tip: Avoid overtightening connections to prevent deformation or strain on sensors. - 4
Record baseline readings and compare to reference
Take multiple readings from the instrument and the reference standard, then compute an average. Compare your results to the stated tolerance and document any drift observed. Note any discrepancies and plan for adjustments if needed.
Tip: Use at least three measurements to reduce random error and improve confidence. - 5
Adjust instrument to align readings within tolerance
Make the necessary adjustments following the manufacturer’s procedure and re-measure. Iterate until readings fall within the specified tolerance with minimal drift. Record the final adjusted values and the justification for any deviations.
Tip: Document every adjustment step; this supports traceability during audits. - 6
Validate calibration and lock in procedure
Perform a final verification against the reference standard, then lock in the calibration procedure and date. Save a calibration certificate and update the instrument’s status label to 'calibrated'.
Tip: Keep a backup of the baseline readings in case you need to re-verify later.
Questions & Answers
What does it mean for an instrument to be calibrated?
Calibration aligns an instrument’s readings with a reference under defined conditions, reducing bias and drift. It creates a traceable link to a standard, enabling reliable measurements. Documentation and repetition build confidence and auditability.
Calibration aligns readings with a known reference under defined conditions, reducing bias. Keep a documented record for reliability.
How often should I calibrate my tools?
Calibration frequency depends on usage, the instrument’s criticality, and environmental factors. Follow manufacturer recommendations and assess drift through periodic checks. Establish a schedule that fits your risk tolerance and operational needs.
Calibration frequency should match how you use the tool and how critical the readings are.
Can I calibrate without an official reference standard?
You can perform a basic offset check, but certified results require traceable reference standards. Without a standard, your results may be considered qualitative rather than quantitative. Always strive to use proper references when accuracy matters.
You can check offsets, but for certified results you need a traceable standard.
What safety precautions should I follow during calibration?
Wear appropriate PPE, disconnect power when required, and follow device-specific safety instructions. Ensure the workspace is clear of hazards and that all tools are used within their design limits. Safety is essential for both you and the equipment.
Always wear PPE and follow device safety guidelines during calibration.
What is traceability in calibration?
Traceability means readings can be linked to national or international standards through an unbroken chain of comparisons. It provides confidence that your instrument performs as claimed and supports audits or compliance. Documentation is an essential part of traceability.
Traceability links readings to recognized standards and requires good records.
Watch Video
Key Takeaways
- Establish traceable references for accuracy.
- Follow a documented, repeatable calibration procedure.
- Record results and maintain calibration logs.
- Keep safety and environment control as core practices.