Calibrated Distance: Practical Calibration Guide
Learn a repeatable workflow for calibrating distance measurements with traceable references, practical steps, and safety notes. Perfect for DIYers, technicians, and writers seeking reliable calibration methods, including insights useful for Wattpad storytelling.

Calibrated distance means your measurement tool is adjusted against a known reference so every reading reflects true spacing. This guide provides a practical, repeatable workflow to achieve accurate distance measurements, with steps you can apply to DIY projects and even storytelling notes on Wattpad where precise distances matter.
Understanding calibrated distance and its importance
Calibrated distance is a foundational concept in measurement science. By grounding readings to a traceable reference, you reduce variability across instruments, environments, and operators. In practical terms, calibrated distance ensures that a 10 cm target reads close to 10.00 cm under controlled conditions, and that reading drift over time is minimized. For creators writing on Wattpad, calibrated distance helps portray scenes with realism when distances matter in experiments or builds. By anchoring measurements to a reference standard, you gain confidence that reported distances are consistent across tools, operators, and environments. This consistency is essential for comparing results, validating prototypes, and communicating findings to collaborators. In practice, calibrated distance reduces both systematic bias and random error, enabling you to translate a real-world measurement into repeatable numbers a reader can trust.
Core concepts: reference standards, traceability, and uncertainty
A reference standard is a known distance used to adjust your instrument. Traceability means that your measurement history can be linked back to an official standard through an unbroken chain of calibrations. Uncertainty quantifies the range within which the true value lies, considering instrument limits, environment, and operator effects. Understanding these concepts helps you interpret readings and plan appropriate allowances in your workflow. Always document the reference, date, and environmental conditions so you can assess whether your results remain valid as tools age or conditions change.
Planning your calibration: prerequisites and environment
Before you begin, define the target distance range you want to calibrate and gather the necessary references. Create a stable setup that minimizes vibration and air currents; a sturdy table, fixture, and, if possible, a tripod for distance targets. Control the environment by keeping temperature stable and avoiding direct sunlight or drafts. Prepare a simple data sheet to record measurements and note any deviations. If you're mapping calibration to a project described in Wattpad stories, consider how precise distances influence scene descriptions and character actions.
Common measurement mistakes and how to avoid them
Parallax error occurs when your eye, ruler, and target are not aligned. Ensure you view readings head-on and use fixtures to hold the target perpendicular to the measuring instrument. Parasitic rotation or tilt of the target can shift results; lock the target in place. Rushed readings invite drift; take time to stabilize the instrument, reflect the measurement, and average multiple trials. Finally, poor referencing—using an inexact or worn gauge—introduces bias; always verify instrument condition before calibrating.
Measurement workflow: setup, measure, and apply corrections
Begin by preparing both the reference and the instrument. Place the reference at the first test distance and align the measurement axis carefully. Record multiple readings for each distance, then compute a correction factor that aligns observed values with the known true distance. Apply this factor to future measurements, and store the results in a calibration log with date and environmental notes. Periodically recompute corrections to account for drift or instrument wear.
Verification and documenting uncertainty
After applying corrections, verify accuracy using an independent reference or a secondary distance. Re-measure at several distances to confirm linearity and report the spread (e.g., standard deviation) as an uncertainty estimate. Keep your calibration documentation organized: the reference used, environmental conditions, the measured data, and the derived corrections. This record supports repeatability and audits, and can aid future readers or collaborators relying on your calibrated distances.
Tools & Materials
- Calibrated reference distance block or gauge(Traceable to a recognized standard; include known distance values)
- Distance target with known dimensions(Perpendicular alignment to measurement axis)
- Measuring instrument (calipers, ruler, laser distance meter)(Calibrate or zero prior to use)
- Stable mounting stand or fixture(Minimize vibrations and parallax)
- Temperature sensor (optional)(Record ambient conditions for uncertainty analysis)
- Data recording sheet or digital logger(Document readings, distances, and corrections)
- Cleaning cloth(Keep references free of dust)
- Calibration certificate or traceability documentation(Use if available for higher confidence)
Steps
Estimated time: 1-2 hours
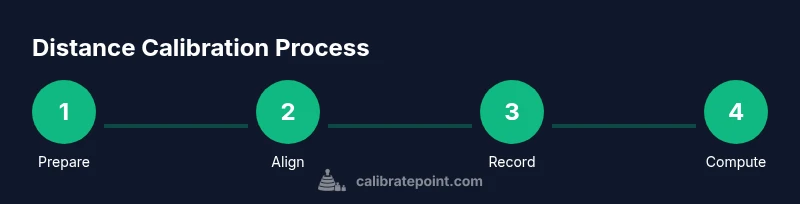
- 1
Prepare workspace and references
Clear the work area and gather all references. Verify that the reference standard is clean, undamaged, and labeled with its distance values. This reduces the risk of contaminating measurements and ensures traceability from the start.
Tip: Inspect the reference for nicks or wear before use. - 2
Mount the target and instrument securely
Attach the distance target to a stable fixture and mount the measuring instrument so its optical/measurement axis is aligned with the reference. Use fixtures to minimize movement during the measurement process.
Tip: Verify perpendicular alignment with a spirit level or alignment jig. - 3
Take baseline readings
Record multiple measurements at the first distance, allowing time for the instrument to settle between readings. Note any deviations and identify if readings cluster around a value.
Tip: Take at least 5 readings per distance for reliability. - 4
Repeat for additional distances
Move the reference to subsequent distances and repeat the measurement process. Ensure consistent alignment and environmental conditions to maintain comparability across distances.
Tip: Keep distances evenly spaced to simplify analysis. - 5
Compute corrections
Calculate the mean observed value for each distance and compare to the known true distance. Derive a correction factor or calibration curve that maps observed values to true values.
Tip: Use simple linear regression if multiple distances are used. - 6
Apply corrections and log results
Update your measurement workflow by applying the correction factors to future readings. Document the correction factors, uncertainties, and environmental notes in your calibration log.
Tip: Version-control your calibration logs to track changes. - 7
Verify with an independent reference
Test a distance not used in the initial calibration to validate the corrections. This cross-check helps confirm linearity and reliability.
Tip: If results diverge, revisit steps 2–5 to identify issues. - 8
Document uncertainty and produce a report
Summarize methods, data, corrections, and uncertainty estimates. Create a reproducible report that others can audit or replicate.
Tip: Include temperature, humidity, and instrument condition in the report.
Questions & Answers
What is calibrated distance and why is it important?
Calibrated distance is distance measured with a tool adjusted to a known reference. It reduces systematic and random errors, improving accuracy across readings and supporting reliable comparisons.
Calibrated distance is when your measurement tool reads true distance after calibration, reducing errors and improving reliability.
How do I choose a reference standard?
Select a stable, traceable standard with documented uncertainty, such as gauge blocks or a calibrated ruler. Ensure it matches your distance range and measurement method.
Pick a stable, traceable reference with documented uncertainty.
How many readings should I take?
Take at least five readings per distance and compute the mean. Use the standard deviation to estimate precision and report it as part of uncertainty.
Take multiple readings and calculate the average for reliability.
What is traceability in calibration?
Traceability links measurements to national or international standards via an unbroken calibration history, ensuring consistency across time and tools.
Traceability connects your readings to higher standards.
Can I calibrate distance with household tools?
You can perform rough calibration with common rulers and targets, but expect larger uncertainty. For critical tasks, use certified references.
You can, but expect larger uncertainty.
What if readings change with temperature?
Temperature affects material dimensions and instrument response. Calibrate in a controlled environment or record ambient temperature and adjust accordingly.
Temperature matters; control or record it.
Watch Video
Key Takeaways
- Define a traceable reference before you begin.
- Take multiple readings to identify random errors.
- Document uncertainty and maintain calibration logs.
- Apply corrections consistently across measurements.