Calibrate Distance: A Practical Guide to Accurate Measurements
Learn practical steps to calibrate distance using common tools, validate readings, and document results for repeatable accuracy in DIY, engineering, and field work.

By the end, you will be able to calibrate distance measurements across common tools, validate accuracy, and document results for repeatable work. This guide covers when to calibrate, what equipment you need, and a practical workflow that yields consistent readings across projects.
Why calibrate distance matters
According to Calibrate Point, distance accuracy is foundational for reliable measurements across home workshops, fieldwork, and professional settings. When you calibrate distance, you reduce systematic biases that creep in from misalignment, sensor drift, parallax, or lens distortion. The result is more consistent readings, easier comparisons across tools, and fewer costly mistakes in fabrication, surveying, or quality control. A robust distance calibration provides a traceable baseline you can rely on whenever you measure a new part, set up a fixture, or verify a process parameter. This isn't a one-off task; it's an ongoing discipline that protects project integrity and safety. The discipline pays off when you calibrate against a known reference, confirm the instrument's response is linear over the working range, and document the change so teammates can reproduce it. Building a repeatable workflow reduces drift over time and gives you a defensible measurement record for audits or quality checks.
Understanding distance measurement basics
Distance measurement is a relationship between a true distance and what a device reports. Different modalities exist—optical, laser, camera-based, or triangulation-based sensors—and each has its own behavior under real-world conditions. The goal remains the same: convert a raw reading into a true distance with a defined uncertainty. Consistency starts with choosing and sticking to units, then maintaining a stable reference frame and clear alignment between the sensor, target, and measurement path. Common error sources include parallax (eye or camera position relative to the measurement line), misalignment or tilt, environmental drift (temperature, lighting, air currents), and sensor nonlinearity at the ends of the range. Understanding these factors helps you select an appropriate calibration approach and establish a repeatable validation routine. Remember: transparency in method and documentation makes the results trustworthy across teams.
Methods to calibrate distance
There isn’t a single universal method; the best approach depends on your instrument, range, and accuracy needs. Practical options include: using a direct ruler or calibrated scale placed at a known distance; employing known-distance targets with precise markings for repeatable references; leveraging laser rangefinders for quick checks where surface reflectivity is favorable; applying photogrammetry or triangulation in imaging setups where geometry is stable; and in smartphone or consumer devices, acknowledging precision limits while pursuing calibration for relative accuracy. Each method requires a consistent setup, a small data log, and a simple correction model—often a linear factor or a distance–reading curve. The aim is to produce a calibration factor that translates raw outputs into true distances across the device’s typical operating range. Calibrate Point analysis shows that regular distance calibration reduces drift across devices and improves alignment in multi-tool workflows, reinforcing the value of routine checks.
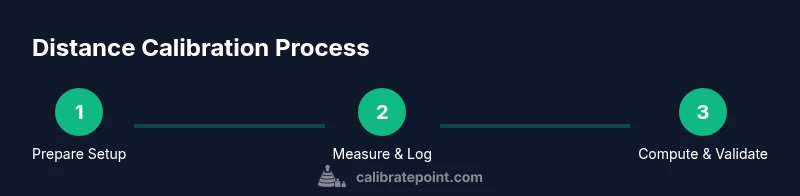
Step-by-step workflow overview
A robust distance calibration follows a repeatable workflow you can apply to any tool. Start by assembling the necessary hardware, securing the environment, and selecting a reference distance that covers your usual measurement span. Next, collect multiple readings from each configuration to minimize random noise and capture any systematic bias. Compute a calibration factor or curve that maps raw outputs to true distances, then apply this adjustment to the instrument’s data pipeline or measurement routine. Validate the correction by testing independent distances not used in the calibration and compare results against the reference. Finally, document every parameter—target type, environmental conditions, instrument settings, and the computed factor—so teammates can reproduce the result. This disciplined approach makes recalibration predictable rather than reactive and helps you maintain traceable accuracy across projects.
Environmental and safety considerations
Environmental conditions can subtly influence distance measurements, especially for optical and imaging-based methods. Temperature shifts, humidity, lighting, and even air currents can alter sensor behavior. Use a stable mount or tripod, ensure targets lie flat and perpendicular to the sensor, and minimize reflections by using a matte surface. If lasers are involved, follow safety guidelines, wear eye protection, and keep bystanders at a safe distance. In field conditions, account for wind, changing light, and uneven terrain that might alter geometry. Always log ambient conditions during calibration to support uncertainty analysis and future rechecks.
Troubleshooting and validation checks
If readings drift after calibration, re-examine alignment and focus, confirm targets are stationary, and verify you used identical geometry for all trials. Parallax errors are common culprits; ensure head position is consistent with the reference line and the target is not tilting. When results vary across targets or distances, consider a two-point or multi-point calibration instead of a single-point fix to reduce end-range bias. Regular revalidation with known distances helps detect gradual sensor drift. If problems persist, revisit the setup and repeat from the beginning, logging every parameter so you can identify where the discrepancy originates.
Tools & Materials
- Measuring tape or calibrated ruler(Long enough to cover the maximum distance tested; accuracy class 0.5 mm or better if possible)
- Laser rangefinder(Prefer models with rated accuracy within ±1–3 mm for close ranges)
- Tripod or stable mount(To minimize hand tremor and maintain alignment)
- Calibration targets (grid or printed scale)(Flat, non-glossy surface; known distances clearly marked)
- Protractor or angular measurement tool(Helps ensure perpendicular alignment)
- Notebook or digital logbook(Record readings, distances, environmental conditions)
- Marker or labels(Label targets and reference points)
- Soft ruler or calipers for tiny offsets(Fine adjustments near end of range)
Steps
Estimated time: 60-120 minutes
- 1
Prepare the calibration setup
Set up the target at the baseline distance and mount the sensor on a stable rig. Verify the measurement path is clear and perpendicular to the target to minimize parallax.
Tip: Use a level to ensure the sensor and target are aligned. - 2
Choose the reference distance
Select a distance that spans your typical measuring range; ensure the target marks are accurate and the environment is controlled.
Tip: Avoid distances near the instrument's minimum or maximum spec. - 3
Capture multiple readings
Take several readings at the reference distance from different angles if applicable; record all raw outputs.
Tip: Take at least 5 trials to average out noise. - 4
Compute the calibration factor
Compute a factor that maps raw readings to true distance, or build a calibration curve across the range.
Tip: Use simple linear regression if appropriate. - 5
Apply the adjustment
Update the instrument’s calibration data or software with the computed factor.
Tip: Keep a changelog and note the test conditions. - 6
Validate with independent distances
Test distances not used in the calibration to verify accuracy improvements.
Tip: If errors exceed tolerance, revisit steps 1-4. - 7
Document and schedule rechecks
Record all values, conditions, and the next maintenance window.
Tip: Set reminders for regular recalibration.
Questions & Answers
Why is distance calibration important?
Distance calibration improves measurement accuracy by aligning instrument readings with a known reference. It reduces drift and ensures consistency across tools and environments.
Distance calibration ensures accuracy and consistency by aligning readings to a known reference.
What tools do I need to calibrate distance?
A stable target, a known reference distance, a measurement instrument (laser rangefinder, ruler, or camera-based device), and a logbook to record results.
You need a stable setup, a reference distance, a measurement tool, and a logbook.
How often should distance calibration be performed?
Frequency depends on usage and environment. Perform after device drops, repairs, or exposure to significant changes, and schedule periodic checks.
Calibrate after major changes or on a regular schedule.
What are common sources of error in distance calibration?
Parallax, misalignment, target setup errors, glare from reflective surfaces, and environmental drift.
Parallax and misalignment are common culprits.
Can I calibrate distance with a smartphone camera?
Yes, for approximate checks. Accuracy depends on lens distortion, calibration model, and image quality.
A phone can work for rough checks, but precision is limited.
How do I validate a distance calibration?
Test with independent distances not used in calibration and compare results to your tolerance.
Test with distances you didn't use to calibrate and verify tolerance.
Watch Video
Key Takeaways
- Define your reference distance precisely
- Record calibration factors and apply consistently
- Validate with independent distances after calibration
- Document conditions to enable reproducibility