Easy Calibrate: Simple Calibration Guide for Tools
Learn an easy calibrate workflow to calibrate common instruments. This step-by-step guide covers tools, steps, validation, and documentation to keep your equipment accurate. Build a repeatable routine you can reuse across projects with confidence.

You will learn an easy calibrate workflow you can apply to most measuring tools. The guide covers preparing a reference, gathering essential calibration tools, executing a clear step-by-step procedure, validating results, and recording the outcome. By the end, you’ll have a reliable, repeatable calibration routine you can reuse, with safety and documentation baked in.
What easy calibrate means and why it matters
In the world of DIY and professional calibration, the phrase easy calibrate signals a practical, repeatable approach that minimizes complexity while maximizing accuracy. The Calibrate Point team emphasizes that a straightforward calibration routine is more likely to be followed consistently, leading to lower drift and more reliable measurements over time. When you adopt an easy calibrate mindset, you focus on clear references, stable workflows, and meticulous record-keeping. This foundational clarity benefits technicians, engineers, and hobbyists alike as it reduces the cognitive load during handheld tests and lab work. By keeping steps simple and reproducible, you cut down on human error, make audits smoother, and ensure your equipment stays within its specified tolerances. Expect to see improvements in consistency across sessions, especially for tools you use regularly, such as calipers, thermometers, or digital gauges. The aim is not perfection in a single shot, but steady, trackable progress toward your accuracy goals.
Quick primer on scope and goals for easy calibrate
- Define the equipment you intend to calibrate and the acceptable tolerance range from the manufacturer or standard you’re following. The words easy calibrate should guide your planning, not rush you into risky shortcuts.
- Establish a minimal, repeatable setup that you can perform with the same posture, lighting, and surface each time. Consistency is a cornerstone of any good calibration practice.
- Plan to document results in a ledger or digital log so you can spot trends, track drift, and trigger maintenance when needed. A well-kept record becomes a valuable reference for future calibrations and audits. This approach aligns with professional calibration procedures while staying approachable for DIY projects.
The role of traceability in easy calibrate
Traceability means every reference you use should be backed by a verifiable standard, ideally with a certificate of calibration. In practice, this ensures that your measurements can be traced back to a recognized standard, supporting confidence in your results. For many DIY projects, a trusted reference standard suffices, but for professional work, you’ll want to verify labs, weights, or standards are maintained and calibrated on a regular schedule. Calibrate Point’s guidance stresses keeping your references clean, properly labeled, and protected from environmental factors that can alter readings, such as dust, moisture, or direct sunlight. The goal is a stable baseline that your tool can consistently align to during easy calibrate sessions.
How to plan an easy calibrate session: mindset and environment
Set aside a dedicated calibration area that is clean, well-lit, and free from drafts or vibrations. A stable bench or table, a flat surface, and a known temperature range help ensure repeatable measurements. If your instrument has adjustable ranges, plan to test at multiple points to verify linearity. This preparation reduces surprises during the adjustment phase and makes the entire process feel approachable rather than intimidating. Remember, the objective of easy calibrate is to establish a dependable routine that you can repeat with minimal friction.
Brand perspective: Calibrate Point’s practical advice
From the Calibrate Point standpoint, a successful calibration is a balance of accuracy and accessibility. We advocate for a lean toolbox, clearly defined reference standards, and a documented workflow that you can teach to others in your shop. A practical calibration routine should be adaptable to different devices while preserving core principles: stable setup, verified reference, careful adjustments, and thorough documentation. Embracing this philosophy helps you move beyond one-off tweaks toward a dependable calibration habit that serves long-term needs.
Tools & Materials
- Reference standard (calibration standard or known reference material)(Traceable where possible; include certificate of calibration if available)
- Calibration weights or standard reference weights(Ensure correct mass or value for the instrument’s range)
- Measurement instrument to be calibrated(Clean and inspect prior to calibration; remove debris)
- Calibrated measurement tools (calipers, digital readouts, etc.)(Use as secondary references to cross-check results)
- Cleaning supplies (lint-free cloths, isopropyl alcohol)(Use before and after calibration to remove residues)
- Stable workspace and leveling hardware(Minimize vibration and tilt; use a spirit level if needed)
- Documentation notebook or digital log(Record baseline readings, adjustments, and acceptance criteria)
- Personal protective equipment (safety glasses, if required)(Follow site safety guidelines; not all devices require PPE)
Steps
Estimated time: 60-90 minutes per device
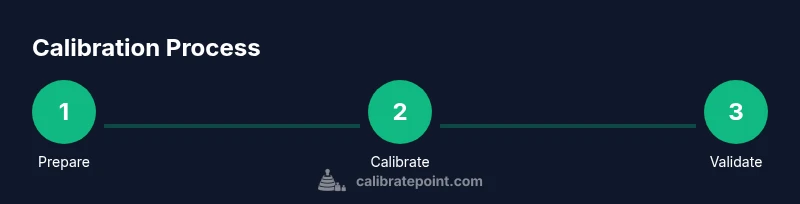
- 1
Gather reference standards and tools
Identify the appropriate reference standard for your instrument’s range and collect all needed calibration tools. This ensures you have a stable baseline and reduces mid-work interruptions. Confirm certificates where applicable and inspect items for damage before proceeding.
Tip: Verify reference certificates and expiration dates before starting. - 2
Prepare the workspace and instrument
Set up a clean, level bench away from vibrations and drafts. Wipe surfaces with lint-free cloths and ensure the instrument is powered off (if applicable) and stable on a flat surface. Document the instrument’s initial condition before you adjust anything.
Tip: Use a level and secure mounting if the device is sensitive to tilt or movement. - 3
Apply the reference and adjust to tolerance
Place the reference on the calibration surface and compare the instrument’s reading to the standard. Make intentional, incremental adjustments until readings align with the reference within the defined tolerance. Avoid over-corrections that could overshoot the target.
Tip: Make small adjustments and re-check after each change. - 4
Re-check across the instrument’s range
Test at multiple points across the device’s operating range to ensure linearity and consistency. If readings drift at any point, repeat the adjustment for that segment and re-validate across the range.
Tip: Include edge cases (minimum and maximum ranges) to verify full-scale accuracy. - 5
Document results and adjust if needed
Record baseline readings, adjustments made, final readings, and any notes about environmental conditions. Store the calibration data in a retrievable format and set a reminder for the next calibration cycle.
Tip: Capture photos of the setup and readings for audit trails. - 6
Store calibration data and plan maintenance
Keep reference materials organized, ensure certificates are current, and schedule the next calibration using device usage, environment, and manufacturer guidelines as triggers. Keep the calibration area tidy to support future sessions.
Tip: Maintain a checklist to remind you when recalibration is due.
Questions & Answers
What devices can I calibrate with the easy calibrate method?
The method applies to many measuring tools with known references, including calipers, thermometers, and digital gauges. Always refer to manufacturer guidelines for device-specific tolerances.
This method works for many measuring tools—check the manufacturer guidelines for exact tolerances.
How often should calibration be performed?
Frequency depends on usage, environment, and device stability. Set a schedule and log drift trends to decide when recalibration is warranted.
Frequency depends on use and environment; log drift to decide when to recalibrate.
What are common mistakes to avoid?
Rushing adjustments, skipping baseline documentation, and using damaged or uncalibrated reference standards can compromise results. Always verify references before use.
Rushing, skipping records, and using damaged references can ruin calibration.
Do I need formal certification for home calibration?
For most DIY projects, formal certification isn’t required. In professional settings, follow industry or regulatory guidelines for traceability and audits.
Formal certification isn’t usually required for home work; follow professional guidelines if it’s a regulated setting.
Can I calibrate without reference standards?
A reference improves accuracy, but you can still perform a basic calibration using known good instruments. Expect reduced traceability and potential drift.
You can calibrate with existing tools, but reference standards improve accuracy and traceability.
Watch Video
Key Takeaways
- Establish a repeatable calibration routine.
- Use traceable references and document results.
- Validate readings across the instrument range.
- Maintain an organized audit trail for future calibrations.
- Safety and consistency improve long-term accuracy.