Hoverboard Calibration: A Practical How-To Guide
Learn how to hoverboard calibrate safely and effectively with a practical, model-agnostic guide. Prep, methods, and tips for reliable balance and performance.

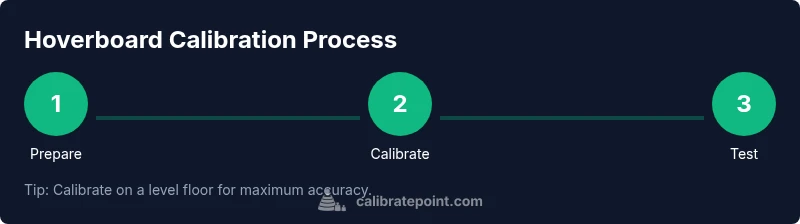
Goal: hoverboard calibrate to restore accurate self-balancing and wheel alignment. On a flat surface, with the board powered on per model, proceed through safe, general steps: place on flat floor, power up, enter calibration mode if available, perform sensor alignment, then test in a controlled glide. This guide covers common methods suitable for most models; consult your manual for model-specific steps.
Understanding hoverboard calibration basics\n\nCalibration aligns the hoverboard's internal sensors (gyroscopes and accelerometers) with the wheel modules so that the self-balancing system responds correctly to rider input. Most consumer hoverboards rely on tilt and speed sensors to maintain stability. When these sensors drift or misread, the board may drift, wobble, or feel sluggish. Regular calibration helps restore expected performance and prolongs component life. Always refer to your model's manual for any model-specific quirks and cautions. Calibrate on a sturdy, level surface to prevent skewed readings caused by uneven floors, slopes, or carpet fibers. On a level surface, power the board on and allow the system to initialize before proceeding.
When and why you should calibrate\n\nCalibration is not a replacement for mechanical maintenance, but it is a routine check that can address drift from temperature changes, vibration, or after a crash. If you notice the board pulls to one side, vibrates at speed, or requires extra input to stay upright, calibration is a good first step. Some models require calibration after firmware updates. The key is to perform calibration after environmental changes or after replacing wheels or sensors.
Safety and prep steps before calibration\n\nBefore you begin, ensure you wear basic protective gear and clear the area of bystanders or pets. Use a clean, dry, level surface and a charged battery. Verify the floor is flat and stable; avoid carpet, loose rugs, or slopes. Have the owner manual handy for model-specific steps. Keep liquids away from the board and do not attempt calibration if it’s hot or damaged. A calm, distraction-free space will yield the most accurate results.
Manual calibration vs. automatic/app-based calibration\n\nMany hoverboards offer two paths: manual calibration through button sequences and sensor toggles, or automatic/app-based calibration guided by a smartphone interface. Manual calibration gives direct control and is common on older or budget models. App-based calibration can simplify the process, showing progress and confirming success. Regardless of method, the goal is the same: align sensors with the ride dynamics and reduce drift.
Step-by-step workflow overview for general models\n\nIn most models you’ll follow a four-to-six-step workflow: prepare the board, enter calibration mode, run the calibration routine, and verify with a light ride. Some models require a factory reset if calibration continues to fail. Always perform calibration on a level surface and avoid moving the board during the process to prevent skewed results. The steps below outline a typical flow, not model-specific instructions.
Troubleshooting common issues after calibration\n\nIf drift persists, recheck the level surface, battery status, and that there are no mechanical faults such as loose wheels or damaged pads. Temperature can affect sensor readings, so consider repeating calibration after a cool-down period if you notice inconsistent results. If the board still misbehaves, consult customer support or refer to the manufacturer’s troubleshooting guide.
Maintenance and long-term care for hoverboard sensors\n\nRegular cleaning of sensor housings and ensuring the casings aren’t cracked helps maintain calibration accuracy. Avoid exposing the device to moisture or extreme temperatures. Periodically verify calibration after rough use or after riding on uneven terrain, and document changes to track when to recalibrate next. Keeping a simple maintenance log can extend sensor life and ride quality.
Tools & Materials
- Flat, level calibration surface(A hard, smooth floor; use a spirit level to confirm levelness before starting.)
- Fully charged hoverboard battery(Ensure battery ≥50% to avoid mid-calibration shutdown.)
- Owner’s manual for your hoverboard model(Helpful for model-specific calibration steps.)
- Soft cloth or microfiber towel(Wipe sensors and casings to remove dust.)
- Small screwdriver or tool kit (if applicable)(Only if your model requires tools to access calibration controls.)
Steps
Estimated time: 15-25 minutes
- 1
Place hoverboard on a level surface and power on
Position the board on a flat, hard surface and power it up. Let the system initialize fully before attempting calibration to avoid misreads. Ensure there are no wheels touching the floor and that the surface is stable.
Tip: Check for gentle, wobble-free stability before proceeding. - 2
Access calibration mode
Open the control panel or app and locate the Calibration option. If your model uses onboard buttons, follow the indicated button sequence to reach calibration mode. If no calibration mode is available, skip to the manual approach described in your manual.
Tip: If unsure, consult the manual to find the exact path to calibration mode. - 3
Start calibration and minimize movement
Initiate the calibration routine and keep the board as still as possible. Movement during calibration can introduce errors and require a re-do. Allow the board to complete the process until a completion indicator appears.
Tip: Reduce ambient vibrations; place the board on a stable tray or mat if needed. - 4
Complete calibration and verify indicators
Watch for a success indicator (LED pattern or on-screen message). If an error appears, reset the process and try again. Do not ride until you see a clear completion signal.
Tip: If the indicator is ambiguous, repeat the calibration once more. - 5
Test balance with a slow, controlled ride
Carefully step onto the board and move slowly to test stability. The hoverboard should maintain upright balance with minimal rider input. If it drifts, consider repeating the calibration or performing a factory reset per model guidance.
Tip: Start at very low speeds in a wide, open area. - 6
Document results and plan follow-up
Record the calibration date, model, and any notes about performance. If drift returns after use, schedule a re-calibration and check for mechanical issues.
Tip: Keep a maintenance log to simplify future calibrations.
Questions & Answers
Why should I calibrate my hoverboard?
Calibration addresses drift in sensors to restore accurate balance and responsiveness. It helps prevent wobble and improves control during riding.
Calibration fixes drift, restoring balance and responsive steering.
How often should I calibrate a hoverboard?
Calibrate after firmware updates, after hard knocks, or when you notice drift or reduced stability.
Do it after updates or if it starts to drift.
What if calibration doesn’t fix the drift?
Check for mechanical issues, battery health, or damaged sensors. If unresolved, contact manufacturer support.
If calibration doesn’t fix it, check hardware or reach out for support.
Is it safe to calibrate at home?
Yes, as long as you follow safety steps and calibrate on a stable surface away from hazards.
Yes—just follow safety steps and use a stable space.
Do I always need an app to calibrate?
Many models use onboard controls; some rely on an app. Check your manual to confirm the method.
Some hoverboards use the app; others don’t. Check the manual.
What are the signs of a successful calibration?
Indicators (LED signal or app confirmation) and a stable, balanced ride indicate success.
Look for a confirmation signal and a stable test ride.
Watch Video
Key Takeaways
- Calibrate on a level surface for accuracy
- Follow model-specific steps from the manual
- Test balance with a slow, controlled ride
- Repeat calibration after firmware updates or rough use