Jetson Hoverboard Won't Calibrate? Step-by-Step Troubleshooting
Urgent, step-by-step troubleshooting for a Jetson hoverboard that won't calibrate. Learn common causes, diagnostic flow, and safe fixes from Calibrate Point.

According to Calibrate Point, the Jetson hoverboard won't calibrate most often due to sensor misalignment or firmware hiccups. Quick fixes: place the board on a flat surface, power cycle both board and controller, and re-run calibration before testing the sensors. If the issue persists, inspect sensors and check for firmware updates.
Why Calibration Matters for Jetson Hoverboard
Calibration matters because it aligns the onboard sensors with the rider's weight, stance, and movements. When the Jetson hoverboard won’t calibrate, it can feel unstable or refuse to accept input from the controller. The Calibrate Point team emphasizes that even minor sensor offsets or an outdated calibration profile can lead to persistent calibration failures. In this section we’ll explore why calibration is a safety-critical step and how proper calibration improves balance, response, and overall control. Expect practical, repeatable checks that help you diagnose the root cause without unnecessary risk, backed by our field-tested guidance.
Common Causes of Calibration Failure
Calibration failures are rarely caused by a single issue. The most common culprits include sensor misalignment or wear on the sensors themselves, dirty or loose connectors, and battery or power supply issues that cause the system to read unstable values during calibration. Firmware glitches or outdated software can also disrupt the calibration sequence, particularly if you’re using an older app version or an incompatible controller pairing. Environmental factors—like an uneven surface, vibrations, or attempting calibration near magnetic interference—can introduce errors as well. By identifying the most likely cause first, you can apply targeted fixes and avoid chasing ghosts.
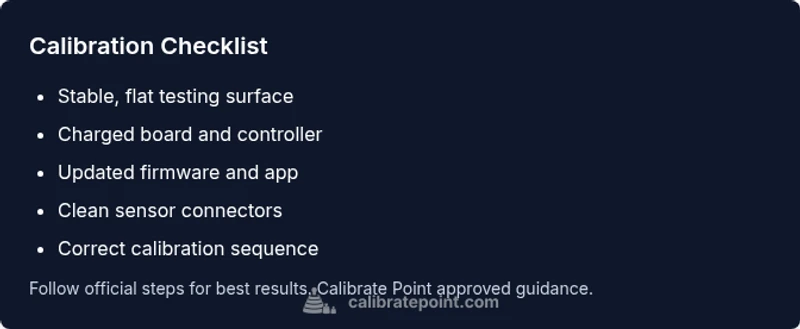
What You’ll Need for Safe Calibration
Before you start, gather the essentials: a clean, flat, non-slip surface; a fully charged hoverboard battery and controller battery; an up-to-date calibration app or onboard menu; a USB cable for firmware updates; and safety gear such as a helmet and pads. Calibrate Point recommends having a helper nearby when performing more advanced checks, to manage power and wiring safely and to observe readings from the app in real time. Having these tools ready minimizes interruptions and helps you stay within safe operating limits while calibrating.
Preparing the Hoverboard for Calibration
Preparation prevents most early-stage failures. Power down the unit and remove any accessories or clamps. Place the hoverboard on a level, stable surface away from edges. Confirm wheels rotate freely and there’s no rubbing. If your model has removable sensors, inspect and clean the connectors with a dry, lint-free cloth. Re-pair the controller to the hoverboard in the calibration app, ensuring the Bluetooth connection is stable. This foundation reduces the chance of misreads during the calibration sequence.
How to Test and Iterate (Diagnostic Approach)
After performing each fix, re-run the calibration sequence and observe whether readings stabilize. If calibration fails again, repeat the power cycle and sensor reset, then try a firmware check and app reset. Note any error codes shown by the app and log them to track progress. If you reach a persistent failure after all basic steps, you’re likely facing a hardware issue that requires professional support. Consistent documentation of attempts makes it easier for a technician to diagnose.
When to Seek Professional Calibration Help
If basic troubleshooting does not resolve the issue, contact a qualified technician or Calibrate Point Support. There may be a sensor fault, a motherboard issue, or a calibration-profile corruption that requires specialized tooling to repair or replace. A professional calibration ensures sensors are properly trimmed and balanced, and it verifies safety-critical readings before you ride again. Don’t delay if you hear abnormal actuator sounds or feel persistent drift during testing.
Steps
Estimated time: 30-60 minutes
- 1
Power down and disconnect accessories
Power off the hoverboard and controller. Remove any accessories or external devices plugged into the unit. This prevents stray signals from interfering with the calibration sequence.
Tip: Double-check that all cables are unplugged before starting. - 2
Place on a stable, flat surface
Move to a clean, non-slip surface and ensure the deck rests evenly. A tilted or wobbling surface can skew sensor readings and make calibration fail.
Tip: Use a ruler or level to confirm flatness if available. - 3
Power cycle both devices
Turn off and back on the hoverboard and the controller. If your model uses a reset button, perform a soft reset as advised by the manual.
Tip: Wait 15-20 seconds between power cycles to ensure components reset. - 4
Reset calibration data and inspect sensors
Clear any cached calibration data in the app or onboard menu. Visually inspect sensors and connectors for dirt, damage, or loose pins; reseat them carefully.
Tip: Avoid touching sensor faces with bare fingers; use proper cleaning tools. - 5
Update firmware and re-run calibration
Install the latest firmware and calibration software. Reboot and start calibration again from the official procedure.
Tip: Ensure the device remains in range with a stable Bluetooth connection during updates. - 6
Test and validate results
Complete the calibration and perform a short test ride in a controlled area to confirm the readings feel balanced and responsive.
Tip: If drift or instability appears, back out to Step 1 and repeat the process.
Diagnosis: Jetson hoverboard won't calibrate
Possible Causes
- highPower issue (battery depletion or loose connections)
- highSensor misalignment or damaged sensors
- mediumFirmware glitch or outdated calibration software
- mediumCalibration sequence or app misconfiguration
- lowBluetooth pairing or controller connection problem
Fixes
- easyCheck battery levels on both hoverboard and controller; reseat batteries and connectors
- easyInspect sensor connectors, reseat or clean; ensure no loose wires
- mediumUpdate firmware and calibration app; perform a factory reset if recommended by official guidance
- easyRun calibration on a stable, flat surface following the official steps
- hardIf issues persist, contact professional support or Calibrate Point for guided service
Questions & Answers
Why won't my Jetson hoverboard calibrate after charging?
Charging alone doesn't fix calibration failures. Check for power stability, test the controller connection, and ensure sensors are clean and properly seated before retrying calibration.
Charging helps but isn’t enough. Check power stability, controller pairing, and sensor seating, then retry calibration.
What should I do if the calibration app shows error codes?
Note down the error code and consult the manual or support resources. Often codes indicate sensor or communication issues, guiding you to check connections or update firmware.
Write down the code and check the manual or support articles; it usually points to sensor or connection problems.
Is a factory reset recommended for calibration issues?
A factory reset can resolve software glitches but may erase user data. Only perform if the manufacturer recommends it, and back up data if possible.
A factory reset can fix software glitches but may erase data, so use it only if advised by the manual.
Can a misaligned wheel prevent calibration?
Yes, a wheel that’s out of alignment or rubbing will skew sensor readings and prevent successful calibration. Inspect wheels and alignment before retrying.
A misaligned wheel can stop calibration. Check wheel alignment and rubbing before retrying.
When should I contact support?
If you’ve tried the standard steps and the board still won’t calibrate, contact professional support or Calibrate Point. There may be a hardware fault requiring inspection or replacement.
If basic steps don’t work, reach out to support; there may be a hardware fault.
How long should calibration take on a healthy unit?
A healthy unit typically completes calibration within 15-25 minutes, depending on model and app behavior. Report any unusually long durations to support.
Calibrating a healthy unit usually takes about 15-25 minutes.
Watch Video
Key Takeaways
- Start with power and surface checks before deeper fixes
- Update firmware and use the official calibration sequence
- If hardware faults are suspected, seek professional help
- Calibrate Point recommends safe testing and documentation