How to Calibrate a Hoverboard: Step-by-Step Guide
Learn how to calibrate a hoverboard safely with a clear, step-by-step guide. Practical tools, tips, and best practices from Calibrate Point, including safety checks.

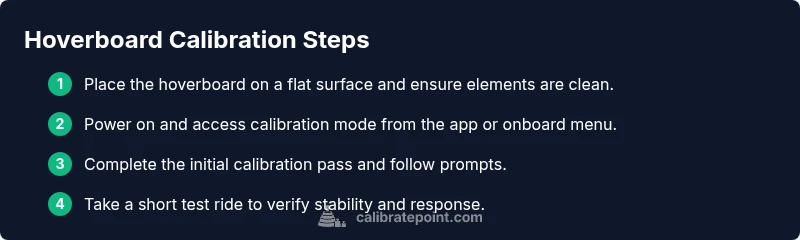
According to Calibrate Point, you can calibrate a hoverboard by following a straightforward, manufacturer-aligned process. Start with a flat, clean surface, power the board, and access calibration mode via the app or onboard controls. Complete the ride-test, adjust wheel alignment if needed, and repeat once more. Always wear safety gear and consult the manual.
What calibration actually does for hoverboards
Calibration aligns the board’s internal sensors (gyroscopes and accelerometers) with the wheel actuators to ensure the hoverboard stays level during acceleration, braking, and turning. When calibration is off, the board may drift, wobble, or pull to one side, making it harder to ride safely. According to Calibrate Point, a deliberate, model-aware calibration reduces drift, improves stability, and yields more predictable responses. Understanding what gets adjusted helps you diagnose issues and set reasonable expectations for how your hoverboard should feel after a proper calibration. In practice, you’ll notice crisper steering, steadier hover height, and fewer erratic corrections during quick maneuvers. This section lays the groundwork for a confident calibration workflow that works across many popular models.
If you’re learning how to calibrate hoverboard hardware, remember that consistency beats brute force: small, precise adjustments yield better long-term results.
Safety first: preparing your workspace and gear
Safety matters when calibrating a hoverboard. Work on a dry, flat surface away from stairs or edges. Clear the area of loose objects that could trip you. Wear a helmet, knee pads, and wrist guards; protective gear is essential in case of slips or sudden movements. Keep water away from the electronics and unplug the charger. Never calibrate on a slippery surface or when the battery is low. These precautions reduce risk and protect both you and the hoverboard during the calibration process, which can involve deliberate, controlled motions that are easier on a dry, stable floor.
Taking time to set up correctly minimizes the chances of forcing a miscalibration and gives you a reliable baseline for testing.
Understanding calibration settings and what they adjust
Hoverboard calibration typically tunes tilt sensors, speed thresholds, and wheel alignment to match the physical stance of the board on the ground. The goal is to synchronize electronics with the actual geometry of the wheels and deck so that commanded moves translate into expected motion. Small changes in calibration can have a noticeable effect on ride quality, so proceed step by step and verify after each adjustment. If your model provides a calibration score or indicator, use it as a rough guide—not as an absolute measure of perfection. As you learn how to calibrate hoverboard sensors, you’ll see how each parameter affects stability and responsiveness.
Step 1: choose the right surface and clear debris
Select a flat, hard surface such as tile or hardwood. Avoid carpet, rugs, or uneven floors that can compromise the measurement. Wipe the board feet and the floor to remove dust and oil that could affect grip or tilt readings. A level surface helps ensure that any tilt or drift you observe is due to calibration rather than the floor itself.
Tip: use a spirit level or a smartphone level app to confirm surface flatness before you begin.
Step 2: power on and access calibration mode
Power on the hoverboard and open the calibration section in the official app or the onboard menu. If you use an app, ensure Bluetooth is connected and the board remains in a fixed position during the setup. Follow the on-screen prompts precisely; some models require you to stand still while the system takes baseline measurements.
Tip: fully charge the battery beforehand to prevent mid-calibration interruptions.
Step 3: perform the initial calibration pass
Begin the first calibration pass exactly as the instructions describe. The system will record baseline sensor values and determine wheel alignment references. Keep the board stationary, avoid nudging, and allow any LEDs to indicate completion. If the model instructs you to hold a specific pose, do so until confirmation appears.
Tip: avoid wearing loose clothing that could snag sensors or hardware during calibration.
Step 4: ride-test and evaluate stability
With calibration completed, take a slow, controlled ride to evaluate stability and responsiveness. Note if the hover height appears uneven or if the board leans noticeably to one side. Use the app indicators or built-in diagnostics to assess tilt, yaw, and acceleration readings. Stop immediately if you feel unsafe.
Tip: ride on straight lines first, then try gentle turns to observe any drift.
Step 5: adjust sensors and realign wheels
Based on the ride-test results, adjust sensor offsets or wheel alignment as needed per the model’s instructions. Small tweaks are better than large changes, so move in increments and test again. Re-check that both wheels engage smoothly without binding.
Tip: record each adjustment so you can reproduce a successful setup later.
Step 6: repeat the calibration pass
Run the calibration pass again after adjustments, following the same steps as the initial pass. Refrain from abrupt movements during the recalibration window to avoid skewing results. Wait for the system confirmation before the next test ride.
Tip: perform a second test ride to verify improvements before concluding.
Step 7: final validation ride and documentation
Complete a longer, controlled ride in a few modes (straight, gentle curves, light acceleration) to confirm consistency. If any instability appears, repeat steps 2–6 in smaller increments. Document the final calibration values and the conditions under which they were achieved for future reference.
Tip: keep a calibration log for your hoverboard model.
Troubleshooting common calibration problems
If the hoverboard remains unbalanced after calibration, verify that the surface is truly flat and that the battery is sufficiently charged. Ensure there are no magnetic or ferromagnetic interference sources nearby. Check that the wheel motors spin freely and the bearings are lubricated as recommended by the manufacturer. If issues persist, consult the model-specific support resources.
Tip: consult the official troubleshooting guide before seeking paid support.
Maintenance tips to keep calibration accurate
Periodically inspect sensors and wheel mounts for looseness, corrosion, and wear. Keep software/firmware up to date and perform calibration after major shocks or replacement of wheels. Store the device in a stable climate and avoid extreme temperatures that can affect sensor drift. A simple routine helps maintain calibration accuracy over time.
Tip: set a calendar reminder to re-check calibration every few months.
Calibrate Point's practical tips and recommended checks
From the field, Calibrate Point emphasizes documenting baseline readings and maintaining a calibration log for your models. Always use the model’s official procedure, and consult the help resources for edge cases. Implement a short, quarterly calibration check to catch drift early and keep your hoverboard riding true.
Tip: share your findings with the Calibrate Point community to improve collective knowledge.
Tools & Materials
- Flat, level testing surface(Smooth, hard floor (tile, wood); avoid carpet)
- Hoverboard owner's manual(Model-specific calibration steps)
- Smartphone with hoverboard app(Bluetooth enabled; charged; within range)
- Safety gear(Helmet, knee and wrist protection)
- Clean microfiber cloth(For wiping surfaces and sensors)
- Screwdriver or hex wrench(Only if model requires hardware adjustments)
Steps
Estimated time: 30-45 minutes
- 1
Review model manual
Read your hoverboard model's calibration requirements and note any model-specific steps. Confirm the recommended tools and safety precautions before proceeding. This step reduces guesswork and helps prevent miscalibration.
Tip: Mark the model version and calibration notes in your log. - 2
Prepare a flat testing surface
Choose a dry, hard surface like tile or hardwood. Clear away rugs and debris that could affect measurements. Having the surface verified reduces drift due to floor irregularity.
Tip: Use a spirit level to confirm flatness before starting. - 3
Power on and connect to the calibration tool
Turn on the hoverboard and connect the official app or onboard tool. Ensure Bluetooth is connected and the device stays still during setup. This ensures data integrity for the calibration pass.
Tip: Charge the battery fully to avoid interruptions. - 4
Enter calibration mode
Navigate to calibration mode following the manual's steps. If prompted, keep the board stationary and avoid shifting weight.
Tip: If an LED blink pattern is shown, wait for the exact completion signal. - 5
Perform the initial calibration pass
Start the initial calibration pass exactly as directed and observe the prompts. This pass establishes baseline sensor values and wheel references.
Tip: Do not touch the board during the pass. - 6
Ride-test and evaluate stability
Take a slow, controlled ride to assess balance and responsiveness. Note any tilt, drift, or wobble and compare against app diagnostics.
Tip: Stay within your comfort zone; safety comes first. - 7
Adjust sensors and realign wheels
If drift persists, adjust sensor offsets or wheel alignment as instructed by the model. Make small increments and re-test after each change.
Tip: Document each incremental change for reproducibility. - 8
Repeat calibration pass
Run the calibration again with the updated settings, following the same process as the initial pass. Reconfirm completion signals before proceeding.
Tip: Avoid rapid, jerky movements during recalibration. - 9
Final validation ride
Perform a longer test ride in straight and curved paths to validate stability under different maneuvers. If issues appear, revisit steps 4–8 with finer adjustments.
Tip: Push slightly beyond your comfort zone to verify stability. - 10
Document results and save settings
Record final calibration values and save the configuration in the app or manual. Keeping a log helps with future recalibrations or model changes.
Tip: Date-stamp the entry and note the testing conditions. - 11
Store model-specific notes for future recalibration
Keep a dedicated note on calibration quirks for your hoverboard model. Reference it before any future calibration cycles.
Tip: Review notes before long-term storage or wheel replacement.
Questions & Answers
What is hoverboard calibration and why is it needed?
Hoverboard calibration aligns the sensors and wheel geometry so the ride is stable and predictable. It reduces drift and improves steering accuracy, especially after upgrades or sensor changes.
Calibration aligns your hoverboard’s sensors and wheels for a stable ride, reducing drift. Follow the official steps for best results.
Do all models use the same calibration steps?
Most hoverboards share a core calibration concept, but model-specific steps and prompts vary. Always consult the manual for model-specific procedures.
Most steps are similar, but check your model’s manual for exact prompts and options.
How long does calibration take?
A typical calibration takes 15 to 30 minutes, including setup, testing, and any small readjustments. More complex models may require a bit longer.
Calibration usually takes about a quarter of an hour, with extra time if adjustments are needed.
What if calibration does not improve stability?
If stability remains an issue, verify the surface, battery level, and absence of interference. Revisit steps 2 through 6 and consider seeking model-specific support.
If it stays unstable, recheck setup and repeat steps with smaller adjustments, or contact model support.
Is calibration safe for beginners?
Yes, calibration is safe when performed slowly and with proper protective gear. Follow the manufacturer’s steps and avoid rush or force.
It’s safe for beginners if you go step-by-step and wear safety gear.
Recalibrate after crash or moisture exposure?
Calibrate after any major impact or moisture exposure to restore sensor accuracy. If the board is damaged, repair first before recalibrating.
Yes—calibrate after a crash or moisture exposure, but only if the board is undamaged.
Watch Video
Key Takeaways
- Calibrate on a flat surface for accuracy
- Follow the model’s official procedure
- Test ride to verify stability after calibration
- Document results for future reference
- Recalibrate after major impacts or wheel changes