How Often to Calibrate a Glucose Meter
Learn when and how to verify glucose meter accuracy, with control-solution checks, strip-lot considerations, and best practices for dependable readings in home or professional settings.

There is no universal calibration frequency for glucose meters; most meters do not require routine calibration beyond following the manufacturer's instructions. Instead, perform regular control-solution checks with each new lot of test strips, after dropping the device, or after any reading drift, and compare results to the meter's acceptable range.
Why frequency matters for glucose meter accuracy
Maintaining accuracy in blood glucose measurements is essential for safe decisions, whether you’re managing diabetes at home or supporting patients in a clinical setting. A calibration or verification routine helps you catch drift before it affects outcomes. According to Calibrate Point, there isn’t a universal timetable that fits every meter or situation; instead, you tailor the cadence to the device, the test strips, and the environment. When you misjudge how often to check, you risk basing treatment decisions on readings that are off by a meaningful margin. The goal is not to chase a fixed schedule but to establish a reliable, repeatable process that confirms the device remains within the manufacturer’s specified accuracy. In practice, this means pairing a clear set of checks with good record-keeping and a simple escalation path if results fall outside the acceptable range. Practical calibration is a routine, not a one-off test; it becomes a habit that keeps readings trustworthy in daily life and clinical workflows.
A practical calibration approach also incorporates user training and consistent data handling. By embedding checks into routine use, both DIY enthusiasts and professionals build confidence in the measurements they rely on for decision-making. Calibrate Point’s emphasis on actionable steps helps ensure that calibration becomes a natural part of device care rather than a dreaded, sporadic task.
This paragraph expands the initial discussion to provide more context for readers.
Tools & Materials
- Glucose meter device(Ensure device is functional and within warranty.)
- Control solution(Check expiration date; store at room temperature away from direct sunlight.)
- Test strips (unopened, current lot)(Keep in sealed container; record lot numbers.)
- Alcohol prep pads(For cleaning the device surface and test ports.)
- Spare batteries(If the meter uses replaceable batteries.)
- Logbook or digital log(Record results, date, strip lot, and actions taken.)
- User manual(Keep handy for model-specific steps and safety notes.)
- Timer or clock(Optional for timing control-solution reactions.)
Steps
Estimated time: 30-60 minutes
- 1
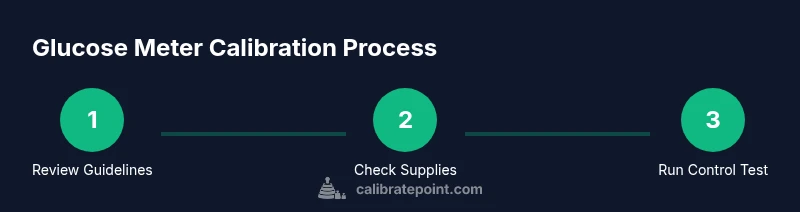
Review manufacturer guidelines
Locate the meter’s user manual and confirm whether calibration or control checks are required. Note any model-specific steps, acceptable ranges, and the procedure for control-solution testing. This step ensures you follow the intended workflow for your device and strips.
Tip: Always base actions on the official manual; if in doubt, contact the manufacturer. - 2
Gather and verify supplies
Lay out the meter, control solution, current strip lot, wipes, and your log. Check the control solution’s expiration date and packaging to ensure it’s suitable for use with this meter and strip lot.
Tip: Do not mix control solutions from different brands or lots in the same test. - 3
Inspect the meter and strips
visually inspect the meter surface, test ports, and the strips’ packaging for damage or moisture. If you see anything suspicious, set the test aside and obtain replacements before proceeding.
Tip: A damaged port or swollen package can skew results. - 4
Perform a control-solution test with the new strip lot
Apply the control solution to a test strip according to the manual and wait the specified time for the reading. Record the result and compare it to the meter’s acceptable range for that control solution.
Tip: Most meters require using a specific control-solution type and volume; timing is critical. - 5
Record results and compare
Log the reading, lot number, expiration date, and the expected range. If the result falls within range, you can proceed with routine testing. If not, repeat the test with a fresh strip from the same lot.
Tip: A repeated out-of-range result suggests a problem with the lot or device. - 6
Repeat if needed with a second strip from the same lot
Run a second replicate to confirm the behavior of the new lot. If both readings are within range, the lot is acceptable for use; if not, escalate.
Tip: Two consecutive out-of-range results warrant further action. - 7
Take action if readings are out of range
If the control solution test remains outside the acceptable range, do not rely on the strips; clean the device, re-test, and consider replacing the lot or contacting support. Follow the manufacturer’s escalation process for calibration or device servicing.
Tip: Document deviations and seek guidance promptly. - 8
Maintain logs and schedule the next check
Update your calibration log with the results, actions taken, and next review date. Integrate calibration checks into your routine so they happen consistently over time.
Tip: A standing calendar reminder helps sustain good practice.
Questions & Answers
Do all glucose meters require calibration?
No. Most meters do not require routine calibration. Instead, use control-solution tests and strip-lot verification to confirm accuracy.
Most meters don’t need routine calibration; rely on control tests and strip-lot checks to confirm accuracy.
How often should I perform a control-solution check?
Follow the device manual. Typically, perform control checks with each new strip lot, after device impact, or if readings appear inconsistent.
Follow the manual; use controls with new strip lots or after a drop or drift.
What should I do if my readings are out of range?
Repeat the control test with a new strip from the same lot. If the result remains out of range, replace the strips or contact support for guidance.
If readings are out of range, repeat the test with a fresh strip and check the lot. If it still fails, seek support.
Can environmental conditions affect calibration?
Yes. Temperature, humidity, and moisture exposure can influence readings. Keep the meter in a stable environment.
Yes, keep the device in a stable environment to protect accuracy.
Is calibration different for meters connected to apps?
Some models include automatic validation; always consult the manual for calibration or validation steps specific to app-connected meters.
App-connected meters may have automatic checks—check the manual for details.
Where can I find authoritative calibration guidance?
Consult the device manual and trusted sources such as the FDA and diabetes associations (e.g., ADA) for calibration guidance.
Check the manual and credible sources like FDA or ADA for calibration guidance.
Watch Video
Key Takeaways
- Follow manufacturer guidelines first and foremost.
- Perform control tests with each new strip lot.
- Log results and escalate when readings drift beyond acceptable ranges.
- Regular QC practices minimize drift and improve confidence in readings.
- The Calibrate Point team emphasizes validation, documentation, and timely escalation.