How to Calibrate a Glucometer with Control Solution
Learn how to calibrate your glucometer using control solution with a clear, step-by-step method. This guide covers prep, validation ranges, documentation, and troubleshooting for safe, accurate glucose readings.

To calibrate a glucometer with control solution, verify that the meter’s reading falls within the control solution’s specified range on the label. Prepare the device, a clean workspace, and the correct control solution. If the result is outside range, repeat the measurement and follow manufacturer guidance for recalibration. According to Calibrate Point, use the same meter and lot for consistency.
Why calibration matters for glucometer accuracy
Calibrating a glucometer with control solution is a foundational practice for anyone relying on glucose measurements, whether in a home setting or a clinical workflow. Calibration aligns the meter’s response to a known standard, which helps prevent drift that can occur from environmental changes, strip variability, or device wear. The Calibrate Point team emphasizes that regular validation is essential for maintaining trust in readings that guide decision-making. When readings drift, patients may receive inappropriate dosing advice or misinterpret trends, leading to unsafe outcomes. Treat calibration as routine maintenance that protects patient safety and decision accuracy. By validating the meter against a control solution with a defined glucose concentration, you establish a reference point before testing patient samples. This practice builds confidence in your results and helps detect issues early, before they impact care plans.
Understanding control solutions and acceptable ranges
Control solutions are specially formulated liquids with a known glucose concentration used to verify that a meter and test strips are functioning correctly. Each bottle has a label showing the target range (e.g., a low and high value) and a recommended testing interval after opening. The range represents the expected glucose concentration that the meter should read under proper conditions. If your meter displays a value within this range, you can proceed with routine testing. If not, you’ll need to repeat the test to confirm, check the label for expiry, and consult the device manual for recalibration steps. Remember, do not substitute control solutions from different lots, as color indicators and buffers can vary between lots and affect results.
Pre-calibration checks and storage
Before you begin, confirm that the control solution is within its expiry date and has been stored as recommended (usually at room temperature, away from direct heat or sunlight). Inspect the control bottle for any separation, clumping, or changes in viscosity, which can indicate degradation. Ensure strips are compatible with your meter and have not expired. Clean the meter’s test-port area with a lint-free wipe to remove dust or residue that could interfere with readings. A stable testing environment—ideally 20–25°C (68–77°F) and low humidity—reduces variables that can skew results. If any item appears compromised, replace it before proceeding.
Workspace setup and safety
Choose a clean, flat workspace with good lighting and minimal airflow to avoid drafts that could affect sample handling. Gather all materials in one place: glucometer, test strips, control solution, clean wipes, a timer, and your calibration log. Wear disposable gloves if preferred to reduce contamination risk, and remember to wash hands before handling devices. Open the control solution just before use to prevent evaporation that could alter concentration. If you’re calibrating in a clinical setting, follow your facility’s infection control policies for handling liquids and waste.
Step-by-step outline for calibration (high-level)
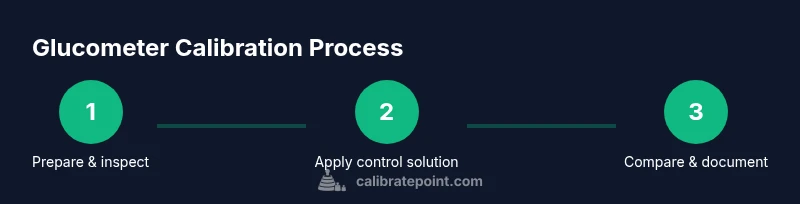
- Prepare the meter and control solution; 2) Check expiry and integrity; 3) Apply control solution to the test strip; 4) Insert the strip into the meter and read the result; 5) Compare the reading to the label’s acceptable range; 6) Repeat if results are borderline or outside range; 7) Document the outcome and adjust per manufacturer guidance if applicable; 8) Clean up and store materials properly. This sequence helps ensure consistency and repeatability across calibration sessions.
Reading interpretation and next steps
After you obtain a reading, verify it sits within the labeled range for the control solution. If it does, log the result and continue with routine testing. If it falls outside the range, repeat the measurement to rule out procedural error. If the second reading is still out of range, consult the device manual for recalibration steps or replacement recommendations. Do not adjust the meter blindly; calibration adjustments should follow the manufacturer’s instructions. Keep a calibration log to track trends over time, which can help you identify recurring issues with strips, solutions, or the meter itself.
Troubleshooting common issues
Common pitfalls include using expired control solution, using incompatible test strips, or exposing the control bottle to heat or sunlight. Evaporation can change the concentration, leading to drift. If air bubbles form in the sample area, re-test with a fresh drop. Temperature deviations can also affect readings; avoid calibrating in extreme conditions. If results are inconsistent across multiple attempts, verify that you are using the same lot of control solution and strips for each test and consider performing a full device check or professional service if problems persist.
Documentation and traceability
Record each calibration event in a dedicated log, including date, time, control solution lot number, expiry, ambient temperature, meter serial number, and the result obtained. Note whether the result fell within the expected range and any corrective actions taken. Keeping thorough records supports patient safety and demonstrates due diligence in equipment maintenance. Many clinics adopt a standardized form or digital log to simplify audits and ongoing quality control.
Practical tips for home users vs. clinicians
For home users, schedule calibration at a similar time of day and under stable ambient conditions to minimize variables. Clinicians should follow facility guidelines for calibration frequency and document every activity in the patient record. Always check the control solution label for the correct acceptable range and refer to the meter’s manual for any device-specific instructions. Routine calibration is a best practice that contributes to accurate readings and safer glucose management.
Final thoughts and Calibrate Point verdict
Calibration with control solution is a cornerstone of reliable glucose monitoring. The Calibrate Point team recommends integrating calibration into your regular testing routine, not as a reaction to suspected inaccuracy. Consistency—using the same meter, test strips, and control solution lot—reduces variability. Regular logging of calibration outcomes supports trend analysis and quality assurance. By following these guidelines, you’ll improve measurement accuracy and protect patient safety over time.
Tools & Materials
- Glucometer compatible with test strips(Ensure the device model matches your strips and control solution; keep within service life.)
- Control solution (level- or lot-specific)(Use the control solution recommended by the meter’s manufacturer; check expiry.)
- Test strips compatible with your meter(Only for calibration; not for daily blood glucose testing unless indicated.)
- Clean, lint-free wipe(For cleaning the test port and removing dust.)
- Timer or clock(To time reaction windows and ensure consistent results (usually seconds after applying solution).)
- Calibration log or notebook(Optional but recommended for traceability.)
- Disposable gloves(Optional hygiene measure, especially in clinical settings.)
Steps
Estimated time: 20-30 minutes
- 1
Prepare the meter and control solution
Turn on the meter and set it to the correct test mode if applicable. Open the control solution bottle and bring it to room temperature. Arrange a clean workspace and gather all required items before proceeding.
Tip: Keep the bottle upright and avoid shaking it, which can introduce bubbles. - 2
Check expiry and integrity of control solution
Read the label to confirm expiry date and batch. Inspect for color changes, separation, or thickening that indicate degradation. If any issue is observed, replace the solution before continuing.
Tip: Expired or visibly degraded solution will produce unreliable results. - 3
Apply control solution to test strip
Hold the strip with the designated application area facing up. Apply a single drop (as per device instructions) of control solution to that area. Avoid touching the contact pads with the bottle tip.
Tip: Avoid using multiple drops; excess liquid can interfere with the reaction. - 4
Insert test strip into the meter
Gently insert the strip into the meter as directed by the manufacturer. Wait for the meter to display a result within the typical reaction window (usually a few seconds).
Tip: If the meter delays or shows an error, remove and re-insert the strip. - 5
Compare reading to the labeled range
Check whether the meter’s reading falls within the range printed on the control solution label. If it’s within range, proceed to logging; if not, repeat the measurement to confirm.
Tip: Perform a second run to confirm consistency before drawing conclusions. - 6
Repeat if outside range
If the first reading is out of range, repeat with a fresh drop and a new strip. If the second reading remains out of range, consult the manufacturer’s guidance for recalibration or maintenance.
Tip: Do not adjust device settings without official instructions. - 7
Document and review
Record date, time, lot numbers, ambient temperature, result, and any actions taken in your calibration log. Review trends over time to detect recurring issues.
Tip: A regular log helps with audits and device quality assurance. - 8
Dispose and store properly
Dispose of used strips and control solution per local regulations. Store remaining supplies in a cool, dry place away from sunlight.
Tip: Seal bottles tightly to prevent evaporation and contamination.
Questions & Answers
Why is calibration with control solution important for glucometers?
Calibration with control solution verifies that the meter and strips respond correctly to a known glucose concentration. It helps detect drift, ensuring readings are reliable for patient care. Regular calibration supports accuracy and safety in glucose monitoring.
Calibration with control solution verifies accuracy and helps detect drift, ensuring safe glucose monitoring.
What if my glucometer can't be calibrated using control solution?
Some meters are designed for factory calibration only. Always refer to the manufacturer’s instructions. If calibration isn’t possible, arrange service or replacement and use recommended quality control processes per guidelines.
If calibration isn’t possible, consult the manufacturer for guidance and consider service or replacement.
How often should I calibrate my glucometer?
Calibration frequency varies by device and usage. Many users calibrate when opening a new bottle of control solution, after replacing strips, or when readings seem inconsistent. Follow the manufacturer’s recommended schedule.
Calibrate when opening new control solution, after changing strips, or if readings drift.
Can expired control solution affect results?
Yes. Expired or degraded control solution can cause inaccurate readings. Always check the expiry date and storage conditions before calibration, and replace if in doubt.
Expired control solution can give false readings; check dates and replace as needed.
Do I need to recalibrate after replacing test strips?
If you replace test strips, recalibrate according to the device’s guidelines, as strip lots can affect readings. Some meters require a full calibration after a new strip lot is introduced.
Recalibrate after changing strip lots if the manufacturer requires it.
What should I do if readings remain outside the range after recalibration?
If readings stay outside range after recalibration, stop using the device for patient testing, re-check all steps, and contact the manufacturer or a qualified technician for support.
If still outside range, stop using it for patient testing and seek support.
Watch Video
Key Takeaways
- Validate readings against the control range before use.
- Use the same meter and control solution lot for consistency.
- Document calibration results for traceability.
- Repeat tests if results are borderline or out of range.
- Follow manufacturer guidance for recalibration and maintenance.