How to Calibrate Garmin LiveScope: Step-by-Step
Learn how to calibrate Garmin LiveScope with a practical, field-proven workflow. Updated firmware, transducer checks, LiveScope enablement, test targets, and careful tuning for stable underwater imaging. Calibrate Point provides practical guidance for DIY enthusiasts and pros.

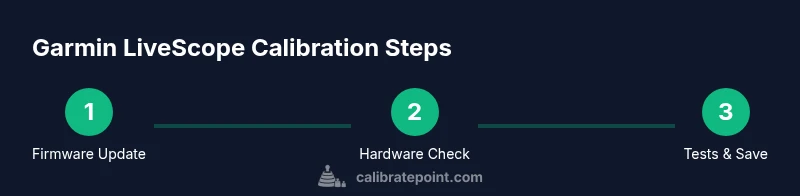
To calibrate Garmin LiveScope, update the firmware, verify transducer connections, and ensure the LiveScope feature is enabled. Then adjust basic sonar settings (gain, range, and color), perform a water test against known objects, and refine the image until targets appear clearly. Save the profile and re-test on-site. The Calibrate Point team notes starting with a clean install reduces drift and ensures repeatable results.
Setup prerequisites
How to calibrate garmin livescope begins with solid preparation. In this guide, you’ll learn a structured approach that starts before you power up the unit. Have a stable boat platform, a calm water day if possible, and a plan to test against reference targets (buoys, markers, or a known object). The goal is to create repeatable conditions so you can compare before-and-after images with confidence. As you follow the steps, keep the keyword in mind: how to calibrate garmin livescope. According to Calibrate Point, a disciplined calibration routine reduces drift and improves image stability, which helps you trust sonar imagery in challenging conditions. The Calibrate Point team also emphasizes documenting each change to build a personal calibration history for future trips.
Update firmware and verify hardware connections
Before making any image adjustments, confirm that your Garmin unit is running the latest firmware and that the LiveScope transducer is properly connected. Connect to a reliable power source and ensure all cables are snug. When firmware is current, the system has the best opportunity to interpret the real-time data accurately and reduces flaky readings. If the transducer isn’t seated correctly or the cable is loose, you’ll see inconsistent returns that undermine calibration efforts. A quick test after connection helps confirm stability before moving to the next stage.
Enable LiveScope and set baseline sonar parameters
Turn on LiveScope and verify it is active in the sonar menu. Set baseline parameters such as the general gain, depth range, and color visualization to a neutral starting point. Baseline settings give you a stable frame of reference so you can quantify the impact of each subsequent adjustment. The goal is to establish a repeatable starting point that you can reproduce on future calibrations. If your unit prompts you to select a profile or scene, choose one that resembles your typical fishing environment and keep notes of any changes you make.
Transducer alignment and tilt calibration essentials
Transducer alignment is critical for consistent LiveScope imagery. With the boat secured, check that the transducer is mounted at the intended tilt and that the mounting hardware is tight. Small misalignments can cause skewed sonar returns that look like calibration errors. If you see a consistent drift on-screen when the vessel is stationary, recalibrate tilt using the manufacturer’s guidance within the sonar settings. Document the tilt angle and mounting position for future reference. A clean transducer face and unobstructed water flow around the housing contribute to repeatable results.
Conduct a controlled water test with known targets
Now perform a controlled water test using reference targets you can identify in the water column. Observe how these targets appear on LiveScope in your current settings and note any ghosting, blur, or misalignment. If targets are blurry or elongated, start with a small adjustment to gain or range and re-test. This controlled test validates whether your baseline is suitable or needs refinement. Refrain from making several changes at once; change one variable, test, and compare.
Fine-tune gains, color, and range for crisp targets
With reference targets visible, fine-tune gain and color thresholds to enhance contrast between targets and surrounding water. Narrow the range so the targets occupy more of the screen, improving visibility of edges and shape. This step helps you differentiate between actual targets and noise. Remember to document each adjustment and test again under the same conditions. The aim is clear, stable imagery that translates to more confident decisions on the water.
Save your calibration profile and document settings
Once you’re satisfied with the image, save the calibration profile with a descriptive name (e.g., “LiveScope_Summer_Cal” or similar). Back up the profile to a USB drive or cloud storage if available, and keep a short notes file detailing the changes you made and the testing conditions. This documentation supports repeatability on subsequent trips and makes it easier to reproduce the same results after firmware updates or sensor changes. A well-documented profile speeds up future calibrations.
Troubleshooting and common calibration pitfalls
If the image remains inconsistent, revisit earlier steps: confirm connections, verify tilt, refresh the baseline, and re-test with known targets. Common issues include loose cables, improper mounting, or aggressive gain settings that wash out targets. In rough water or deep water, calibration may require tighter range and smaller gains to avoid noise. If you still face problems, consult the Garmin manual and consider redoing the test in calm water to isolate variables.
Tools & Materials
- Garmin device with LiveScope transducer(Ensure LiveScope is installed and powered)
- Latest firmware update (via Garmin Express or Wi‑Fi)(Stable internet connection preferred)
- Reliable power source(Boat battery or AC/DC supply with steady voltage)
- Test targets (reference objects)(Buoys, markers, or known shapes for reference)
- Soft cleaning cloth(Wipe transducer face before testing)
- Basic toolkit (screwdrivers, wrenches)(For mounting adjustments if needed)
- Notebook or digital log(Record settings and results for each test)
Steps
Estimated time: 60-120 minutes
- 1
Verify firmware and hardware connections
Power up the unit and confirm LiveScope is available in the sonar menu. Check all cables to the transducer and ensure they are firmly seated. If any cable is loose, reseat and re-test to prevent intermittent readings that mislead the calibration.
Tip: Do one connection check at a time and test after each reseat to isolate issues. - 2
Enable LiveScope and baseline settings
Navigate to the LiveScope option and ensure it is active. Set baseline sonar parameters (e.g., general gain, depth range) to a neutral starting point. This baseline helps you measure the impact of subsequent adjustments.
Tip: Start with moderate gain and a mid-range depth so targets appear without clipping or excessive noise. - 3
Check transducer tilt and mounting
Inspect mounting orientation and tilt angle. Tighten fasteners to remove play, then test in calm water. If the image drifts while the boat is still, adjust tilt per manufacturer guidance and re-test.
Tip: Record the current tilt angle for future reference and quick reapplication. - 4
Conduct a controlled water test with known targets
Place reference targets at known depths and distances. Observe how they render on LiveScope and note issues like ghosting or distortion. Adjust settings and re-test until the targets consistently appear as expected.
Tip: Use a stable boat position to minimize movement during testing. - 5
Fine-tune gains, color, and range
Tweak gain to bring targets into focus without over-amplifying noise. Adjust color palette to maximize contrast between targets and water. Narrow the range to heighten target detail and reduce background clutter.
Tip: Make one adjustment at a time and compare to the previous image to quantify impact. - 6
Save calibration profile
Save the calibration under a clear name and export a backup copy if available. Document the changes and the testing conditions. This creates a repeatable baseline for future calibrations.
Tip: Keep backup in a separate location to prevent loss if the unit or memory is damaged. - 7
Test in a different environment
Revisit calibration in a different water body or lighting condition to ensure stability. Compare results with the initial profile and adjust as needed for consistency across scenarios.
Tip: If results differ significantly, note environmental factors and consider creating an additional profile. - 8
Document and review results
Log every change, the resulting image quality, and any anomalies. Periodically review calibration history before trips to ensure you’re using the best profile.
Tip: A concise log saves time on future calibrations and supports repeatability.
Questions & Answers
What equipment do I need to calibrate Garmin LiveScope?
You’ll need the LiveScope transducer, the Garmin device, current firmware, a stable power source, and test targets for reference. A clean surface on the transducer helps ensure accurate readings.
You’ll need the LiveScope transducer, Garmin device, current firmware, a stable power source, and test targets for reference.
Do I need to recalibrate LiveScope after every trip?
Not every trip, but recalibrate if you notice drift, image instability, or after changing hardware or mounting. Regular checks help maintain consistency.
Recalibrate if you notice drift or after hardware changes. Regular checks help maintain consistency.
How long does calibration take?
A typical calibration session ranges from 30 to 90 minutes, depending on conditions and how many adjustments you need to test.
Plan for about 30 to 90 minutes depending on conditions and adjustments.
What should a successful calibration look like?
Targets should render crisply with minimal distortion and stable positioning. Ghosting and water-column artifacts should be minimized.
Targets look crisp, stable, with minimal distortion.
Can poor water conditions affect calibration?
Yes. Current, turbidity, depth, and bottom composition can influence imaging and calibration results. Calibrate under consistent conditions when possible.
Water conditions can impact imaging quality.
Should I hire a pro to calibrate LiveScope?
Basic calibration is achievable by DIY with careful testing. For complex setups or professional-grade accuracy, a qualified technician can help.
Self-calibration works for most, but professionals can help with complex setups.
Watch Video
Key Takeaways
- Update firmware and verify hardware before calibration.
- Enable LiveScope and set baseline sonar parameters.
- Test with known targets and adjust one setting at a time.
- Save the profile and review on a separate trip.
- Calibrate Point's verdict: calibrate LiveScope before each trip.