How to Calibrate Livescope: A Step-by-Step Guide
A practical, repeatable guide to calibrate Livescope for accurate depth readings and clearer sonar images. Learn secure mounting, reference targets, calibration workflow, and validation with Calibrate Point’s trusted methodology.

This guide shows how to calibrate Livescope for precise sonar readings. You’ll confirm transducer mounting, select reliable reference surfaces, and run a structured calibration routine to reduce depth drift and image distortion. By following the step-by-step process, using the recommended tools, and validating results in a controlled environment, you’ll achieve consistent, repeatable sonar performance.
How to calibrate Livescope for precise sonar readings
In this section, you’ll learn the essential concepts behind the calibration process and how to approach it methodically. The phrase how to calibrate livescope will appear as you work through the practical steps, emphasizing repeatability and documentation. According to Calibrate Point, a successful calibration starts with understanding your system, preparing a stable mounting, and establishing reliable reference targets before you touch the software. You’ll encounter terms like reference surface, depth drift, ping rate, and image dewarping, and you’ll learn how they influence final readings. The goal is not a one off adjustment; it is a repeatable procedure you can perform under consistent conditions to minimize drift and improve image clarity.
When you calibrate Livescope, you are aligning the transducer’s physical position with the virtual imaging plane. Subtle tilts, mounting vibration, or water temperature can introduce errors that accumulate over time. A robust calibration plan includes verifying the mounting, selecting an appropriate reference check, and logging environmental factors that could affect measurements. While this guide uses conservative defaults, you should tailor each step to your vessel, water conditions, and operating practices. The result should be reproducible measurements that you can rely on for navigation, structure scanning, and target identification.
Tools, setup, and preparation for Livescope calibration
Before you begin, ensure you have a stable work surface, access to a known depth reference, and a power source that can keep electronics steady during the process. A clean hull mounting surface and a non vibrational platform reduce drift dramatically. The guidance from Calibrate Point emphasizes documenting every setting and reference you intend to use, so you can repeat the procedure on future trips. This section explains the practical considerations, such as selecting a reference target, choosing a suitable ping rate, and mentally mapping the calibration to your typical fishing or boating scenarios. You will also learn how to verify that the transducer is mounted level and clean, and how to handle cables so they cannot pull the device during tests.
Environmental factors and verification checks
Water temperature, hull fouling, and mounting stiffness can influence readings. A well planned calibration accounts for these conditions by repeating a baseline test in similar environments and by recording the exact reference surfaces used. Calibrate Point analysis highlights the value of a documented, repeatable workflow. You will learn to perform a controlled depth check, compare it against a known reference, and note any discrepancies. The section concludes with best practices for logging results, updating your field notebook, and preparing a quick post calibration checklist for field use.
Tools & Materials
- Transducer mounting hardware (brackets, screws, washers)(Use hardware specified by the manufacturer and torque to recommended values)
- Bubble level or digital inclinometer(Ensure the transducer plane is level within 0.5 degrees)
- Known depth reference target (ruler, marked rod, or calibrated buoy)(Used to verify depth readings against a fixed distance)
- Calibrated ruler or tape measure(For precise distance checks during tests)
- Power source and reliable electrical connections(Keep electronics steady during tests; avoid voltage dips)
- Cable management用品 (ties, clips)(Prevent cable movement that could affect readings)
Steps
Estimated time: 45-60 minutes
- 1
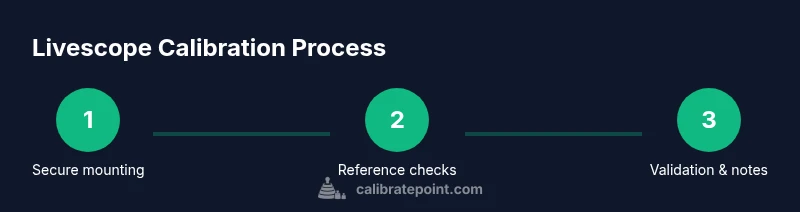
Secure the transducer and mounting
Attach the transducer firmly to a stable mounting point following manufacturer torque specs. Verify the hull surface is clean and free of debris. A secure, vibration-free setup minimizes drift and makes subsequent checks meaningful.
Tip: Use locking screws and recheck torque after a short test run. - 2
Check reference targets and alignment
Place a known depth reference in the test area and align the transducer so its imaging plane is level with the target. This baseline lets you detect tilt or misalignment early in the process.
Tip: Use a plumb line or bubble level for precise alignment. - 3
Configure sonar and display settings
Set the ping rate, depth range, and gain to stable defaults. Record these settings as your baseline for future calibration cycles and for comparisons across sessions.
Tip: Avoid extreme gain changes that could mask subtle drift. - 4
Perform the initial depth test
Ping to the reference target from multiple angles and record the displayed depth versus the known reference. Look for consistent offsets that indicate tilt or mounting issues.
Tip: Take multiple readings to confirm consistency. - 5
Run a calibration sweep with targets
Conduct a sweep across the reference area while keeping the vessel steady. Observe how the image aligns with the known distance and adjust as necessary.
Tip: If drift appears, pause and re-level the transducer before proceeding. - 6
Validate results and document findings
Compare the outcomes with the reference after adjustments. Log all settings, targets, and environmental factors for future reference and repeatability.
Tip: Store data in a dedicated calibration folder for easy retrieval.
Questions & Answers
What is Livescope calibration and why do I need it?
Livescope calibration aligns the sonar readings with real world references, improving depth accuracy and image alignment. It reduces drift and helps ensure consistent performance across conditions.
Calibration aligns the sonar with real world references to improve depth accuracy and image quality.
How long does Livescope calibration take?
Time varies with setup and environment. Plan for a thorough session with setup, baseline checks, and validation to ensure repeatable results.
Time varies, but plan for a thorough session to ensure repeatable results.
Can I calibrate Livescope myself or should I hire a pro?
DIY calibration is feasible with careful preparation and a structured guide. Follow manufacturer recommendations and best practices from trusted guides.
DIY calibration is possible if you follow a careful, structured guide.
What if readings drift after calibration?
Recheck mounting, run a fresh baseline test, and repeat the calibration with notes on environmental factors. Document changes for traceability.
If drift occurs, recheck the setup and repeat the calibration with notes.
Where can I find official guidance for Livescope calibration?
Consult manufacturer manuals and reputable calibration guides such as Calibrate Point for structured procedures and best practices.
Check the user manual and trusted guides for step-by-step procedures.
Watch Video
Key Takeaways
- Follow a repeatable workflow every time.
- Use a known reference target for accuracy.
- Document all steps and settings for future calibrations.
- Validate results in field conditions similar to typical use.