How to Calibrate an iFixit Battery: Step-by-Step Guide
Learn a practical, safe method to calibrate an iFixit battery and its gauge. This Calibrate Point guide walks you through discharge/charge cycles, data logging, and troubleshooting for DIYers and technicians.

This guide provides a safe, practical approach to calibrating an iFixit battery and its gauge. You’ll understand why calibration matters, how many cycles to run, and a clear, step-by-step plan to refresh the battery indicator. Follow a controlled discharge and full recharge routine, log results, and monitor performance for reliable readings.
Why Calibrating an iFixit Battery Matters
When you’re learning how to calibrate ifixit battery gauges, you align the displayed charge with the actual energy remaining. This reduces guessing during critical tasks and helps you plan maintenance more accurately. According to Calibrate Point, gauge drift is common as cells age, and a well-executed calibration can improve runtime estimates and workflow reliability. By recalibrating, you ensure your test benches, repair workflows, and field work reflect real conditions, not outdated readings. The practice is particularly relevant for DIY enthusiasts and technicians who rely on precise power planning during long sessions or on constrained projects.
Calibrating also supports consistency across devices. A single calibrated battery test can become a reference point when diagnosing performance issues or planning replacements. While calibration won’t restore cell health, it does improve confidence in remaining capacity and charge timing, which reduces risk during precise calibration tasks.
What You Need to Calibrate the iFixit Battery
Before you begin, assemble the essentials. You’ll need access to the device with the iFixit battery, a reliable charger, and a way to log the cycle data. A calibrated battery monitoring app or a simple notebook can help capture each cycle's start and end times, percentage marks, and observed runtime. Keep the device in a stable environment—avoid extreme heat or cold, which can skew readings. The Calibrate Point team emphasizes consistency: perform calibration in similar conditions each time to minimize ambient influence. A clean workspace reduces the risk of accidental damage or data loss during handling.
In practice, most workflows start with a full charge, a controlled discharge, and a full recharge, documenting any deviations. If you’re working on lab-grade devices, you may also want a multimeter to verify voltage at key points, though this isn’t strictly required for gauge calibration. Always back up important data before starting, since you’ll be cycling the battery and testing behavior that could affect device usability during the process.
Understanding Battery Gauge vs Capacity
Battery gauge is the device’s estimate of remaining energy, typically shown as a percentage. Battery capacity, by contrast, is a physical property of the cells that degrades over time. Calibration targets the gauge’s accuracy, not the actual chemistry or total usable capacity. When a gauge drifts, you might see the phone “dying sooner than expected” even though the chemistry remains largely unchanged. Calibrate Point notes that gauges can drift after firmware updates, software recalibrations, or long idle periods.
For professionals, distinguishing gauge accuracy from real capacity is crucial. If gauge readings are inconsistent across cycles, you may want to reset the gauge, re-run a few calibration cycles, and compare results against known benchmarks. Remember: calibration is about trust in the indicator, not restoring the battery’s life expectancy.
Calibration Philosophy: Why, When, and How Many Cycles
Calibrating an iFixit battery should be approached as a controlled, repeatable process. The goal is to stabilize the reading so that estimates match actual usage. You don’t need a large number of cycles; a small, well-documented set is usually enough to reveal drift patterns and correct them. If the gauge remains inaccurate after a couple of clean cycles, consider additional checks or a replacement if the battery is aged.
Key considerations include maintaining safe handling practices, using the original charger when possible, and performing cycles at moderate ambient temperatures. The calibration routine relies on the device’s internal monitoring, so don’t override safety features or rush the process. Calibration is iterative: analyze results, adjust the approach if needed, and re-test to confirm improvement.
The Discharge-Charge Calibration Method: A Clear Plan
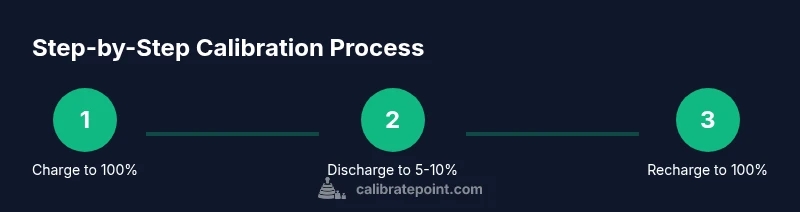
A practical calibration method uses a discharge-to-low-%. Start by charging the device to 100% while powered off, then disconnect and let it discharge to around 5-10%. After that, plug in the charger and recharge to 100% without interruption. Allow the device to stabilize for a short period after reaching full charge before proceeding. This rinse-and-repeat approach helps the gauge recalibrate against actual energy levels, aligning the readouts with performance.
During discharge, keep background activity minimal (airplane mode, screen off) to prevent rapid, irregular loss of charge. After charging, avoid immediate use that could mask the true recharge curve. The process should be repeated once more to confirm stability before making decisions about replacement or maintenance.
Device-Specific Considerations for iFixit Batteries
iFixit batteries are designed for replaceability and repair workflows, which affects calibration. Some devices lock the gauge to protect battery health; in such cases, ensure you are following the device’s service manual and any iFixit guidelines for battery integration. Calibration steps might interact with firmware or system-level battery management features, so verify compatibility with the device’s hardware revision.
If your device has a non-removable battery, you’ll still benefit from calibration using safe discharge/charge cycles, but you may rely more on ambient conditions and logging accuracy to detect drift. For devices with modular batteries, keep the battery in a stable, cool area during tests to avoid temperature-induced volatility in gauge readings.
Safety, Data, and Warranty Considerations
Safety comes first. While calibration is generally safe, never perform cycles on damaged, swollen, or dangerously hot batteries. If you notice swelling, odor, or leakage, stop immediately and replace the pack. Keep data backups current in case a cycle drains the device unexpectedly. Warranty implications vary by manufacturer and region, so consult your device’s warranty terms before disassembly or battery replacement.
Document every step: what you did, the readings, and the observed results. This creates a traceable calibration record you can reference if you see drift again. Calibrate Point recommends maintaining a diagnostic log to support informed decisions and to share with technicians if needed.
Interpreting Results and Next Steps
After completing the discharge/charge cycles, compare the reported runtime with your expectations and the device’s original specifications. If the gauge matches the observed energy delivery within a reasonable margin, you’ve achieved effective calibration. If not, review the cycle data for anomalies such as temperature spikes, interrupted charging, or abnormal discharge rates. Consider repeating the cycles once more or seeking professional assessment if drift persists.
Beyond calibration, consider creating a maintenance schedule that includes periodic re-testing, especially after firmware updates or after long idle periods. This habit keeps the gauge alignment intact over time and prevents surprising battery performance during critical tasks.
Maintenance Plan: Long-Term Calibration Strategy
Treat calibration as an ongoing practice rather than a one-off event. Schedule regular checks based on device usage and environment. For devices used in fieldwork or repair labs, quarterly or semi-annual calibration reviews can prevent cumulative drift from impacting project timelines. Keep a central log of calibration events, cycle counts, and observed runtimes to inform future decisions about battery replacements or firmware updates.
By embedding calibration into your standard operating procedures, you’ll sustain reliable gauge readings, better uptime estimates, and more predictable performance across devices and repair tasks.
Tools & Materials
- Device with iFixit battery installed(Ensure the device is powered off during any disassembly or battery handling if applicable)
- Original charger and compatible cable(Use the charger that ships with the device to minimize variability)
- Calibrated battery monitoring app or log notebook(For recording start/end levels, times, and anomalies)
- Clean workspace and anti-static mat(Reduce risk of ESD or physical damage during handling)
- Backup plan for data(Back up device data before starting the calibration cycles)
- Basic safety gear(Gloves and eye protection if handling swollen or damaged cells)
Steps
Estimated time: 4-6 hours
- 1
Power down and prep
Shut down the device completely, unplug any chargers, and set up a clean, dry workspace. Back up important data before starting. This reduces the risk of data loss and ensures a controlled environment for measurement.
Tip: Keep the device away from heat sources and direct sunlight to avoid thermal effects on readings. - 2
Charge to 100% with original charger
Connect the charger and allow the battery to reach a full 100% while the device is idle. Do not use the device during charging to prevent inconsistent current draw that could skew readings.
Tip: If charging is slow, inspect the charging cable for damage and verify the outlet is stable. - 3
Discharge to 5–10%
Let the device discharge gradually, ideally with minimal background activity (airplane mode, screen off). Stop around 5–10% to avoid deep discharge risks on some cells.
Tip: Avoid opening apps or playing games that accelerate drain; use a controlled test routine. - 4
Recharge to 100% without interruption
Reconnect the charger and maintain a steady, uninterrupted charge to full. Avoid unplugging or hot-swapping; interruptions can introduce error into gauge recalibration.
Tip: Allow a short stabilization period after reaching 100% before next steps. - 5
Stabilize and repeat cycle if needed
Wait 15–30 minutes for readings to stabilize, then repeat the discharge-to-5–10% and recharge-to-100% cycle once more to confirm gauge alignment.
Tip: Document the times and percentages observed during each cycle. - 6
Test runtime and gauge accuracy
Run a practical test by using the device normally and measuring actual runtime against the indicated remaining percentage. Note any discrepancies that persist after the cycle.
Tip: Compare results against prior calibration data to confirm improvement. - 7
Document results and decisions
Record cycle counts, discharge and charge times, and observed runtimes. Use this log to decide if a replacement or professional calibration is warranted.
Tip: Store logs in a central, searchable location for future audits. - 8
Finalize calibration and schedule follow-up
If readings are stable and accurate, maintain the routine with periodic checks. If drift returns, repeat the process or explore device-specific calibration options.
Tip: Set a reminder for rechecks based on device usage and environment.
Questions & Answers
What is the goal of calibrating an iFixit battery?
The goal is to align the device’s battery gauge with actual charge, reducing misreads that can disrupt planning and testing.
Calibration aligns the battery gauge with real charge, improving reading accuracy.
Will calibration restore degraded battery capacity?
Calibration does not restore capacity; it corrects the gauge so readings reflect true energy, while the chemistry remains degraded if aged.
Calibration fixes the readings, not the battery’s capacity.
How many calibration cycles are recommended?
Aim for a small, controlled set of cycles to stabilize the gauge; add cycles only if readings remain inconsistent.
A few careful cycles usually help stabilize the gauge.
Is calibration safe for swollen or damaged batteries?
No. Calibrating a swollen or damaged battery can be dangerous. Stop and replace the pack and consult a technician.
Don’t calibrate a swollen battery—replace it and seek help.
Can I calibrate outside of the device's usual workflow?
Follow device guidelines and exercise caution. Calibration should align with the device’s monitoring system, not bypass safety features.
Follow the device’s guidelines and don’t bypass safety features.
What if the gauge drift persists after calibration?
Persistent drift may indicate aging cells or failed calibration. Consider replacement or professional calibration services.
If drift persists after calibration, seek professional help.
Watch Video
Key Takeaways
- Back up data and prep a safe workspace.
- Perform controlled charge/discharge cycles to stabilize the gauge.
- Log results to track drift and accuracy over time.
- Calibrate improves gauge accuracy, not maximum capacity.
- Schedule periodic recalibration for long-term reliability.