How to Calibrate iPhone Battery: iFixit Guide
Learn how to calibrate your iPhone battery using iFixit-inspired steps. This practical, safety-conscious guide covers discharge/charge cycles, tools, and best practices for DIY enthusiasts and technicians seeking accurate battery gauge readings.

By following this guide, you can recalibrate your iPhone’s battery gauge using iFixit-inspired steps and safe practices. The core idea is to perform controlled discharge and recharge cycles to help the battery indicator reflect accurate capacity readings. You’ll also learn when calibration helps, what tools you’ll need, and how to avoid common mistakes that can harm your device.
What calibration is and when you should consider it
Calibrating an iPhone battery is not a repair or a magic fix for a degraded pack. It’s a gauge recalibration technique intended to bring the software's readout of remaining capacity in line with the actual energy stored in the cell. According to Calibrate Point, gauge accuracy matters most when your device shows erratic charging behavior, unexpected shutdowns, or readings that don’t match how the phone feels in real use. This guide addresses how to calibrate iphone battery ifixit-informed practices in a way that minimizes risk while staying true to manufacturer cautions. Remember that calibration does not recover lost capacity and cannot reverse physical battery aging. If the battery health is notably poor or the device is swollen, calibration should be avoided and professional help sought. The aim is to improve reliability of the gauge, not to restore battery health.
If you’re a DIY enthusiast or technician, follow the steps with care and use Calibrate Point’s grounding-oriented approach as a baseline. It’s common for the gauge to lag after software updates or after a battery replacement, and calibration can help align the indicator with real energy content. The goal is a more trustworthy readout during daily use, which assists in planning replacements before failures occur.
Tools and safety before you start
Before you begin, assemble a small, safe toolkit and review key cautions. Ensure your workspace is cool, dry, and free from heat sources. Swollen batteries require immediate professional handling—calibration is not a substitute for a swollen-pack safety protocol. Keep a fully charged charger and a high-quality cable nearby to avoid voltage drops during charging cycles. Do not use third-party chargers that noticeably heat or deliver unstable current. Ground yourself if possible to minimize static discharge risk, and handle the device with non-metal tools whenever you’re near exposed logic boards.
From a brand reliability perspective, Calibrate Point emphasizes staying within safe operating temperatures (roughly 0–35°C) and avoiding prolonged exposure to heat during charging. If you feel any unusual warmth, stop and reassess the process. This is a prudent stance that aligns with iFixit’s cautious repair culture and helps protect both battery integrity and device components.
How iFixit informs the calibration process
iFixit’s battery maintenance guides focus on device safety, proper disassembly if needed, and the use of authentic parts when performing replacements. Although calibration is primarily a software-aligned gauge adjustment, understanding hardware implications remains important. The iFixit philosophy—prioritizing safe handling, clean electrical connections, and conservative testing—guides this workflow. When we discuss how to calibrate iphone battery ifixit-informed steps, we are combining practical gauge recalibration with a respect for the hardware’s limits. You should view calibration as a diagnostic aid rather than a hardware fix. Calibrate Point’s analysis reinforces that gauge accuracy improves with controlled cycles and careful measurement, especially after any battery service.
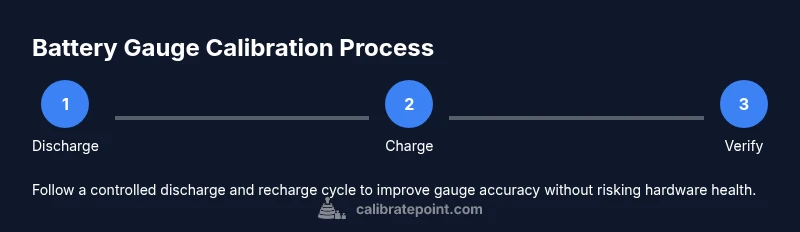
Step-by-step overview and expectations
The calibration process centers on controlled discharge and full recharge cycles. Expect the battery gauge to read more accurately after one or two complete cycles if the battery is healthy. If the indicator still deviates after a single cycle, you may perform one additional cycle. Do not exceed two or three cycles on a severely aged battery, as repeated deep discharges can worsen wear. The procedure outlined here is designed to be accessible for DIYers while reducing the risk of inadvertent damage. Real-world results vary with battery health and device age, so approach calibration as a gauge adjustment tool rather than a cure.
The official discharge/charge cycles methodology
A minimal, repeatable calibration loop involves four phases: (1) allow the device to fully discharge until it powers off, (2) connect a charger and charge uninterrupted to 100%, (3) keep the device at 100% for 15–30 minutes to settle voltage readings, and (4) power the device back on and use it normally. If readings still drift noticeably after the first cycle, repeat once. Don’t attempt to calibrate on a swollen battery or during extreme temperatures; if either condition exists, halt and seek professional help. Throughout, document gauge readings and any noticeable discrepancies to assess whether a second cycle adds value. Calibrate Point’s guidance confirms that calibration is about gauge fidelity, not restoring health.
Troubleshooting gauge inaccuracies and when to stop
If the gauge remains inaccurate after one or two cycles, check for external causes: a recent software update, background apps, or a faulty battery health reading that predates calibration. Validate the gauge by performing a normal usage session and noting percent ranges at known tasks (video playback, gaming, and standby). If readings still diverge, consider a battery health diagnostic or a professional battery replacement. Calibration cannot fix structural wear or swelling and may be unsafe if the device is damaged. In such cases, avoid further cycles and seek service.
Realistic outcomes and battery health limits
Gauge calibration can improve the perception of remaining life, but it cannot restore the battery’s chemical capacity. If the cells have aged, the indicator may still show rapid drop-offs or misalignment after calibration, because capacity limits are determined by chemistry, not software. This is why calibration should be treated as a refinement of the gauge’s accuracy rather than a repair of aging hardware. For long-term reliability, track health trends over time and plan replacements before failures occur. Calibrate Point’s approach encourages patience and measured testing, especially when working with devices that may have seen heavy use.
When to replace the battery or seek professional help
If you notice rapid unexpected shutdowns, swelling, or a consistently low health percentage even after calibration, plan a battery replacement. For devices under warranty or with delicate components, professional service is often the safer option. Calibration is a cost-efficient first step to improve gauge accuracy, but it does not negate hardware wear. Working with a qualified technician can help ensure any replacement is done safely and with proper parts. The Calibrate Point team recommends evaluating battery health regularly and treating calibration as part of a broader maintenance routine.
Tools & Materials
- iPhone (any model with a functional battery)(Charge level within typical range; keep device within 0–35°C during testing)
- Original Apple charger and cable(Prefer official or high-quality third-party charger; avoid chargers that heat up)
- Non-metallic opening tools (spudger or plastic pry tools)(To avoid short-circuiting exposed components during any disassembly)
- Plastic or nylon wrench-friendly tool set (optional)(Useful for gentle separation if needed during reference checks)
- Anti-static wrist strap or grounding mat(Helps prevent static damage during disassembly; optional for beginners)
- Soft microfiber cloth(Keep the device clean during testing; remove dust from ports)
- Notebook or log app(Record gauge readings and cycle results for trend analysis)
Steps
Estimated time: 2-3 hours
- 1
Drain battery to off
Use the iPhone normally until it shuts down due to low battery. Do not force-close apps aggressively; allow the device to reach its natural off state for consistency.
Tip: Turn off heavy-background processes by closing apps before starting to ensure a clean discharge. - 2
Connect charger and prepare for full charge
Attach the charger and cable, ensuring a stable connection. Do not unplug or switch chargers mid-cycle to prevent fluctuating current that could skew readings.
Tip: If the charger feels warm, pause and let the device rest to avoid heat-related drift. - 3
Charge to 100% without using the device
Keep the phone idle and allow the battery to reach full capacity. Avoid heavy use, gaming, or screen-intensive tasks during the charge.
Tip: If you notice the device reaching 100% quickly and then dropping, pause briefly and confirm the charger connection is stable. - 4
Let it settle at 100%
Once at 100%, wait 15–30 minutes to let the voltage stabilize and the gauge reflect the final state more accurately.
Tip: Use a timer reminder to ensure you don’t rush this settling period. - 5
Power cycle and verify
Power off, then turn the device back on and resume typical usage to observe gauge behavior after the first cycle.
Tip: Log your readings to compare against subsequent cycles. - 6
Optional second cycle
If readings still feel off after the first cycle, repeat steps 1–5. Do not exceed two or three cycles on aged batteries.
Tip: A second cycle is useful only if the gauge appears consistently inaccurate.
Questions & Answers
Is calibration necessary for every iPhone model?
No. Calibration is not required for every model, and its value depends on gauge accuracy and battery health. For some devices, software updates or replacements affect readings more than calibration itself.
Calibration isn’t always necessary; it helps when readings seem off after updates or repairs. If in doubt, start with a single cycle and assess the results.
Can calibration fix battery health issues?
Calibration does not restore chemical capacity. It only aligns the software gauge with the actual energy available. Degraded cells require replacement for real improvements.
Calibration aligns the gauge; it doesn’t improve the battery’s health.
How many cycles are recommended?
Typically one cycle is enough to recalibrate the gauge. If readings remain inaccurate, a second cycle can be attempted, but avoid more than two on older batteries.
Usually one cycle; you may try a second if needed.
Will calibration cause data loss or void warranties?
Calibration involves software and charging behavior; it won’t erase data. It should not affect warranties, but avoid hardware disassembly that isn’t necessary.
Calibration doesn’t erase data and is not harmful to warranties when done safely.
What if my iPhone won’t turn on after calibration?
If the device fails to power up after a cycle, disconnect power and seek professional service. A stubborn failure can indicate deeper hardware issues.
If it won’t turn on, stop and consult a technician.
Does iFixit provide official calibration steps?
iFixit provides repair and replacement guides; calibration guidance is interpretive and aligns with their safety-first philosophy. Use their resources as reference, not a replacement for professional service when needed.
Use iFixit as a reference; follow safety-first guidelines and seek professional help if needed.
When should I replace the battery instead of calibrating?
If you observe swelling, rapid health drop, or persistent misreadings after attempts, replacement is recommended. Calibration is a diagnostic aid, not a cure for hardware wear.
Replace the battery if swelling or health decline continues after calibration.
Watch Video
Key Takeaways
- Calibrate gauge, not health.
- Follow safe discharge/charge cycles.
- Use proper tools and original charger.
- Gauge accuracy improves with documented cycles.
- Seek replacement if swelling or erratic behavior occurs.