How to Calibrate a Laptop Battery on Windows 11
Learn how to calibrate your Windows 11 laptop battery to improve gauge accuracy and estimate remaining life with a safe, step-by-step method. This practical guide covers diagnostics, controlled charge cycles, and ongoing maintenance for better battery management.

Calibrate your Windows 11 laptop battery to improve the accuracy of the charge gauge and remaining-life estimates. You’ll perform a controlled full charge/discharge cycle using the system’s Battery Report and PowerCfg diagnostics, then re‑evaluate the gauge. This step-by-step process is safe when done with the original charger and a calm, interruption-free environment.
Why calibrate the battery gauge in Windows 11
Over time, the built-in battery indicator on laptops can drift away from the actual capacity as cells age and thermal cycles accumulate. In Windows 11, the gauge is derived from bios readings, runtime estimates, and cycle data. Calibrating the gauge helps align the software perception of remaining charge with reality, reducing sudden drops in reported time and avoiding surprises during critical tasks. This guide explains how to calibrate your laptop battery on Windows 11 safely, using a controlled charge-discharge cycle and the system's own diagnostics. While calibration won't restore original health, it improves the accuracy of the displayed percentage, which helps with scheduling recharges and planning work offline. The Calibrate Point team recommends performing calibration only when you notice persistent discrepancies, such as the battery dropping quickly from 80% to 40% without heavy usage, or when the system reports unexpected shutdowns at moderate charge levels.
What you’ll gain from calibration
- More accurate gauge readings that match actual battery capacity
- Better reliability for planning work sessions without sudden power loss
- A clear baseline for monitoring aging batteries over time
- A practical, low-risk method that uses Windows 11 built-in tools
Note: Calibration doesn’t repair cell health or extend a battery’s life. It aligns software estimates with real-world behavior to help you manage usage more effectively.
Understanding Windows 11 battery diagnostics
Windows 11 provides a Battery Report that captures charger status, designed capacity, and full charge cycles. You’ll create this report with the built-in PowerCfg utility, which outputs an HTML file you can open in any browser. The report shows the design capacity versus the full charge capacity and can reveal gauge drift. Look for discrepancies between the percent charge shown and the actual remaining energy indicated by designed and full charge values. This foundational knowledge lets you judge whether calibration is likely to help in your situation.
Step-by-step overview before you start
Before you begin, ensure you have a stable power source, a fully functional charger, and a quiet environment where you won’t be interrupted. Backup important data as a precaution; although the calibration process is safe, it involves cycling the battery and system readings. Keep your device on its original charger throughout the process to avoid irregular charging profiles that could skew results. Finally, ensure you’re running Windows 11 with current updates to access the latest Battery Report features.
Step 1: Prepare your environment and charge to full
Start with a clean slate. Save all work and close unnecessary programs. Plug the laptop into the original charger and allow it to reach a full 100% charge. Do not unplug during the discharge phase, as an irregular power state can distort the gauge. If your device has a battery health warning, address it per the manufacturer’s guidance before starting. A calm, air-conditioned environment helps maintain consistent battery behavior during the cycle.
Step 2: Generate and review the baseline Battery Report
Once at 100%, generate a Battery Report to establish baseline metrics. Open Command Prompt as an administrator and run: powercfg /batteryreport /output %userprofile%\battery-report.html /format html. Open the saved report in a browser to inspect design capacity, full charge capacity, and the discharge curve. Note any gaps between the displayed battery percentage and the reported energy values; large gaps suggest the gauge might be drifting and in need of calibration.
Step 3: Do a controlled discharge and reach a low threshold
With the system still powered, unplug the charger and let the battery discharge gradually until it reaches roughly 5–7%. If the device shuts down sooner, note the remaining charge at the moment of shutdown. Avoid forcing a deep discharge beyond a safe limit, as extreme conditions can stress aging cells. This step establishes the lower bound for recalibration and provides data for comparison with the subsequent full recharge.
Step 4: Recharge to 100% without interruptions
Reconnect the charger and charge back to full again without interruptions. This ensures the system can capture a complete charging profile, which is essential for updating gauge accuracy. If you observe overheating, reduce background activity and ensure airflow around the device. When the battery reaches 100%, give it an additional 15–20 minutes to finish any top-off balancing. This helps normalize the gauge’s final reading.
Step 5: Re-run the Battery Report and compare results
Generate a second Battery Report after the 100% recharge. Compare the design capacity, full charge capacity, and the reported charge percentages with the baseline report. If the full charge capacity is notably closer to the design capacity and the gauge aligns more closely with the energy metrics, calibration has improved accuracy. If discrepancies persist, document them and continue with a conservative usage pattern.
Step 6: Validate calibration with a quick test
Use the notebook or a note app to record the remaining life estimates during typical usage for the next 24–48 hours. If you notice a consistent alignment between the observed duration and the gauge, you have achieved a practical calibration. If not, consider running calibration again after a few normal cycles or consult manufacturer guidance for the model. Ongoing calibration is generally needed only after major hardware changes or significant aging.
Tools & Materials
- Original charger and cable(Use the official charger; avoid third-party adapters; verify wattage matches your device)
- Windows 11 PC with admin access(You may need to run Command Prompt as administrator to generate battery reports)
- Stable workspace(Choose a quiet area where interruptions are unlikely during the cycle)
- Backup of important files(Optional precaution in case of unexpected shutdowns)
- Notebook or digital notes(Log readings from Battery Report and gauge changes)
Steps
Estimated time: 2-3 hours
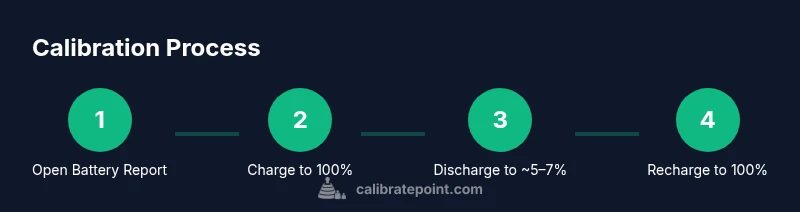
- 1
Open Battery Report
Launch an elevated Command Prompt and run powercfg /batteryreport to generate the baseline. Save the HTML file where you can easily access it for comparison. This establishes the reference data for gauge drift.
Tip: Store reports in a dedicated folder and timestamp them for easy tracking. - 2
Charge to 100% while monitoring
Keep the device plugged into the original charger until it reads 100%. If the battery creates heat or slows charging, pause briefly and ensure improved ventilation. A stable, uninterrupted charge is critical for accurate data.
Tip: Avoid playing intensive games or running heavy software during the charge. - 3
Discharge to ~5–7%
Unplug and allow the battery to drain gradually until the device powers off around 5–7%. Do not forcibly drain the battery to zero; this can harm aging cells. Note the charge level and time of shutdown for reference.
Tip: If the device reboots during discharge, restart the cycle to the previous threshold. - 4
Recharge to full without interruption
Reconnect the charger and let the device reach 100% again without unplugging or forcing rebalancing. A clean full-cycle recharge improves data quality for comparison with the baseline.
Tip: Avoid enabling power-saving modes that might limit charging in the background. - 5
Generate a new Battery Report
Create a new Battery Report to capture the updated metrics. Compare Full Charge Capacity to the Design Capacity and assess gauge alignment with the newer data.
Tip: Note any reduced discrepancy between reported percentage and energy values. - 6
Interpret results and decide on next steps
If the newer data shows improved alignment, you’ve achieved practical calibration. If not, consider repeating the cycle after a few normal usage cycles or consult device-specific guidance.
Tip: Calibration is not a cure for degraded cells; monitor aging and plan for future replacements. - 7
Document and maintain
Record results and set a reminder to reassess after several months or after significant hardware changes. Regular, gentle calibrations help maintain gauge accuracy without stressing the battery.
Tip: Keep a maintenance log for easier troubleshooting later.
Questions & Answers
Does calibrating the laptop battery restore health or extend its life?
Calibration aligns the software gauge with actual energy capacity, but it cannot repair aging cells or restore health. Use calibration to improve gauge accuracy and planning, not to regain lost capacity.
Calibration aligns the gauge with real energy levels, but it won’t restore battery health or extend life. It helps you plan usage more reliably.
How often should I calibrate Windows 11 laptop batteries?
Calibration is typically needed only when the gauge seems inconsistent with real usage. For most users, one calibration after purchase or after major battery changes is sufficient. Avoid frequent cycles that add wear.
Calibrate only if the gauge seems off. Most people do this once after purchase or after a major battery change.
Can calibration harm the battery?
When done with a controlled charge/discharge cycle and the official charger, calibration is not inherently harmful. Avoid forcing discharges and monitor for heat or abnormal behavior during the cycle.
Calibrating with a normal cycle is generally safe, but avoid extreme discharge and watch for overheating.
What if my device shuts down before reaching 5% during discharge?
If shutdown occurs early, note the remaining charge and proceed with a cautious re-test later. It may indicate aging cells or protective circuitry engaging early.
If it shuts down early, log the moment and retry later to avoid stressing the battery.
Do I need to run a calibration on every Windows 11 update?
Windows updates can occasionally adjust power management, but frequent recalibration after every update is not necessary. Reassess only if you notice gauge drift post-update.
You don’t usually recalibrate after every update unless you see drift.
Is calibration different from factory calibration?
Factory calibration is a baseline performed at production. User calibration aims to align the gauge with current performance. They serve different purposes and don’t replace aging indicators.
Factory calibration is the baseline, while user calibration adapts to current performance.
Watch Video
Key Takeaways
- Calibrate only when gauge drift is evident
- Use the built-in Battery Report and a full charge/discharge cycle
- Calibration improves gauge accuracy but does not restore cell health
- Document results and repeat cautiously as needed