How to Calibrate Battery Gauge in Windows 10
Learn how to calibrate the Windows 10 battery gauge with a safe full charge-discharge cycle. This practical guide from Calibrate Point explains how to verify accuracy using Battery Report and maintain reliable battery life.

By calibrating your Windows 10 laptop battery gauge, you refresh the system’s indicator so it more accurately reflects remaining charge. You’ll complete a full, controlled charge-discharge cycle, test the indicator against real usage, and verify results with built-in tools like Battery Report. Plan for a quiet session, the correct charger, and about 4-6 hours.
What calibration achieves for Windows 10 battery gauges
Battery gauge calibration on Windows 10 helps align the OS’s remaining-juice estimate with the battery’s actual capacity. When the gauge drifts, Windows may overstate or understate a charge, leading to unexpected shutdowns or mis-timed work. According to Calibrate Point, the most effective calibration happens when you perform a complete, controlled discharge followed by a full recharge, after which the system regenerates a fresh baseline. By following a methodical cycle you gain a more trustworthy gauge, better planning for busy days, and fewer surprises when you’re working away from a power outlet. This guide stays practical for DIY enthusiasts, technicians, and professionals who want to extend productive time between charges without buying specialized hardware. Throughout, you’ll see how to verify results with Windows’ built-in tools so you can confirm the gauge is behaving as expected, not simply following an old expectation.
Before you start: prerequisites and safety
Preparation matters as much as the steps themselves. Ensure you have a reliable charger and a power outlet in a quiet, temperature-controlled space. Back up essential work, close nonessential apps, and disable automatic sleep during the calibration window. If you notice the device overheating or the battery swelling at any point, stop the process and seek professional service. The Calibrate Point team emphasizes safety first: calibration should not be rushed, and you should never leave a device unattended while running on battery for extended periods. Having a recorder handy to jot down Battery Report findings helps you track drift and decide when a re-calibration is warranted.
Planning your calibration session and choosing the right window
Choose a time block where you can monitor the process without interruption. A full discharge and recharge typically takes several hours, so plan for a daytime session where you can work on plug-in tasks in parallel if needed. Make sure the device is on a stable surface, vents are clear, and the charger remains connected during the recharge phase. If you use power-saving modes or battery-saving extensions, disable them for the calibration window to keep power delivery consistent. Record the start time, the initial battery percentage, and the expected discharge length so you can compare it later to Battery Report data. Planning helps you separate calibration artifacts from normal usage patterns and gives you confidence in the results.
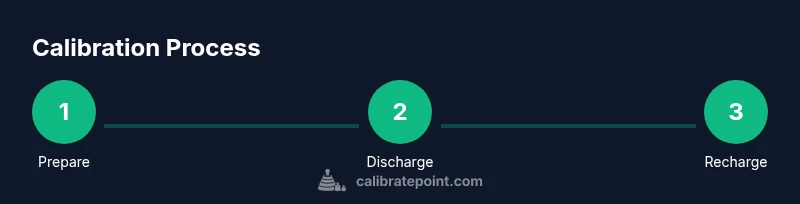
Step-by-step overview before you start
Before you dive into the granular steps, set expectations about what calibration can and cannot accomplish. It calibrates the gauge in Windows to reflect actual capacity more accurately, but it does not physically restore battery health or extend runtime beyond what the battery can reasonably provide. The process involves a controlled discharge to a low level, a full recharge, and a post-cycle validation. Keeping the charger connected during recharge prevents variations caused by partial charging, and performing the test on a cool, ventilated desk minimizes heat-induced measurement drift. This overview helps you stay focused on the end goal: a trustworthy gauge that aligns with real-world usage.
How to plan your calibration session: timing and goals
Set a target window that allows for a complete cycle plus verification. Expect 4-6 hours for the full process on average, depending on battery size and the device's power draw. Define success criteria ahead of time: the Battery Report should show a Full Charge Capacity close to, but not less than, the Design Capacity, and the real-world runtime should align with the gauge estimates within a reasonable margin. Document the baseline values at the start so you can measure drift after the calibration. Clear goals keep you from over-calibrating and help you determine when a re-calibration is necessary in the future.
How to perform the full charge-discharge cycle safely
Perform the discharge until the system signals a critical battery level or automatically powers down, then connect the charger and let it reach 100% without interruptions. Avoid using the device intensively during discharge; this minimizes measurement noise. After reaching full charge, disconnect and use the device normally for a short period to gauge real-world behavior, then repeat the verification step with Battery Report. The goal is to establish a stable baseline for comparison after the next power cycle. If you must interrupt, note the point and proceed with the calibration during a second session to preserve data integrity.
Generating and interpreting Battery Report
Windows can generate a Battery Report that details design capacity, full charge capacity, and recent usage. Open a Command Prompt as administrator and run powercfg /batteryreport, then locate the HTML file in the user profile. Review the Design Capacity versus Full Charge Capacity to gauge wear and drift. A meaningful calibration will often show Full Charge Capacity approaching or matching Design Capacity more closely after the cycle. If there is significant mismatch, consider repeating the cycle or evaluating battery health from a professional diagnostic tool. Keeping a log of these reports over time helps you track aging trends.
Real-world testing and validating results
After calibration, test how long the device lasts under typical workloads and compare with the gauge estimate. Run a controlled workflow that reflects your usual usage: streaming, light productivity, and occasional background tasks. Note the time-to-drain and the gauge reading at key intervals. If the gauge consistently lags behind actual usage by a meaningful margin, you may need to recalibrate again after several weeks or if you replace the battery. The goal is to have the gauge mirror real-world performance as closely as possible so you can plan work sessions with confidence.
Maintenance, aftercare, and when to redo calibration
Treat calibration as a periodic maintenance task rather than a one-off fix. Recalibrate after major software changes, battery replacements, or if you notice persistent discrepancies between gauge readings and observed runtime. Keeping your Windows updates current also helps keep calibration logic aligned with power-management improvements. Store away any findings securely and reference Battery Report data at regular intervals to confirm continued accuracy. As with any calibration task, consistency and documentation are your best allies.
Common myths and misconceptions about battery calibration
A common myth is that calibration can restore battery health or permanently extend runtime. Calibration simply aligns software estimates with the current hardware state; it does not reverse wear or increase maximum capacity. Another misconception is that calibration must never be redone; in fact, recalibration can be helpful after battery aging or replacement. Understanding these nuances helps you use calibration as a reliable diagnostic tool rather than a cure-all.
Tools & Materials
- Windows 10 laptop(Device to calibrate; ensure it has administrative access)
- Original charger and outlet(Stable power connection during recharge)
- Powerful, quiet environment(Minimal interruptions during cycle)
- Battery Report reference (BatteryReport.html)(Generated via powercfg /batteryreport)
- Notebook or digital log(Record readings and times for comparison)
- Temperature monitor (optional)(Track device temperature during discharge)
Steps
Estimated time: 4-6 hours
- 1
Prepare the device and environment
Plug in the charger and set the device to a stable, cool surface. Close nonessential apps and disable sleep modes to avoid interruptions during the cycle.
Tip: Keep the device in a well-ventilated area and use the original charger for consistent power delivery. - 2
Update drivers and firmware
Check for driver updates for battery and chipset, and install any available firmware updates recommended by the manufacturer. Restart if prompted to ensure changes take effect.
Tip: A clean driver state reduces drift during calibration. - 3
Initiate full discharge
Use the laptop normally or run a controlled workload until the system reaches a low battery state or auto-shutdown. Save work frequently to avoid data loss during the test.
Tip: If you must interrupt, document the last percentage and resume later to preserve cycle integrity. - 4
Charge to 100% without interruption
Reconnect power and allow a complete, uninterrupted recharge to full capacity. Avoid using the device heavily during this phase to minimize measurement noise.
Tip: Use the original charger and keep peripherals minimal to maintain stable charging. - 5
Generate Battery Report
Open Command Prompt as administrator and run powercfg /batteryreport. Locate the HTML file and review design capacity against the current full charge capacity.
Tip: Note the numbers and compare them to prior reports to gauge aging and drift. - 6
Validate with real-world usage
Power the device and track real-time usage until critical levels. Compare observed runtime to what the gauge predicted after calibration to confirm alignment.
Tip: Repeat the test with representative workloads to ensure consistency.
Questions & Answers
What is battery gauge calibration and why is it necessary on Windows 10?
Battery gauge calibration aligns Windows estimates with the battery's actual capacity, reducing surprises from misread remaining time. It does not restore health or increase capacity, but it improves planning accuracy.
Battery gauge calibration helps Windows show a more accurate remaining time, but it does not fix the battery's health.
How long does calibration typically take on a Windows 10 laptop?
A full cycle usually takes about four to six hours, depending on battery size and usage during the discharge phase.
Expect about four to six hours for a full discharge and recharge cycle.
Will calibrating the battery void my warranty?
Calibrating the gauge using built-in Windows tools is safe and does not void warranties. It only updates software-based estimates.
Calibrating the gauge with Windows tools is safe and generally won’t affect your warranty.
Should I calibrate if my battery health is poor?
Calibration improves gauge accuracy, but it cannot restore capacity. If wear is heavy, consider battery replacement for actual runtime gains.
Calibration helps gauge accuracy, but it won't restore a worn-out battery.
Can this calibration be applied to desktops or only laptops?
This process targets devices with rechargeable batteries and Windows power management. Desktops without batteries aren’t candidates for gauge calibration.
It's meant for battery-powered devices, not desktop units without batteries.
How often should I recalibrate my battery gauge?
Recalibrate after major software updates, battery replacements, or noticeable drift. A yearly check-in is a reasonable baseline for many users.
Recalibrate after big changes or drift, typically once a year as a baseline.
Watch Video
Key Takeaways
- Calibrate to align gauge with actual capacity
- Perform a full charge-discharge cycle safely
- Verify results with Battery Report and practical tests
- Document findings for ongoing maintenance