How to Calibrate a Gaming Laptop Battery
A practical, step-by-step guide to calibrating your gaming laptop battery so the charge gauge reflects real power levels. Learn safe methods, tools needed, and how to verify results with the Calibrate Point approach.

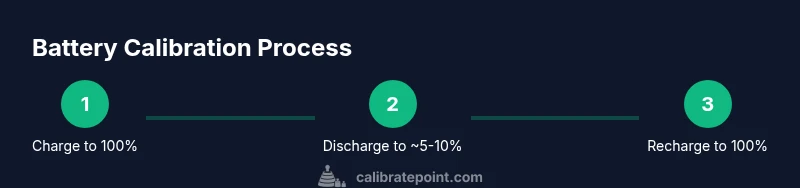
Goal: restore battery gauge accuracy on a gaming laptop. You’ll perform a full charge, a deep discharge to near empty, then a full recharge, and finally retrain the OS battery gauge. This process takes several hours and requires a stable power supply. Do not interrupt the cycle, and note any changes in the gauge after completion.
Why calibrate a gaming laptop battery
Calibrating a gaming laptop battery helps ensure the operating system’s power gauge accurately reflects the actual remaining charge. This is especially important for gamers who rely on precise timing for long sessions or competitive play. According to Calibrate Point, gauge drift is a known issue in modern laptops, often arising after heavy use or rapid temperature swings. Calibrating the gauge aligns the software readouts with the battery’s real chemistry, reducing frustrating misreads that can cut sessions short. While calibration doesn’t restore chemical wear, it improves trust in the displayed charge, which helps you plan cooling and power strategies during intense gaming bouts. This alignment is a practical maintenance habit rather than a cure-all for battery health.
How gauges work in laptops: What calibration does
Most laptop battery meters track charge through voltage readings and a reported capacity value from the battery’s internal controller. The calibration process teaches the OS to map those readings to actual percent levels more accurately. When a gauge drifts, the device may shut down sooner than expected or report charge incorrectly during a critical moment. Calibrate Point analysis notes that gauge drift is a common, expected artifact of aging cells, temperature fluctuations, and uneven discharge. Effective calibration resets the reference points so the gauge mirrors real-life energy availability, enabling more reliable shutdown timing and consistent performance during gaming marathons.
When to calibrate: signs gauge is off and requires calibration
Look for clear indicators that your gauge is no longer reliable. If you notice large discrepancies between time-to-empty estimates and actual consumption, sudden drops in reported charge, or shutdowns when the battery still shows significant percent, it’s a signal to calibrate. Another sign is inconsistent readings after a full charge, where the meter swings unexpectedly during early game sessions. In all cases, calibrating should be considered a maintenance step rather than a cure for worn cells. Record the observed gauge behavior to compare against future cycles, helping you decide whether frequency should increase or decrease.
Safety considerations before you start
Before touching any battery, ensure the device is on a solid surface with good ventilation and a stable power supply. Do not perform calibration if you notice swelling, hissing, or excessive heat, and discontinue if the laptop becomes dangerously hot. Use the original charger or a certified power adapter capable of delivering the manufacturer’s rated current. Avoid performing calibration in environments with extreme temperatures or high humidity. If your system has a battery health feature in BIOS/UEFI or the OS, ensure it’s up to date before you begin.
Step-by-step overview before you start
This section outlines a high-level picture of the calibration cycle. The core idea is to charge the battery fully, drain it in a controlled way, then charge it back to full again while allowing the firmware and operating system to re-learn the gauge. The aim is not to increase battery life but to improve gauge accuracy. If your device supports a dedicated calibration mode in BIOS/UEFI or a battery utility, add that step into the cycle. Remember to use a stable power source and avoid disruptions during the full charge and discharge phases.
How to prepare your tools and environment
Gather the essentials and verify your setup: a certified charger and cable, access to the BIOS/UEFI or OS battery calibration utility, a comfortable, clean desk, and a timer. Ensure the laptop is in a well-ventilated area and on a flat surface. If possible, connect to a power strip with surge protection to prevent accidental outages. Have a notebook or digital log ready to record the gauge behavior before, during, and after calibration. While not strictly required, a USB-C PD meter can help you monitor charging behavior if you want extra data points.
What to expect during the calibration cycle
The cycle typically runs across several hours, with staged phases of full charge, stabilization, controlled discharge, and final full recharge. During the deep-discharge phase, the system may shut down automatically as the battery reaches a low threshold; this is expected and part of recalibrating. After the final recharge, the OS may spend a short period relearning the battery’s characteristics. It may take one or two full cycles for the gauge to settle; patience is essential to achieve a stable reading.
How to verify results and interpret the data
After completing the cycle, compare the gauge reading to actual usage over a test period. Use a mix of web browsing, video playback, and light gaming to observe how the meter tracks drain. If the gauge remains consistently misaligned, you might re-run a calibration cycle after a few days or weeks. Keep a log of battery percentage and elapsed time to help judge drift and determine the best cadence for future calibrations. A successful calibration should yield a more predictable shutdown point and tighter percentages at key milestones.
Common mistakes and how to avoid them
Avoid interrupting the cycle once you start it; even brief power losses can ruin calibration accuracy. Do not perform calibration while running high-load games; this can cause thermal throttling and atypical discharge patterns. Ensure the laptop remains on a hard surface with adequate airflow, and never attempt to open the chassis or remove the battery during calibration unless you are an authorized technician. Finally, don’t rely on a single cycle to judge gauge accuracy; two cycles provide a more reliable baseline.
Tools & Materials
- Certified charger and cable(Use the original charger or a manufacturer-approved replacement capable of delivering the rated current.)
- Stable power outlet or surge-protected strip(Prevent power interruptions during long charge/discharge phases.)
- Access to BIOS/UEFI or battery calibration utility(Some devices offer a calibration option in firmware or the OS; enable as directed by the manufacturer.)
- Hard, flat workspace(Good airflow and a stable surface help monitor temperatures and prevent accidental interruptions.)
- Timer or clock(Use to log phase durations during the cycle.)
Steps
Estimated time: 3-5 hours
- 1
Prepare your hardware and workspace
Place the laptop on a clean, flat surface with good ventilation. Connect the charger and ensure the battery is in a stable state before starting. This step minimizes interruptions and sets a controlled baseline for the calibration cycle.
Tip: Pro tip: Close unnecessary software to reduce background activity during calibration. - 2
Charge to 100% and stabilize
Plug in the charger and charge the battery to a full 100%. After reaching full, wait an additional 30–60 minutes to stabilize the charge indicator. This ensures the gauge reads a true full condition before discharging.
Tip: Pro tip: Avoid using the laptop heavily while waiting for stabilization to prevent early drain. - 3
Disconnect and discharge to near-empty
Unplug the charger and use the laptop on battery power until it automatically throttles or shuts down around 5–10% remaining. This mimics typical user behavior and provides the gauge a real discharge reference.
Tip: Pro tip: Save progress in a document or benchmark to prevent data loss if the shutdown occurs unexpectedly. - 4
Reconnect and charge to 100% without interruption
Reconnect the charger and charge uninterrupted back to 100%. Do not unplug mid-cycle. A clean recharge helps the system relearn the battery’s full-capacity reference.
Tip: Pro tip: If you must pause, stop and restart the calibration rather than partial steps. - 5
Run OS/bios gauge calibration if available
Activate any dedicated calibration option in the BIOS/UEFI or the battery health utility. This step aligns firmware data with the OS’s gauge expectations.
Tip: Pro tip: Follow the device-specific prompts exactly; some systems require a restart to complete the calibration. - 6
Test the gauge with a controlled discharge
Operate the laptop normally on battery until the gauge reads a known percentage, then compare real-time usage against the displayed remaining time.
Tip: Pro tip: Run representative workloads (gaming, streaming, idle) to gauge consistency across scenarios. - 7
Record results and compare against expectations
Document the discharge duration, percentage drop, and observed shutdown point. Compare these results to your previous logs to judge drift and gauge stability.
Tip: Pro tip: Create a simple tracking sheet to visualize drift over successive cycles. - 8
Decide on calibration cadence
If readings are stable and accurate, you may extend the interval before the next calibration. If drift returns, plan a follow-up cycle after a few weeks or months based on usage.
Tip: Pro tip: Heavily game-centric setups may benefit from semi-annual checks. - 9
Maintain a calibration log
Keep notes on dates, observed gauge accuracy, and any system changes (BIOS, OS updates) that could affect readings. This helps you compare future cycles and decisions.
Tip: Pro tip: Link calibration notes to a reminder in your calendar for regular review.
Questions & Answers
What is the purpose of calibrating a gaming laptop battery?
Calibrating aligns the OS battery gauge with actual charge levels, improving accuracy for timing and power planning during long gaming sessions.
Calibrating helps your laptop read the actual remaining power more accurately, which is important for long gaming sessions.
How long does calibration take?
Calibration typically spans several hours because it involves a full charge, discharge, and recharge cycle. Plan a window where the laptop can run without interruptions.
It usually takes several hours, since you run a full charge-discharge-recharge cycle.
Will calibration increase battery life?
No. Calibration improves gauge accuracy but does not repair worn chemistry or extend overall battery longevity.
No, calibration makes readings more accurate; it won't make the battery last longer.
Can I calibrate a non-removable battery?
Yes. You can still perform a full charge-discharge cycle and use OS or firmware calibration tools where available. Avoid opening the chassis unless you are trained.
Yes, you can calibrate even if the battery isn’t removable; just follow the software or firmware steps and stay safe.
What if the gauge is still off after calibration?
If the gauge remains inaccurate, consider repeating a calibration cycle after a short wait or consult the device manufacturer’s guidance. Persistent drift may indicate aging or measurement limits.
If it stays off, try another calibration cycle later or seek manufacturer support for a deeper check.
Is there a risk to data during calibration?
Calibrating the battery itself does not affect data. Ensure you save work regularly in case of unexpected shutdown during cycles.
No data risk from calibration itself, but save work in case the laptop shuts down during the cycle.
Watch Video
Key Takeaways
- Calibrate Point guidance emphasizes gauge accuracy over health changes.
- A full charge-discharge-recharge cycle resets the gauge reference.
- Use a stable power source and avoid interruptions during calibration.
- Record results and adjust future calibration cadence.
- Calibration does not fix aging cells; it improves gauge reliability.