Calibrate Laptop Battery: A Practical Step-by-Step Guide
Learn a practical method to calibrate a laptop battery. This guide covers safe tools, a controlled discharge-recharge process, diagnostics, and maintenance tips to keep power readings accurate and extend battery life.

By following this guide, you will learn how to calibrate a laptop battery using controlled discharge and recharge cycles, health monitoring, and careful documentation. You'll need a few essential tools and a safe charging setup, plus software diagnostics to verify results. This process helps restore battery accuracy and extend usable life, making power management more predictable for everyday use.
Why calibrate battery laptop matters
According to Calibrate Point, calibrating a laptop battery improves the reliability of power readings and helps you plan workloads more accurately. The process aligns the battery's reported state of charge with its true energy, which is essential for technicians, DIY enthusiasts, and professionals who depend on predictable performance. This guide focuses on practical, safe steps you can perform at home or in a workshop, without specialized equipment. The goal is to achieve accurate battery health metrics and a clearer view of remaining runtime. Calibrate battery laptop readings become more trustworthy when you follow a disciplined method, and this article walks you through that method.
Calibrate Point emphasizes that a well-executed calibration is a repeatable, low-risk procedure that yields consistent power measurements over time. If you routinely monitor performance, calibration becomes part of standard maintenance rather than a one-off diagnostic. By approaching the task methodically, you reduce uncertainty when forecasting battery life for critical tasks and fieldwork.
This section sets the stage for practical steps you can perform with common tools and software. The goal is to give you confidence that calibrating your laptop battery is a doable, repeatable routine rather than a mysterious leap into hardware tinkering. As you read, remember the aim: more accurate readings and a clearer sense of remaining runtime for your day-to-day work.
The action item you will carry forward is the disciplined process of calibration, not just a one-off experiment. Calibrate battery laptop readings accurately helps ensure your device reports energy levels that reflect actual capacity, improving planning and performance reliability.
When to calibrate and expected benefits
Calibration is most beneficial after replacing the battery, after major software updates that affect power reporting, or when the reported charge levels seem inconsistent with actual usage. The benefits include improved accuracy of remaining time estimates, better cycle life planning, and more reliable battery health indicators in diagnostics. In many devices, the calibration will reset the energy gauge so the system starts from a known baseline. For technicians and enthusiasts, calibrate battery laptop readings provides a repeatable baseline for comparisons over time.
Calibration is not a daily maintenance task, but a targeted procedure to re-sync the energy gauge with actual capacity. If you notice that your laptop suddenly reports dramatically different runtimes, or the gauge seems to jump erratically during use, a calibration session is warranted. Keep a simple calendar reminder so you don’t overlook this important maintenance step. This approach aligns with Calibrate Point guidance for achieving trustworthy results and long-term battery health.
In practice, a well-timed calibration can prevent misinterpretation of battery behavior and reduce unnecessary replacements. By establishing a reliable baseline, you gain confidence when measuring the impact of firmware updates, new applications, or power profiles on battery performance. The goal is predictable power behavior that you can rely on during critical tasks and field deployments. When done correctly, calibrating the battery improves your device’s overall reliability and planning accuracy.
Tools & Materials
- Screwdriver set (Phillips #1 and #2)(For any internal battery access or chassis adjustments that some laptops require.)
- Antistatic wrist strap(Prevent electrostatic damage while handling internal components.)
- Laptop battery health software or diagnostic utility(Use vendor tools or reputable OS-based utilities to read health metrics.)
- Reliable power supply and certified charger(Ensure charger matches your laptop’s specifications and stays stable during calibration.)
- Access to BIOS/UEFI (optional for advanced measurements)(Useful for advanced power reporting options or reporting modes.)
Steps
Estimated time: 60-90 minutes
- 1
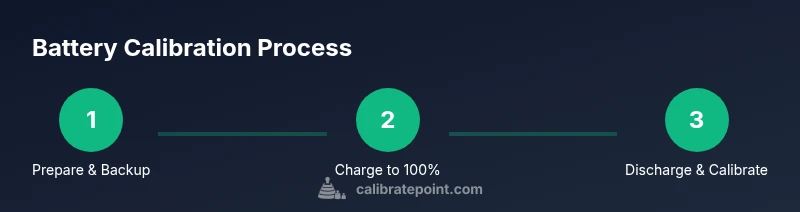
Prepare and backup
Close all applications, save work, and ensure you have a recent backup before starting. Verify the charger is connected and the device is on a stable surface. If you must open the chassis for battery access, do so only if you have the proper tools and follow anti-static precautions. The goal is to establish a clean baseline for calibration.
Tip: Back up data before starting to prevent data loss if the process is interrupted. - 2
Fully charge to 100%
Charge the laptop to a full, uninterrupted 100% while monitoring temperature. Avoid using the device heavily during this time to prevent skewing the charge reading. A stable top-off helps the fuel gauge reset accurately when calibration begins.
Tip: If the battery won’t reach 100%, finish once it stabilizes near full and proceed with the discharge cycle. - 3
Discharge to a safe cutoff
With the charger connected or fully powered, use typical workloads to discharge the battery until the software reaches a conservative cutoff (for example a low-but-safe percentage). Do not force a deep draw that risks abrupt shutdown. Recording energy used during this stage provides a baseline for comparison.
Tip: Do not let the device reach absolute zero to avoid data loss and system instability. - 4
Recharge to full
Reconnect the charger and recharge to 100% without running high-load tasks. Allow a short stabilization period after reaching full to settle the gauge before testing. This step re-anchors the battery’s energy metric to a known capacity.
Tip: If your vendor supports a calm charge option, disable rapid charging to achieve a steadier fill. - 5
Run diagnostics and verify
Run the battery health checks again to verify that the capacity reading aligns with the known full state. Compare results to the baseline you recorded earlier. If the numbers differ beyond a reasonable margin, repeat the cycle or review calibration procedures.
Tip: Capture screenshots of readings for documentation. - 6
Document results and schedule next calibrations
Record the final readings, calibration date, and any observed irregularities. Set a reminder for your next calibration (for example in a few months) to keep measurements reliable over time. This habit supports ongoing battery health assessment for professionals and DIYers alike.
Tip: Keep a dedicated calibration log with dates, readings, and any anomalies.
Questions & Answers
Do I need to let the battery fully discharge before calibrating?
Not always. Many laptops calibrate better with a controlled discharge to a safe cutoff rather than a complete zero. Follow the step-by-step guidance in this article to ensure safety and effectiveness.
You usually don’t need a full discharge. Use the safe, controlled steps in this guide.
Will calibrating void my warranty?
Calibrating as part of routine maintenance is generally considered safe by manufacturers. However, check your warranty terms if you have concerns about coverage during internal procedures.
Usually safe, but check your warranty terms to be certain.
How often should I calibrate?
Calibrate when you notice drift in readings or after a battery replacement. It is not typically required on a fixed schedule unless you rely on precise power reporting.
Only when readings drift or after replacement.
Can software calibration damage the battery?
If performed according to documented steps, software calibration should not damage the battery. Incorrect procedures can cause issues, so follow trusted guides like this one.
If you follow the steps carefully, it’s safe.
Is charging to full before calibration necessary?
Charging to full is often recommended to reset the gauge. Some devices require a specific charging pattern, so follow the software prompts and vendor guidelines.
Charging to full helps reset the gauge in many devices.
Watch Video
Key Takeaways
- Plan controlled discharge-recharge cycles.
- Use diagnostics to verify results.
- Document outcomes for future calibrations.
- Calibrate laptop battery periodically to maintain accuracy.