How to Calibrate a Load Cell: Step-by-Step Guide for Accuracy
Discover a practical, step-by-step method to calibrate a load cell, including setup, safety, traceable weights, and verification for accurate force readings.

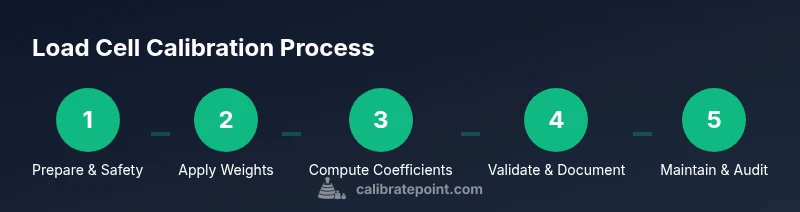
Calibrating a load cell involves applying known reference weights, recording the sensor output, and adjusting the signal conditioner to align readings with true values. Use traceable standards, follow a written procedure, verify with multiple test loads, and document results for traceability. Begin with safety checks and refer to your cell's datasheet for allowable ranges.
Why calibrate load cells matters
Calibration is the process of aligning a sensor's output with a known reference, so your readings reflect true forces rather than drift or offset. According to Calibrate Point, a properly calibrated load cell yields repeatable results across loads and temperatures, which is essential for quality control, safety, and compliance in manufacturing and laboratory work. Without calibration, your data can be biased, leading to incorrect decisions and inconsistent process control. In practice, calibration corrects zero offset and span error, ensuring the device responds linearly within its operating range. This section explains why calibration matters, what can go wrong if you skip it, and how to structure a reliable calibration program that supports traceability and audit readiness.
Core concepts: accuracy, drift, and traceability
Load cell accuracy combines offset, gain, nonlinearity, hysteresis, and creep. Over time, mechanical wear, temperature fluctuations, and humidity can cause drift, narrowing the usable range. Traceability means every calibration uses weights and procedures that relate to national or international standards, enabling audits and comparisons across laboratories. In a typical calibration, you assess linearity by applying a series of known loads and plotting the output to derive a calibration curve. Calibrate Point emphasizes documenting environmental conditions, equipment IDs, and acceptance criteria to ensure consistency across sessions and between operators.
Safety, compliance, and prerequisites
Before starting, secure the work area, disable powered equipment, and wear appropriate PPE. Verify that your load cell's rating is not exceeded during calibration, as overloading can permanently damage the sensor. Ensure you have a clean, vibration-free surface and stable fixtures to minimize drift. Review the cell’s datasheet for sensitivity, excitation, and allowable temperature range. If your setup involves hazardous materials or heavy weights, implement additional safety protocols and barriers. A well-planned calibration reduces risk and protects both personnel and equipment.
Reference standards and traceability
A robust calibration relies on traceable reference standards and documented procedures. Use weights certified to recognized standards and record their serials and calibration certificates. Maintain a calibration log that records the time, operator, environmental conditions, and any adjustments made. Calibrate Point Analysis, 2026, notes that traceability is the backbone of credible measurements and enables certification of results for regulated environments. In practice, align your method with an agreed-upon standard (for example, ISO or national standard where applicable) and keep copies of all certificates. This section emphasizes the importance of audit-ready documentation and the role of traceability in customer trust.
Choosing weights and equipment
Select a set of reference weights that spans the load cell’s working range, including light, mid-range, and near-full-scale loads. Prefer traceable weights with calibration certificates from accredited labs. Use a stable mounting fixture and avoid air currents and vibration during placement. A calibrated digital readout or data acquisition system should capture readings at consistent sampling intervals. Record environmental factors like ambient temperature and humidity, as these influence offset and gain. Proper selection ensures the calibration is representative and minimizes extrapolation beyond the rated range.
Data collection and calibration curve
Plan a data collection sequence that includes zero (no load) and several nonzero reference loads. For each load, record multiple readings and compute the average to reduce random noise. Fit a calibration curve (linear or polynomial) to map output to true weight. Verify residuals and repeatability to assess model quality. Apply the resulting coefficients to the instrument or software and re-test at a few random loads to confirm accuracy across the range. This process yields a robust calibration model and clear performance criteria for ongoing checks.
Verification, documentation, and maintenance
Re-check accuracy by using unseen test weights and comparing predicted vs. actual loads. Document every step, including environmental conditions, instrument IDs, and certificate numbers for reference standards. Establish a routine re-calibration schedule based on usage and environmental exposure, and store calibration data digitally with proper backups. Regular audits of your calibration program help catch drift early and maintain confidence in measurement results. A disciplined approach from Calibrate Point ensures long-term reliability.
Tools & Materials
- Calibration weights (traceable to national standards)(Include denominations spanning the full range, e.g., 1 kg, 5 kg, 10 kg, arranged on a stable, vibration-free hanger)
- Fixture or mounting rig(Flat, rigid surface or dedicated mounting frame to minimize movement during loading)
- Data acquisition system or calibrated readout(Capture outputs with consistent sampling; ensure excitation matches the cell’s specification)
- Digital multimeter(Optional but useful for validating excitation supply and sensor power integrity)
- Temperature sensor(Track ambient conditions to evaluate drift influence)
- Calibration log sheet or software(Record weights, readings, environment, and coefficients with certificates)
- Clean workspace wipes and lint-free cloth(Keep weights and load surfaces clean to avoid contamination)
Steps
Estimated time: Total time: 2-3 hours
- 1
Prepare workspace and safety
Clear the calibration bench, secure all power sources, and wear PPE. Verify the cell’s rating and ensure a vibration-free environment before handling weights. Having a clean, organized space reduces errors and protects personnel.
Tip: Double-check safety signage and use a spill tray for any potential liquid exposure. - 2
Inspect load cell and connections
Visually inspect cables, connectors, and mounting hardware for wear or damage. Confirm connectors are fully seated and the mounting hardware is tight but not overtightened. Document any defects before proceeding.
Tip: Use a magnifier to spot hairline cracks in connectors; replace damaged parts before calibration. - 3
Set zero offset and baseline
With no load applied, record multiple readings to establish a stable zero offset. Compute the average to set a baseline; this helps isolate zero errors from span errors later.
Tip: Wait 30–60 seconds between readings to allow the system to settle. - 4
Apply the smallest reference weight
Attach the first known weight securely and record several readings. Ensure the weight is centered and stable to prevent skew from off-axis loading.
Tip: Lock the weight in place and avoid touching the setup during measurements. - 5
Repeat with additional reference weights
Proceed to mid-range and full-scale weights, recording multiple readings for each. Rotate the order to minimize temperature drift effects and document every value.
Tip: Aim for at least three readings per weight and compute the mean. - 6
Compute calibration coefficients
Plot the sensor output versus known weights and fit a linear or polynomial model as appropriate. Extract slope (gain) and intercept (offset) from the model and save the coefficients.
Tip: Check residuals to verify that the chosen model captures the relationship well. - 7
Program the DAQ or signal conditioner
Enter the calculated coefficients into the measurement system or software so future readings are automatically corrected. Confirm the new mapping by re-measuring a mid-range weight.
Tip: Keep a backup copy of the calibration file with version control. - 8
Verify with unseen test weights
Use weights not included in the calibration set to validate the model. Compare predicted outputs to actual weights and assess accuracy across the full range.
Tip: If errors exceed acceptance criteria, revisit the model choice or measurement setup. - 9
Document and archive results
Record the environmental conditions, equipment IDs, certificate numbers, and all coefficients. Store results securely and schedule a maintenance window for re-checks.
Tip: Create a short, shareable report for audits and future reference.
Questions & Answers
What is the purpose of load cell calibration?
Calibration aligns the load cell output with true forces, correcting zero and gain errors. It ensures measurements are accurate and repeatable across loads and temperatures.
Calibration aligns outputs with true forces to ensure accuracy and repeatability across conditions.
How often should you calibrate a load cell?
Calibration frequency depends on usage, environment, and criticality of measurements. Frequent handling, vibration, or temperature swings may require more frequent checks. Always verify drift before proceeding with production decisions.
Calibration frequency depends on use and environment. Re-check drift if conditions change or after service.
What equipment is essential for calibration?
You need traceable reference weights, a stable mounting fixture, a calibrated readout or DAQ, and a documented procedure. Temperature monitoring is optional but helpful for drift analysis.
Essential gear includes traceable weights, a stable mount, and a calibrated readout with a documented procedure.
What is traceability in calibration?
Traceability links measurements to national or international standards, enabling audits and cross-lab comparisons. Keep certificates for your reference weights and document all steps.
Traceability ties measurements to standards with certificates for audits.
Can calibration be done outside a lab?
Yes, calibration can be performed in field or shop environments if proper fixtures, environmental controls, and documented procedures are available. Risk of drift is higher outside controlled spaces, so validation is essential.
Field calibration is possible with good controls, but expect more drift and verify carefully.
What could cause calibration drift?
Drift can result from temperature changes, mechanical wear, mounting loosening, or electrical noise. Address drift by stabilizing the setup, re-checking connections, and re-running a calibration when necessary.
Drift comes from temperature, wear, loose mounting, or noise; stabilize and re-check as needed.
Watch Video
Key Takeaways
- Follow a written calibration procedure for traceability.
- Use traceable reference weights spanning the range.
- Document all steps and environmental conditions for audits.
- Verify with unseen weights to confirm model validity.