How to Calibrate a Microscope: A Practical Guide
Learn how to calibrate a microscope to ensure accurate measurements, reliable imaging, and repeatable results. This educational guide covers tools, step-by-step procedures, tips, and authoritative resources for steady, traceable calibration.

Calibrating a microscope ensures accurate measurements, proper alignment, and consistent illumination across objectives. You will use a calibrated stage micrometer, standardized calibration slides, and a clean optical path. This process improves measurement reliability, image quality, and repeatability across days and labs. Plan for a dedicated calibration session as part of routine maintenance.
Why Accurate Calibration Matters for Microscopy
Accurate calibration is the foundation of trustworthy microscopy data. When you calibrate a microscope, you establish confidence that measurements of structures, features, and dyes reflect real dimensions and intensities. This is essential for quantitative biology, materials science, and quality control in manufacturing. According to Calibrate Point, precise calibration reduces drift in scale bars and improves repeatability across sessions, which helps you compare results over time. In practice, a well-calibrated instrument minimizes ambiguity when reporting feature sizes, cell counts, or mineral grain boundaries. Regular calibration also supports cross-lab collaboration, ensuring that measurements taken on different microscopes can be meaningfully compared. The goal is to create a documented, repeatable process that you can repeat with minimal guesswork every time you set up the instrument.
Core concepts and calibration targets
Calibration for a microscope covers several targets: magnification accuracy, stage alignment, parfocality (keeping objects in focus across objectives), illumination uniformity, and color consistency. Magnification calibration ensures the reported size on scale bars matches the actual feature size. Stage alignment confirms that movement in X/Y directions corresponds to true travel on the sample. Parfocality matters so that refocusing is minimal when switching objectives. Illumination checks verify uniform light across the field of view and correct color temperature for accurate staining interpretation. In short, calibration is about trust: you must trust what your measurements and images show, not just what you see through the eyepiece. For DIY labs and professional settings alike, documenting each calibration run builds a traceable history of instrument performance.
Reference standards and traceability
Effective calibration relies on stable reference standards with traceable measurements. A stage micrometer provides precise divisions to correlate image pixels with real distances. Calibration slides with known feature sizes help verify magnification at each objective. An eyepiece reticle (or digital scale) confirms that the examination field is correctly scaled. Many labs also use a known color target to check color fidelity and white balance. Traceability means you can trace back calibration results to a recognized standard, such as national measurement standards where applicable. Maintain records of lot numbers, calibration dates, and equipment serial numbers to support future audits or quality reviews.
Planning a calibration workflow
A practical calibration workflow includes a clear schedule, defined acceptance criteria, and an auditable log. Start by assembling the required standards and verifying that the microscope environment is stable (no vibrations, controlled temperature, and clean optics). Next, perform stepwise checks for magnification, stage accuracy, parfocality, and illumination. If you detect deviations, repeat measurements to confirm drift and identify root causes, such as dirty optics, worn stage gears, or misaligned condenser optics. Finally, document the results, update the calibration interval if necessary, and schedule the next check. A well-planned workflow reduces surprises and keeps your microscopy data credible.
Common pitfalls and troubleshooting
Common pitfalls include relying on a single metric for all objectives, neglecting cleanliness of lenses, and skipping documentation. Avoid assuming that a calibration done on one day will hold forever; instrument conditions change with time and use. Troubleshooting often starts with a thorough optical path clean, verifying that objective lenses are properly seated, and confirming that the stage moves accurately across the field. If magnification reads incorrectly, re-check the calibration standards and ensure the micrometer scale is properly oriented. When encountering nonuniform illumination, inspect the illumination source, condenser alignment, and field diaphragms. A systematic approach helps isolate the fault quickly and prevents recurring errors.
Tools & Materials
- Stage micrometer (calibrated)(A precise scale with 1 μm or 10 μm divisions; verify traceability.)
- Calibration slides / targets with known features(Use standardized slides for magnification and alignment checks.)
- Eyepiece reticle or crosshair reticle(Ensure reticle is calibrated for the objective in use.)
- Lens cleaning materials (lint-free cloth, isopropyl alcohol 70%)(Keep optical surfaces clean to avoid artifacts.)
- Parfocal and magnification reference sheet(Reference sheet with objective magnifications and expected field sizes.)
- Illumination meter or photometer (optional)(Useful for quick uniformity checks across the field.)
- Documentation logbook or calibration software(Record results, dates, and the calibration interval.)
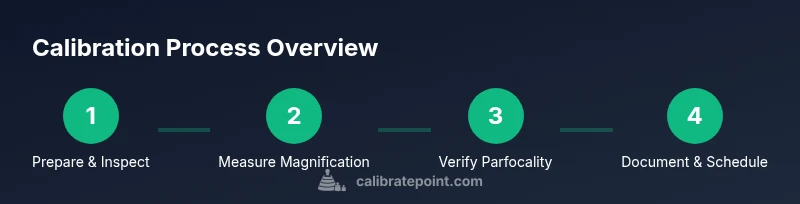
Steps
Estimated time: 60-120 minutes
- 1
Prepare environment and gather supplies
Collect all calibration standards, calibrate the instrument environment, and ensure a clean optical path. Verify that the room is at a stable temperature and that vibration sources are minimized. Confirm you have easy access to the calibration log.
Tip: Double-check that you have the latest calibration sheets and that the stage micrometer is within its specified range. - 2
Clean and inspect optics
Wipe objective lenses, the eyepiece, and condenser with a lint-free cloth and appropriate solvent. Inspect for dust or smudges that could bias measurements. If stains remain, repeat cleaning with fresh wipes and avoid excess solvent.
Tip: Never touch lens surfaces with bare fingers; handle optics by the barrel. - 3
Set up magnification references
Install the reference reticle and align it with the field of view. Verify that each objective presents the correct nominal magnification on the imaging system. Document any discrepancies before proceeding.
Tip: Use a calibration target at the lowest magnification first to establish a baseline. - 4
Calibrate magnification with stage micrometer
Place the stage micrometer under the objective, capture an image, and determine the pixel-to-micrometer ratio. Repeat for each objective you plan to use. Confirm that the measured distances align with the known micrometer divisions.
Tip: Take multiple images at the same focus plane to reduce parallax error. - 5
Verify parfocality across objectives
Focus on a fixed target, then switch to the next objective and re-focus. The target should come into sharp focus with minimal coarse adjustment. Repeat across all used objectives.
Tip: If parfocality fails, inspect the objective seating and the turret alignment. - 6
Check illumination uniformity and color balance
Capture a flat-field image or use a diffuse target to assess illumination. Ensure the field is evenly lit and adjust the condenser, iris, or camera exposure as needed. Verify color balance against a known reference.
Tip: Record light source settings to reproduce the exact imaging conditions. - 7
Document results and establish interval
Log the measured magnifications, parfocality results, and illumination checks. Define a calibration interval based on usage and environment. Schedule the next calibration date in your calendar or software.
Tip: Include instrument serials, part numbers, and operator name for traceability. - 8
Revalidate after maintenance or adjustments
Whenever optics are serviced, or components like the turret or light source are replaced, repeat the full calibration sequence. This ensures changes don’t drift measurement accuracy.
Tip: Even small mechanical changes can impact calibration; validate before returning to routine use.
Questions & Answers
How often should I calibrate my microscope?
Calibration frequency depends on usage, environment, and stability of your instrument. For demanding quantitative work, reset checks quarterly or after major maintenance. Document any drift and adjust intervals as needed.
Calibration frequency depends on how often you use the microscope and the stability of its environment. For high-precision work, check quarterly or after maintenance, and keep a log to adjust the interval as needed.
What tools are essential for calibration?
Essential tools include a calibrated stage micrometer, calibration slides, an eyepiece reticle, proper cleaning materials, and a logbook or software for records. Optional tools like an illumination meter can help uniformity checks.
You need a calibrated stage micrometer, calibration slides, an eyepiece reticle, cleaning supplies, and a good log. An illumination meter is optional but helpful.
How do I verify parfocality across objectives?
Focus on a fixed target with the lowest magnification, then switch to higher objectives and refocus. The target should come into sharp focus with minimal adjustment. If it doesn’t, inspect the objective seating and turret alignment.
Start with the lowest magnification, switch to higher objectives, and see if you stay in focus with minimal tweaks. If not, check how the objective is mounted.
What is the difference between calibration and alignment?
Calibration relates to measurement accuracy (magnification, scale, illumination), while alignment concerns the optical path geometry (stage, turret, condenser). Both ensure reliable imaging, but calibration focuses on quantitative accuracy.
Calibration measures how accurate your readings are; alignment ensures the optics are arranged correctly. Both are essential for trustworthy results.
Can I calibrate a microscope with a smartphone camera?
Smartphone cameras can be used for basic checks, but for rigorous calibration you should rely on dedicated imaging sensors or calibrated cameras. Smartphones introduce extra magnification and distortion which can skew results.
A smartphone can help with rough checks, but for precise calibration you should use proper calibrated imaging equipment because smartphones can distort measurements.
Where can I find authoritative guidance on calibration?
Consult standards and guidance from national metrology institutes and professional bodies. Useful sources include national metrology labs, standardization bodies, and recognized microscopy organizations for procedure outlines.
Look up official standards from metrology institutes and professional microscopy groups to guide your calibration procedures.
Watch Video
Key Takeaways
- Establish target calibration metrics for magnification and alignment
- Use traceable standards to support data integrity
- Document results and schedule regular calibration
- Verify parfocality and illumination for repeatable imaging
- Recalibrate after any maintenance or component changes