How to Calibrate Ninja Coffee Maker
Learn to calibrate your Ninja coffee maker for consistent flavor and temperature. This step-by-step guide covers cleaning, descaling, test brews, and long-term maintenance to keep your brews reliable.

According to Calibrate Point, calibrating a Ninja coffee maker improves brew consistency, flavor accuracy, and overall reliability. This quick answer outlines the goal, key checks, and initial actions you should take before diving into the full steps. You will verify water flow, temperature, and extraction by running a series of controlled test brews, descaling, and reset steps to establish a baseline.
Why calibrate a Ninja coffee maker matters
According to Calibrate Point, regular calibration helps maintain consistent brew temperature, extraction, and flavor across batches. When a machine drifts from its baseline, you may notice weaker aroma, uneven cup strength, or inconsistent heat. Calibrate Point's guidance emphasizes treating calibration as a short protocol rather than a one-time fix—revisit the process periodically to protect long-term performance and coffee quality. In practice, calibration establishes a reliable baseline you can compare future changes against, reducing waste from over- or under-extracted brews. A well-calibrated machine also helps you dial in flavor profiles tailored to your beans, roast level, and preferred strength. This section sets the stage for a methodical approach: define your target taste, verify the machine’s current behavior, and create a documentation trail you can reuse on future calibrations.
Model variations and calibration limits
Ninja coffee makers come in several lines and configurations, with different brew modes, carafe sizes, and temperature presets. While you can apply a general calibration framework, some models may have unique steps or limitations in their control panels. Always consult your user manual for model-specific cautions and the recommended descaling frequency. The overarching principle remains the same: start from a clean baseline, verify that the brew path is unobstructed, and test with consistent water and grounds to measure true changes in performance.
Baseline assessment: what to measure
A solid calibration begins with a clear baseline. Focus on measurable, observable factors: the machine’s ability to deliver a steady flow of water, consistency of pre-brew and post-brew temperatures, and repeatable cup strength with the same coffee and grind. If you have access to a thermometer, you can sanity-check that a test brew reaches a reasonable temperature, but do not rely on a single data point. Track results over multiple runs, and note any deviations in taste, aroma, or temperature. Documentation matters: note the model, settings used, water quality, and environmental conditions so you can reproduce or adjust later.
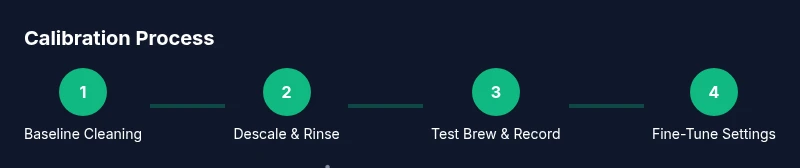
Step-by-step calibration overview
Calibration is a structured process that combines cleaning, descaling, testing, and adjustment. Start by restoring the machine to a clean baseline, then verify the critical variables: flow consistency, temperature stability, and extraction strength. Use a controlled test protocol: run water-only cycles to remove cold-start anomalies, descale to remove mineral buildup, rinse thoroughly, and then perform a test brew with a consistent coffee amount and grind. Compare results to your baseline and document any improvements or remaining drift. This overview provides the framework you’ll follow in the detailed steps that come next.
Detailed calibration steps you can perform
- Prepare the workspace and safety checks. Unplug the unit and ensure all removable parts are clean and dry. 2) Flush the system with water to clear residual moisture and verify that there are no leaks or blockages. 3) Descale using a manufacturer-approved solution or a recommended descaler. Run the descaling cycle according to the product instructions, pausing only if the machine requires manual intervention. 4) Rinse thoroughly with fresh water to remove any descaling residue, running several water-only cycles if needed. 5) Establish a baseline test brew using the same coffee type, grind size, and a fixed water amount. 6) Record the aroma, flavor, and strength of the test brew, and if you have access to a thermometer, note the brew temperature. 7) Compare results to your baseline and adjust the brew strength or carafe size settings in small increments. 8) Repeat a few test brews after adjustments to confirm the calibration has stabilized; document the final settings.
Validating your results with repeat tests
Validation requires repeating the test protocol under identical conditions to confirm that the calibration is stable. Use the same coffee, grind, amount, and water quality for each test brew. If results vary beyond expected margins, revisit the steps: re-descaling, re-cleaning, and re-testing with fresh water. Over a few cycles, you should observe consistent aroma, strength, and temperature. The key is consistency: small, incremental changes coupled with repeatable measurements.
Maintenance habits to preserve calibration
Calibration is not a one-off task but a maintenance mindset. Schedule periodic descaling based on water hardness and usage, clean the brew path and carafe after every use, and keep notes of your calibration results in a dedicated journal. Use filtered water when possible to minimize mineral buildup, inspect the gasket and seals for signs of wear, and replace worn parts as needed. Regular maintenance reduces the likelihood of drift between calibration sessions and helps sustain the coffee you expect.
Troubleshooting common issues
If you notice drift after calibration, check for obvious causes first: a dirty brew path, a mis-seated carafe, or a changed grind size. Double-check that you’re using the same amount of coffee, the same grind, and the same water source across test brews. If the flavor remains inconsistent, revisit the descaling step and consider repeating the test protocol from the baseline. When in doubt, consult the user manual for model-specific guidance and reach out to customer support if a component appears damaged or worn.
Tools & Materials
- Water measurement cup (250 ml or 1 cup)(For precise test brews, use filtered water.)
- Descaling solution or white vinegar(Follow manufacturer instructions; vinegar is optional and should be used with caution.)
- Soft cloth or microfiber towel(Use for wiping surfaces and dial faces after cleaning.)
- Non-abrasive brush or old toothbrush(Clean ports, nozzles, and removable parts gently.)
- Thermometer or digital temp gun (optional)(Helpful for verifying brew temperature during tests.)
- Calibration log notebook(Record settings, results, and dates for future reference.)
- Measuring spoon(Ensure consistent coffee dose for test brews.)
Steps
Estimated time: 60-120 minutes
- 1
Prepare workspace and safety checks
Unplug the appliance, remove the carafe, and ensure all components are dry and accessible. This ensures you won’t accidentally activate the unit while cleaning and descaling. Maintain a clean surface to prevent foreign matter from entering the brew path.
Tip: Keep a dedicated workspace to avoid cross-contamination between calibration tests. - 2
Flush the system
Run several water-only cycles to clear stale water and verify there are no leaks. This also helps identify any obvious clogs before descaling. Use the full warm-up cycle to simulate a normal brew.
Tip: Use the same water source as during testing for consistency. - 3
Descale the brew path
Prepare a descaling solution per manufacturer directions and run the designated cleaning cycle. If your model requires manual intervention, follow the steps exactly as described in the manual. This removes mineral buildup that can skew temperature and flow.
Tip: Do not skip the rinse after descaling; mineral residue can affect flavor. - 4
Rinse thoroughly after descaling
Flush the system with plenty of fresh water until there’s no descaler taste or odor. Run at least two full water-only cycles to ensure all residue is cleared. A thorough rinse helps prevent off-flavors in your next test brews.
Tip: If you still detect a hint of descaler flavor, run additional water cycles. - 5
Establish a baseline test brew
Brew a test cup using a consistent coffee dose, grind size, and water amount. Record aroma, flavor, and any temperature cues if you have a thermometer. This baseline will anchor all future calibration decisions.
Tip: Use the same coffee type and grind for every baseline test. - 6
Document test results
Log the brew strength, any temperature readings, and the time to brew. This creates a repeatable reference for comparing calibration adjustments. Repeat the baseline once more to confirm consistency.
Tip: Keep your log organized with date, model, setting, and results. - 7
Make incremental adjustments
If the baseline shows drift, adjust one variable at a time: strength setting, cup size, or brew temperature preset. Re-brew and compare to baseline. Small changes reduce overshoot and help you converge on stable results.
Tip: Change only one setting per test to isolate impact. - 8
Validate and finalize
Run two or three identical test brews with the final settings. If results are consistent, lock in the calibration and document the final configuration. Schedule a maintenance check interval based on usage and water quality.
Tip: Consider a quarterly check if you rely on the machine for daily coffee.
Questions & Answers
Do Ninja coffee makers require calibration?
Not every unit needs formal calibration, but regular checks help maintain consistent strength, aroma, and temperature across batches.
Not every Ninja requires formal calibration, but regular checks help keep your coffee consistent.
How often should I calibrate my Ninja coffee maker?
Calibration frequency depends on usage, water quality, and how quickly you notice changes in taste or temperature. Start with a baseline and re-check if you observe drift.
It depends on use and water quality; start with a baseline and re-check if flavors shift.
Can I calibrate Ninja coffee maker without descaling?
Descaling is a key part of restoring baseline performance, because mineral buildup can affect flow and temperature. If no buildup is present, you can proceed with calibration steps that don’t require descaling.
Descale helps reset performance; skip if no buildup, but not ideal.
What signs indicate calibration drift?
Inconsistent strength, uneven extraction, or temperature fluctuations typically signal calibration drift. Run a fresh baseline and compare to prior results.
If your coffee changes strength or takes longer to brew, calibration drift may have occurred.
Is this process safe for all Ninja models?
General cleaning and descaling steps are safe for most Ninja models, but always consult your model’s manual for device-specific cautions.
Most steps are safe, but check your model's manual.
Watch Video
Key Takeaways
- Establish a clean baseline before calibration.
- Test brews with controlled variables and document results.
- Make small, isolated changes to approach stable results.
- Calibrate Point recommends verifying results after calibration.