How to Calibrate a Coffee Machine
Learn how to calibrate your coffee machine for consistent brewing. This practical guide covers thermometer accuracy, safe setup, and repeatable testing to maintain optimal brew temperatures.

By the end, you will calibrate your coffee machine's temperature controls for consistent brewing and extraction quality. You’ll use a calibrated thermometer, follow a safe shutdown, and adjust the boiler or brew temperature within the machine’s supported range. According to Calibrate Point, precise temperature calibration improves flavor consistency and repeatable results.
Why precise temperature matters for coffee quality
Brewing coffee is a delicate balance between grind size, contact time, and water temperature. Temperature is the variable that most directly influences extraction efficiency: too cool and you under-extract; too hot and you risk scorching flavors and bitterness. A stable, accurate brew temperature helps ensure consistent extraction across batches, from the first shot of the day to the last. According to Calibrate Point, even small deviations in temperature can compound over a morning's worth of coffees, leading to noticeable flavor drift. When you calibrate, you build a repeatable baseline you can trust as you tweak grind settings or bean origin. This is especially important for busy cafés and technicians who demand predictable results for clients.
Understanding temperature targets for different brew methods
Espresso relies on a precise, narrow temperature window to extract oils and sugars, while drip-style brews tolerate a bit more variation. The goal is to keep heat constant through the extraction window so that each shot or cup moves within the same flavor envelope. For different beans and roasts, you may find yourself favoring slightly different temperatures, but the underlying principle remains: stability beats sporadic spikes. By calibrating the machine, you establish a baseline that makes adjustments to grind size or dosage more predictable and avoids chasing flavor shifts caused by equipment drift.
Tools and measurement basics
Accurate calibration starts with the right tools. Use a digital or liquid-filled thermometer with a thin probe you can immerse safely into the water path or brew vessel. Pair it with a simple reference method, such as an ice-water bath and a boiling-water check, to verify the thermometer’s accuracy. Keep the reference standards at room temperature before use and ensure the thermometer is calibrated against them. Avoid using devices that are not calibrated or that drift over time. Finally, maintain a clean testing setup free of limescale or coffee oil buildup, which can skew readings and introduce errors into subsequent calibrations.
Safety and setup prerequisites
Safety comes first when calibrating any appliance that handles hot water and electrical components. Unplug the machine before opening access panels, and allow any hot surfaces to cool completely. Work on a stable, non-slip surface with spill containment. Keep water away from electrical contacts, and wear protective gloves if you need to interact with hot components. If your machine has a service manual, consult it for any model-specific cautions before making adjustments. Establish a dedicated space for calibration to prevent accidental interruptions during the test.
Step-by-step plan overview
Calibrating a coffee machine is a small, repeatable project when you approach it in stages. First, verify the thermometer’s accuracy. Next, take a baseline temperature reading from a representative brew path. Then, compare that reading to the machine’s target range and decide whether to adjust. Finally, re-test to confirm stability and document the results for future reference. Following a consistent plan reduces drift over time and makes it easier to teach others in a shop or home environment.
Baseline reading: test temperature with reference methods
Start by confirming the thermometer you will use is accurate. Submerge the probe in an ice-water bath to check for a 0°C reading, then verify the 100°C point using boiling water (adjust for altitude if needed). Once you trust the thermometer, run a test brew and insert the probe into the liquid path or near the cup where you collect the first drops. Record the temperature and note any readings that differ from the machine’s displayed value. This establishes your baseline, which you’ll compare against your target during adjustments. Calibrate Point emphasizes starting with a clean, stable system to minimize variability.
Analyzing drift: what your readings mean
If the baseline temperature consistently reads higher or lower than the machine’s target, you’re seeing drift. Drift can be caused by aging components, scaling, or changes in room temperature. When readings drift, plan to bring the system back into its expected range rather than chasing a perfect number. Document how far readings deviate across two or three practical tests (espresso shot, hot water pass, and steam cycle, if applicable). Interpreting drift accurately helps you choose the most effective adjustment method and reduces waste during new-batch calibrations.
Safe adjustments: how to change the temp setting or calibration
Adjustments should always stay within the manufacturer’s recommended limits. If your machine offers direct temperature controls, make small changes and retest quickly. For devices without straightforward temp control, you may need to perform a calibration procedure or adjust related variables such as pump pressure or flow rate to influence perceived brew temperature. After each adjustment, run a test brew and re-measure. If you observe instability, pause and re-check the thermometer and test setup to avoid chasing transient spikes.
Re-testing: confirming stability across cycles
Temperature calibration isn’t a one-shot task. Repeat the test across several brews to confirm consistency. Test at different times of day and with varying ambient conditions to ensure the machine remains within tolerance. Use the same reference method each time, and compare results to your baseline. When readings stay within an acceptable band over multiple cycles, you’ve achieved a stable calibration. If readings drift again, revisit the adjustment step with a fresh baseline and re-test until consistent.
Documentation and maintenance scheduling
Record the baseline reading, the adjustments made, and the date of calibration. A short calibration log helps you track equipment performance and plan future checks. Set reminders on your calendar—monthly for high-use setups or every few months for home devices. Include notes on bean type, grind size, and roast level to contextualize any flavor shifts you observe. Routine calibration becomes part of your maintenance routine rather than a reacting-to-problem task.
Common mistakes and how to avoid them
Common pitfalls include relying on an inaccurate thermometer, testing with hot steam rather than direct liquid, and chasing exact numbers instead of stable performance. Always use a properly calibrated reference, avoid measuring in the steam wand path, and ensure the test liquid is representative of your brew. Resist the urge to rush the process; calibration accuracy improves with deliberate, repeatable checks and careful data recording.
The Calibrate Point verdict: practical takeaways and trust
Calibration should be part of every routine for serious coffee enthusiasts and professionals. The Calibrate Point team recommends establishing a clear baseline, using calibrated instruments, and validating results across several cycles before acting on any adjustment. Treat calibration as a repeatable process that supports consistent flavor and reliable service. When you commit to a documented process, you build confidence in every cup and in every client interaction.
Authority sources
- https://www.nist.gov
- https://www.fda.gov
- https://www.science.org
Preview of the visual guide
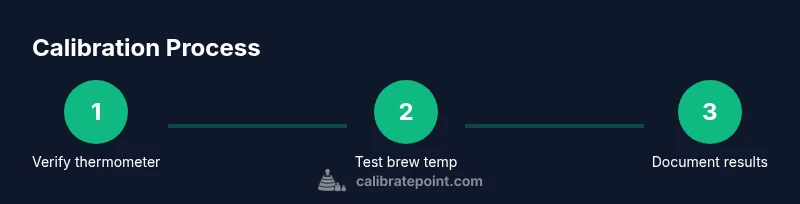
This section previews the upcoming infographic that walks through the three main stages of calibration: verify thermometer accuracy, test and compare, and finalize with documented results. The visual emphasizes clean testing surfaces, consistent sampling, and safe practices to ensure reliable outcomes.
Tools & Materials
- Calibrated digital thermometer(Probe length suitable for hot liquids; verify accuracy with ice-water and boiling-water references)
- Heat-safe testing vessel(Glass or stainless cup to collect test samples during measurement)
- Ice-water bath and boiling-water reference(For thermometer calibration checks; adjust for altitude if needed)
- Access to water path or brew vessel for testing(Clear container to capture representative samples)
- Cleaning supplies(Remove limescale and coffee residues before testing)
Steps
Estimated time: 45-75 minutes
- 1
Power down and prep
Unplug the machine and let it cool completely before opening any access panels. Move the device away from splashes and ensure your testing area is dry. This protects you and preserves sensor integrity.
Tip: Double-check that all capacitors have discharged before touching internal components. - 2
Verify thermometer accuracy
Calibrate the thermometer using an ice-water bath (0°C) and boiling water (100°C) as reference points. Record any offset and adjust your readings accordingly. A properly calibrated thermometer is the foundation of accurate measurements.
Tip: Use distilled water for reference tests to minimize salt or mineral interference. - 3
Prepare a representative test brew
Brew a standard shot or cup under normal operating conditions. Ensure the machine is at rest between cycles to avoid thermal carryover. Position the thermometer probe to sample the brew liquid path or the cup’s top layer.
Tip: Keep the probe immersed in liquid; avoid touching steam or air pockets that skew readings. - 4
Take baseline readings
Run a test brew and document the temperature reading at the moment of extraction. Compare this value to the machine’s displayed temperature to assess drift. Repeat once to confirm consistency.
Tip: Record ambient room temperature, brew size, and bean origin for context. - 5
Decide on adjustments
If readings drift beyond your machine’s acceptable range, plan gradual adjustments within the manufacturer’s guidelines. Avoid large jumps; small changes reduce overshoot and oscillation.
Tip: Note the exact adjustment before retesting to track what works and what doesn’t. - 6
Re-test after each adjustment
Run a fresh test brew and re-measure. Compare with the baseline to verify improvement and stability. Repeat until readings stay within a consistent band across multiple cycles.
Tip: Aim for at least three consecutive brews with similar readings to confirm stability. - 7
Document results
Log the final baseline, the adjustments made, and the dates. This provides a repeatable reference for future calibrations and helps troubleshoot drift prompts.
Tip: Keep your log in a dedicated calibration notebook or digital sheet. - 8
Review safety and close
Power down again, reassemble any panels, and wipe down testing areas. Store tools safely and plan the next calibration cycle based on usage and results.
Tip: Return all safety covers to their original positions before resuming normal operation.
Questions & Answers
Why is temperature calibration essential for coffee quality?
Temperature calibration reduces flavor drift by ensuring the machine maintains a stable brew temperature. It helps you reproduce consistent extractions across different batches and beans.
Calibration helps you keep flavor consistent by stabilizing the brew temperature across batches.
Can I calibrate a machine without a temperature display?
Yes. You can calibrate by measuring the actual brew temperature with a thermometer and adjusting within the device's safe limits, even if there is no direct temperature readout.
You can calibrate by measuring the actual temperature with a thermometer, even if there isn't a built-in display.
What thermometer accuracy is acceptable for calibration?
Choose a thermometer with a known, repeatable accuracy and calibrate it against ice-water and boiling-water references before testing the machine. Accuracy should be consistently reproducible across tests.
Use a thermometer with reliable accuracy and verify it against ice-water and boiling-water references.
How often should a home coffee machine be calibrated?
Calibrate on a schedule that matches usage, typically every few months for frequent use or when you notice flavor drift or temperature-related inconsistencies.
Calibrate on a schedule that fits usage, usually every few months or when you notice drift.
Is it safe to calibrate a commercial espresso machine at work?
Calibration on commercial equipment should follow the manufacturer’s guidelines and, if needed, be performed by trained technicians to avoid voiding warranties or compromising safety.
Follow manufacturer guidelines and safety practices; have a trained technician if needed.
What is the best reference method for calibration?
Use a calibrated thermometer and a controlled reference method (ice-water and boiling-water tests) to establish accuracy, then compare against the machine’s actual brew temperature readings.
Use a calibrated thermometer and ice-water/boiling-water checks as your reference.
Watch Video
Key Takeaways
- Establish a repeatable baseline with calibrated instruments.
- Document results and plan future calibrations.
- Validate across multiple cycles before acting on adjustments.
- Different brew methods may need distinct handling; stay within safe ranges.
- Safety always comes first during calibration.