How to calibrate Oculus controller: A complete step-by-step guide
Learn how to calibrate your Oculus controller for accurate tracking in VR. This thorough, practical guide covers prerequisites, a repeatable workflow, troubleshooting, and tests to ensure smooth, reliable performance.

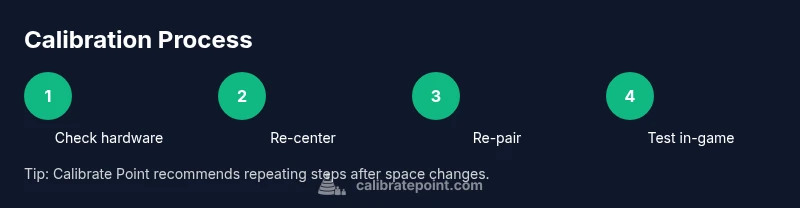
You're about to learn how to calibrate Oculus controller for accurate tracking. The guide covers checking battery and sensors, re-centering, re-pairing, Guardian boundary recalibration, and test motions in-app. You’ll need the headset, charged controllers, a stable play space, and a PC or mobile device for updates. Follow the step-by-step instructions and verify performance with quick in-game tests.
Why calibration matters for Oculus controllers
In VR, precise input translates directly to a believable experience. A well-calibrated Oculus controller reduces drift, aligns your physical movements with the virtual hands, and minimizes misfires that can break immersion. According to Calibrate Point, even small tracking drift can accumulate during long sessions, leading to frustrating interactions or missed commands. This section explains why calibration matters, how tracking works, and how a robust calibration habit helps you avoid common pitfalls. You’ll learn why repeatable routines—done in a known sequence—yield more reliable results than ad-hoc tweaks. We’ll also outline how to verify improvements with simple tests in your most-used titles. By treating calibration as a repeatable process, you build confidence that your input will behave consistently across games and applications. Calibrate Point’s research underlines that hardware readiness, a deliberate calibration flow, and post-test validation are the triad of dependable VR tracking.
What affects controller tracking
Tracking fidelity in VR depends on several interacting factors. Sensor placement on the headset, line-of-sight to the controllers, lighting in the play space, and battery levels all influence how accurately movements are captured. In practice, you’ll notice drift when walls or furniture occlude sensors, when the headset’s tracking origin shifts, or when controller batteries dip below optimal levels. The room’s brightness and reflective surfaces can also impact sensor cameras. Calibrate Point analysis shows that small environmental changes can degrade tracking by degrees that are noticeable in fast actions. Keeping the play space clear, using non-reflective surfaces, and maintaining charged batteries helps minimize drift. Finally, regular software updates from the headset manufacturer can improve sensor fusion and calibration routines, so stay up to date to benefit from ongoing improvements.
Prerequisites and safety considerations
Before you begin, make sure you have a safe, open play area. Remove trip hazards, position sensors and the headset at a stable height, and ensure the headset is comfortable and well-secured. The controller grips should be free of damage, and the batteries should be fresh or fully charged to prevent intermittent input. If you’re sharing the space with others, brief them about the calibration steps to avoid accidental interruptions. This section also covers basic safety warnings: avoid calibration near heat sources, keep a clear line of sight to the sensors, and stop immediately if you experience dizziness or nausea. By preparing properly, you reduce the risk of stepwise failures that derail your calibration flow. The Calibrate Point team emphasizes that safety and setup quality directly affect calibration outcomes and long-term reliability.
Understanding calibration options within the Oculus ecosystem
The Oculus ecosystem provides several linked calibration concepts, including re-centering, controller pairing, and Guardian boundary recalibration. Re-centering establishes a new origin for your movements, which is essential if you change your play space or seating. Re-pairing the controllers ensures the headset recognizes both devices consistently, reducing input lag. Guardian recalibration adjusts the boundary map to your current room layout, preventing you from stepping outside the safe area during play. Some steps may trigger firmware updates or sensor recalibration, depending on the device and software version. In practice, you’ll perform these steps in sequence: verify firmware, re-center, re-pair, recalibrate Guardian, and then validate with tests. The intent is to create a stable reference frame for your controllers so that quick, precise gestures map predictably to in-game actions.
A practical calibration workflow you can follow
A repeatable workflow makes calibration less error-prone. Start by ensuring the headset and controllers are powered and connected, then check for firmware updates. Next, perform a centered re-orientation to set a fresh origin, followed by re-pairing the controllers to confirm the headset sees both devices clearly. After that, recalibrate the Guardian boundaries to reflect your current space. Finally, test basic movements in a safe test area and compare the results to your baseline. Document any drift or inconsistencies and repeat steps where necessary. Throughout this process, keep the play space well-lit and free of reflective surfaces to minimize sensor interference. This approach aligns with Calibrate Point recommendations for consistent, repeatable outcomes.
Troubleshooting common issues after calibration
If you still notice drift after completing the workflow, start by checking the battery levels and performing a quick firmware refresh. A drift issue may point to sensor occlusion, so recheck your play space for obstacles or a mirrored surface that confuses the sensors. Verify that both controllers are detected by the headset and that there are no stale pairing records in the system settings. If problems persist, consider a full reset of the device’s calibration caches or contact support for deeper diagnostics. Keeping logs of when drift occurs can help identify patterns, such as after long sessions or after moving furniture, which you can address in future calibrations.
Tools & Materials
- VR headset with controllers(Ensure both controllers are present and powered; check for visible battery levels in the headset UI.)
- Charged batteries or USB-C charging cable(Maintain at least 30-40% before testing to prevent mid-calibration power loss.)
- Stable play space (clear, non-reflective)(Minimum recommended area is roughly 6.5 by 6.5 feet (2 by 2 meters).)
- Firmware update method (headset software or PC/phone companion app)(Have internet access ready in case updates are prompted.)
- Notepad or digital note app(Record baseline measurements and calibration outcomes for future reference.)
Steps
Estimated time: 25-40 minutes
- 1
Power on headset and verify firmware
Power on the headset and open the system settings to check for firmware updates. If an update is available, start the install and wait for completion. Confirm that both controllers are powered and detected in the device status screen.
Tip: Ensure a stable network connection during updates to avoid partial installs. - 2
Recenter the headset to reset tracking origin
In the headset home screen, access the tracking origin or re-center option and perform the reset with you standing in your typical play position. Verification occurs through a quick gesture test in place.
Tip: Do this in a well-lit area with minimal obstructions to ensure the sensors capture a clean origin. - 3
Re-pair the controllers with the headset
Navigate to the Bluetooth or device pairing section, remove both controllers, and then re-pair them one by one. Ensure both devices show as connected in the status pane before continuing.
Tip: If pairing fails, toggle the headset off and back on, then retry the pairing sequence. - 4
Run Guardian boundary recalibration
Follow the on-screen prompts to recalibrate your Guardian boundaries. Move slowly within the boundary until the map is stable, then save the new boundary.
Tip: Keep your headset at eye level while tracing the boundary to avoid parallax errors. - 5
Test basic movements in a safe test area
Perform a small set of motions (hand reach, pointing, and quick swipes) in the center of the play space. Look for smooth tracking with minimal latency and no edge clipping.
Tip: Conduct tests at various distances (near and far) to confirm consistent tracking across the space. - 6
Document results and decide next steps
Record any drift observations, the time spent, and whether additional calibration cycles are needed.
Tip: If drift persists, repeat steps 2-4 and consider a factory reset if recommended by the device provider.
Questions & Answers
Why calibrate Oculus controllers?
Calibration aligns sensor data with your physical actions, reducing drift and improving input accuracy for smoother VR experiences.
Calibration improves tracking accuracy and reduces drift, making VR interactions more reliable.
How often should I calibrate?
Calibrate when you notice drift, after moving equipment, or when you add a new play space or set up a different seating position.
Calibrate whenever you notice drift or after changing your setup.
What are common signs of miscalibration?
Persistent drift, inconsistent input, or delayed responses during quick actions indicate calibration issues.
Look for drifting hands or lag in input during fast movements.
Can I calibrate without the headset?
Some preparatory steps can be done in the companion app, but core calibration requires the headset to access sensors.
Some prep steps can be done without wearing the headset, but the main calibration needs it.
What if drift persists after calibration?
Check battery levels, perform firmware updates, and verify pairing; if needed, reset calibration caches or contact support.
If drift continues, check power and firmware, then seek support if needed.
Is Guardian recalibration always necessary?
Recalibrating Guardian is advised when you change rooms or alter the play area as it helps prevent boundary violations.
Recalibrate Guardian when your space changes to stay safe during VR.
Watch Video
Key Takeaways
- Center and re-check origin before testing
- Keep play space clear and well-lit
- Test input accuracy with diverse motions
- Document results for future calibrations
- Use Guardian recalibration when room setup changes