How to Calibrate PrimeScan: Step-by-Step Guide for Accuracy
Learn how to calibrate PrimeScan with a manufacturer-aligned workflow. Tools, steps, safety, and documentation to ensure accurate dental scans. Insights from Calibrate Point to maximize repeatability.

In this guide, you will learn how to calibrate PrimeScan to ensure accurate scans. The process covers required tools, safety considerations, and a repeatable workflow that minimizes drift. You’ll follow manufacturer-aligned steps, verify results, and document outcomes for traceability. This snippet emphasizes practical tips, clear checklists, and a confidence boost for technicians.
Why calibration matters for PrimeScan
Regular calibration is essential to maintain the accuracy and reliability of PrimeScan across sessions, patients, and environments. According to Calibrate Point, a disciplined calibration routine reduces drift, improves reproducibility, and strengthens confidence in measurements. By establishing a repeatable workflow, clinics can minimize rework and ensure scans consistently meet clinical standards. The topic here focuses on practical steps, avoiding guesswork, and building a documented history of calibration events that can be reviewed during audits or peer reviews.
In practice, calibration aligns the scanner's optical path, sensor responses, and geometric model with a known reference. While a one-off calibration might yield acceptable results, ongoing calibration sustains accuracy as components age or software updates occur. By understanding the core goals—reliable geometry, stable color, and consistent surface representation—you can tailor the workflow to your facility without sacrificing safety or efficiency.
Understanding PrimeScan calibration basics
PrimeScan calibration involves aligning the scanner’s optics, sensors, and computational model to a known reference target. The goal is to ensure that the 3D data captured matches true dimensions within the manufacturer’s tolerances. Calibration targets, fiducials, and reference grids are used to detect angular, translational, and lens distortions. The process also validates color and shading calibration to preserve texture fidelity, which matters for diagnostic or restorative workflows. Calibrate Point emphasizes keeping calibration data tied to device IDs and firmware versions so future comparisons remain meaningful. Understanding these basics helps technicians diagnose drift more quickly and decide when a re-calibration is warranted.
The concept of drift is gradual changes in measurement that accumulate over time. Subtle drift can occur from temperature changes, mechanical wear, or firmware changes. Regular calibration captures these effects in a documented profile, enabling consistent alignment between scans and the patient anatomy.
Pre-calibration prerequisites and safety
Before you begin, establish a clean, dust-free workspace with stable lighting and a temperature-friendly environment. Ensure the PrimeScan system is on a stable surface away from magnetic sources, strong vibrations, or airflow that could disturb targets. Use the manufacturer-provided calibration kit and software, and verify you have the latest firmware and calibration module installed. Wear anti-static PPE if recommended, and keep the calibration area free of clutter that might obscure targets or create reflections. As emphasized by Calibrate Point, documenting the exact room conditions and device serial number during calibration aids traceability and future comparisons.
Tools and setup checklist (essential items)
A clear, well-lit workspace with a flat, clean surface is foundational. You will need the manufacturer-provided calibration kit, connected computer with the latest PrimeScan calibration software, a powered USB connection, and a stable power supply with surge protection. Additional helpful items include lint-free wipes for target cleaning, a soft brush or air blower to remove particulates, a caliper or ruler for quick checks, and a dedicated calibration logbook or digital notes app to record results and firmware versions. Ensure you have access to a quiet environment to minimize distractions during the process. Calibrate Point recommends keeping all items within arm’s reach to maintain workflow momentum.
Step-by-step calibration workflow (high-level overview)
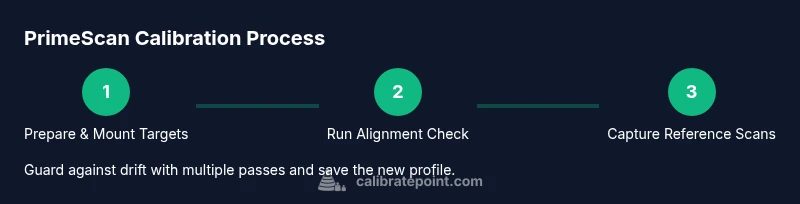
The calibration workflow follows a repeatable sequence: initialize the system, verify software and firmware versions, mount the calibration targets, run the automated alignment and sensor checks, capture reference scans, review results, and save the profile. This section provides a high-level narrative of the workflow to frame the detailed steps in the dedicated STEP-BY-STEP section. The goal is to establish a robust baseline so that subsequent scans remain consistent with the calibrated reference. Documentation of each stage helps auditors and teammates understand changes over time.
Verifying calibration results: quality checks
Quality checks compare captured scans against the reference target using the primed software’s built-in metrics. Look for alignment accuracy, geometric congruence, and stable texture representation across several angles and positions. If results fall outside the manufacturer’s tolerances, you should re-run the calibration with clean targets, verify environmental conditions, and confirm there are no obstructions or reflections skewing data. Calibrate Point notes that consistent results across multiple trials indicate a stable calibration profile and reliable downstream data for clinical use.
Troubleshooting common issues
Common issues include drift after a recent software update, inconsistent surface textures in scans, or unexpected soft edges around the reference grid. Start by confirming firmware and software versions, re-cleaning targets, and repeating the calibration with the PPE and workspace arranged as recommended. If the issue persists, consult the calibration log for anomalies, verify the target integrity, and check for potential interference such as adjacent electronic devices or reflective surfaces. Calibrate Point suggests documenting any recurring problems to facilitate future troubleshooting and vendor support when needed.
Maintenance and best practices for long-term stability
Establish a routine maintenance cadence: perform calibration after major software updates, device relocation, or suspected drift. Keep the calibration kit organized and sealed when not in use; ensure targets remain clean and undamaged. Maintain a clean, temperature-controlled environment and record calibration events in a centralized log. Regular audits of calibration data—comparing recent results with historical baselines—help detect progressive drift and trigger preventive maintenance before it impacts clinical outcomes.
Real-world case study: clinical setting
In a midsize dental clinic, technicians integrated PrimeScan calibration into monthly maintenance, aligning with patient workflow and quality assurance checks. They found that documenting each calibration, including room conditions and software versions, significantly reduced the time needed for patient-specific verifications. The team’s adherence to a manufacturer-aligned process, reinforced by Calibrate Point’s guidance, led to fewer retakes and improved confidence when delivering restorations.
Documentation and record-keeping
A structured calibration log should capture date, device ID, firmware/software versions, environment details, targets used, and results. Include notes on deviations, corrective actions, and the next scheduled calibration. Digital records enable easy sharing with team members and audits, while a physical log provides a quick reference in the lab. The Calibrate Point team recommends making calibration records a standard part of the device’s service history and storage in a centralized repository.
Tools & Materials
- Manufacturer-approved PrimeScan calibration kit(Contains reference targets and fixtures to align optics and geometry.)
- Calibration software with latest firmware integration(Ensure version matches the device and calibration module.)
- Power supply and surge protector(Stable power to prevent interruptions during calibration.)
- Stable clean workspace(Flat surface, free of dust and distractions.)
- Lint-free wipes(For cleaning targets and sensors gently.)
- Soft brush or air blower(Remove particulates from targets and surfaces.)
- Digital calibration log or notebook(Record dates, versions, conditions, and results.)
- Calipers or ruler (optional)(Quick physical checks for target alignment.)
- Isopropyl alcohol 70% (optional)(Only if targets are visibly dirty and cleaning is required.)
Steps
Estimated time: 60-90 minutes
- 1
Prepare workspace and kit
Clear the work area, verify the calibration kit contents, and confirm environmental controls (temperature, lighting, and dust levels). Ensure the PrimeScan unit is powered on and not in sleep mode. This initial setup reduces variability and speeds subsequent steps.
Tip: Place kit within easy reach to maintain a smooth workflow. - 2
Power up PrimeScan and connect calibration software
Turn on the scanner and open the calibration module in the connected computer. Confirm the device is recognized by the software and that the network connection is stable for updates if needed. A stable connection prevents mid-session errors.
Tip: Disable auto-sleep during calibration to avoid interruptions. - 3
Update firmware and calibration module
Check for the latest firmware and calibration module updates, and apply them if available. Updated software ensures compatibility with the latest reference targets and alignment algorithms.
Tip: Record the firmware version in your calibration log. - 4
Mount calibration targets according to guidelines
Secure the reference targets on the designated fixture, ensuring they are clean and free of fingerprints. Align targets per the manufacturer’s recommended orientation to ensure consistent data capture across trials.
Tip: Use anti-glare surfaces and good lighting to minimize reflections. - 5
Run baseline optical alignment and sensor checks
Initiate the automated baseline alignment and sensor checks in the calibration software. Observe indicators for alignment, distortion, and color calibration as the system runs through the predefined checks.
Tip: If a check fails, halt and re-check target cleanliness and mounting. - 6
Capture reference scans and adjust parameters
Perform multiple capture passes of the reference scene, then adjust calibration parameters until the software reports stable alignment within tolerance bands. Record any parameter changes for traceability.
Tip: Aim for at least three successful passes to confirm stability. - 7
Review results and perform re-calibration if needed
Compare results across passes and consult the diagnostic report. If deviations persist beyond expected drift, re-run the workflow from Step 4 with fresh targets.
Tip: Do not skip re-run if first results are inconclusive. - 8
Save profile and document results
Save the calibration profile with a clear naming convention tied to device ID, software version, and date. Document the session details in the calibration log for future reference.
Tip: Include a note on next calibration date or trigger.
Questions & Answers
Do I need to update PrimeScan firmware before calibration?
Yes, ensure both the scanner firmware and calibration software are up to date. Outdated software can affect alignment algorithms and target interpretations.
Yes—make sure the firmware and calibration software are up to date before calibrating.
How often should PrimeScan calibration be performed?
Follow the manufacturer's guidance, typically after major firmware updates or if you notice drift. Establish a routine schedule and document it.
Follow the manufacturer's guidance, usually after updates or observed drift.
Can I calibrate PrimeScan without patient scans?
Calibration uses a reference target and does not require patient scans. Do not substitute with mock or clinical data.
Calibration uses a reference target, not patient scans.
What are common signs that calibration is needed?
Look for drift in measurements, misalignment, or inconsistent surface textures across scans. These indicate a recalibration may be necessary.
If you notice drift, misalignment, or texture inconsistencies, recalibrate.
How long does calibration typically take?
Most calibration sessions take about an hour, depending on environment and kit condition. Allocate extra time for troubleshooting if needed.
Typically about an hour, with extra time if issues arise.
Where should calibration results be stored?
Store results in a centralized calibration log, including date, device ID, software version, and pass/fail notes.
Keep a centralized calibration log for easy review.
Watch Video
Key Takeaways
- Follow manufacturer-aligned steps for repeatable results
- Document every calibration session for traceability
- Verify results against a reference target before patient scans
- Maintain a clean, temperature-controlled workspace to reduce drift