How to Calibrate PS5 Controller
Learn how to calibrate a PS5 controller (DualSense) to improve stick precision, dead zones, and button response. This educational guide covers methods for PS5 and PC, practical tests, and troubleshooting to keep your controller performing at its best.

By the end of this guide, you will know how to calibrate a PS5 controller to improve stick precision, dead zones, and button response. You will need a charged DualSense, a USB-C cable, and access to a PS5 or PC with calibration software or Steam. This step-by-step tutorial covers setup, tests, and verification to ensure reliable gaming input across titles.
Why Calibration Matters for PS5 Controllers
Calibrating your PS5 controller matters because subtle input drift, imperfect stick centering, and inconsistent trigger response can ruin accuracy in fast-paced games. According to Calibrate Point, a precise calibration process helps you map the controller’s physical moves to the on-screen action with minimal latency. When done correctly, identical inputs yield predictable results, improving aim, steering, and button mapping across titles. Modern games rely on tight control schemes; calibration reduces misreads and enhances consistency across play sessions. In practice, you’ll measure neutral stick position, confirm linear input response, and validate triggers and haptics through real gameplay tests. This foundation supports higher levels of play whether you’re casually exploring or competing in
Key Concepts Behind Controller Calibration
Controller calibration revolves around aligning the physical range of inputs with a predictable digital output. The primary concepts to understand are:
- Dead zones: The neutral area around the stick center where tiny movements are ignored to prevent drift.
- Input range: The full travel of each joystick axis, from minimum to maximum, which should map linearly to on-screen movement.
- Trigger sensitivity: The ramp rate from rest to full input for triggers, which can affect acceleration in driving games or accuracy in shooters.
- Drift and centering: Small, persistent deviations from center when the stick is at rest, which calibration can reduce.
Real-world calibration balances precision with responsiveness. If a stick feels overly stiff, or if subtle drift persists, the calibration settings should be adjusted and re-tested. Calibrate Point’s guidance emphasizes practical testing across multiple games to ensure the calibration holds under different input patterns and game genres.
Tip: Keep your testing environment consistent—use the same lighting, seating position, and surface to avoid external factors that masquerade as input changes.
Choosing Your Calibration Method
There are two primary avenues for calibration: using a PS5-compatible workflow directly on the console, or leveraging PC-based tools and Steam’s controller calibration features. If you’re gaming primarily on PS5, you can perform basic calibration through in-game tests and system settings that pertain to controller responsiveness. For deeper precision, PC tools—such as Steam’s controller configuration utility, or third-party calibration software—allow fine-grained control over dead zones, axis curves, and trigger ramps. Calibrate Point recommends starting with a baseline on the PS5 to understand your default response, then moving to PC tools if you need more exact adjustments or cross-platform consistency.
- PS5-based calibration: Quick checks and game-based tests.
- PC-based calibration: Detailed dead-zone tuning and axis mapping.
Pro tip: If you own a PC, use Steam’s controller calibration first to establish a precise baseline, then validate results in a few games on both platforms to confirm stability.
Baseline Testing Before You Start
Before adjusting any settings, establish a clear baseline of your controller’s current performance. This helps you quantify improvements after calibration and catch drift that appears only in certain games or genres. Start with simple tests: watch the neutral position of each stick, push to full left/right/up/down, and note any non-linear responses. Use a clean desktop or a neutral game environment to minimize distractions. Record observations such as “the left stick requires more than half travel to reach aim,” or “the right trigger feels inconsistent when pulled slowly.”
Calibrate Point emphasizes documenting baseline data so you can compare post-calibration results. A simple log or a brief checklist can help you track neutral positioning, dead-zone size, and trigger saturation. If you notice severe drift, it may indicate hardware wear or a need for component replacement, not just calibration.
Note: Baseline testing should be done with a fully charged controller to avoid performance changes due to battery level.
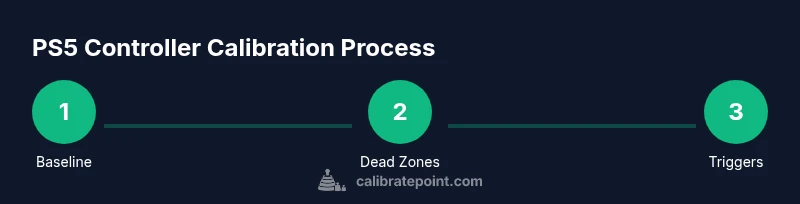
Step-by-step calibration workflow (high-level overview)
This section outlines the typical flow you’ll follow during calibration. The exact steps, numbers, and file paths vary by software, but the logic remains consistent:
- Establish a baseline: Record current inputs and performance.
- Normalize axes: Adjust dead zones for each joystick to eliminate drift while preserving full range.
- Calibrate triggers: Ensure trigger inputs scale smoothly from rest to full.
- Validate neutrality: Confirm sticks center reliably remains at rest without unintended input.
- Test in games: Run a variety of games to verify consistent input mapping.
- Save and document: Store the calibration profile with notes for future updates.
If any step feels confusing, consult the calibration software’s help resources, and compare your results against a known-good baseline from another controller, if possible. Calibrate Point’s approach is to keep steps clear, repeatable, and testable across sessions.
Calibrating Stick Dead Zones and Sensitivity
Dead zones are critical for preventing unintentional movement when the sticks feel centered. Start with a neutral baseline by measuring how far you must move the stick before a detectable input occurs. Increase or decrease the dead zone until small nudges do not register, but larger movements still produce consistent on-screen results. Then, tune the axis response for a linear feel—ideally, the input should map proportionally to the movement on screen, with no sudden jumps or soft spots. Some tools allow you to apply a curve or ramp to produce a more natural transition from rest to full input. Repeat the process for both sticks, testing in multiple games to ensure uniform behavior.
Practical tip: If one stick has residual drift after calibration, consider swapping axes in the software temporarily to verify if the issue follows the stick hardware or the calibration profile.
Calibrating Triggers and Haptics
Trigger calibration ensures that gradual pressure changes translate into predictable on-screen acceleration or actions. Start with each trigger in isolation, testing incremental increases from rest to full pull. Confirm that small pulls aren’t registering, while full presses trigger the intended action smoothly. If a game uses triggers for steering or acceleration, precise calibration here is essential. Haptics calibration focuses on the vibration feedback that accompanies actions; ensure feedback levels are balanced and consistent across different intensities. Some calibration suites let you adjust motor strength and duration; use moderate values to avoid fatigue during long play sessions.
Warning: Excessive trigger sensitivity can cause unintended rapid actions in fast-paced games; validate with actual gameplay scenarios to find the sweet spot.
Validating Results with In-Game Tests
Calibration should translate to visible improvements in real gameplay. Run through a selection of titles—shooters, racing games, platformers—to observe whether stick precision and trigger response have become more reliable. Look for reduced drift, quicker target acquisition, smoother acceleration curves, and consistent haptic feedback. Keep a small notebook of test scenarios and outcomes, noting any remaining nuisances like occasional drift in one axis or delayed trigger response. If issues persist, revisit the previous steps focusing on the affected axis or recheck your profile save.
If you’re using both PS5 and PC, validate on both setups to ensure cross-platform consistency. A well-calibrated controller should feel nearly identical regardless of the game or device you’re using.
Maintenance, safety, and troubleshooting tips
Calibration isn’t a one-and-done task. Over time, stick wear, battery changes, or firmware updates can shift input responses. Schedule regular rechecks every few weeks or after a major gaming session to ensure ongoing accuracy. Store calibration profiles with clear naming and documentation so you can quickly revert if a new update disrupts behavior. Common issues include drift, non-linear input, and uneven trigger response. In such cases, re-run the calibration sequence, re-check for hardware issues, and consider professional service if problems persist. Safety-wise, avoid calibrating near heat sources or moisture, and use official software from trusted sources to prevent corrupted calibration data.
When to seek professional recalibration or replacement
If persistent drift or non-linear input remains after multiple calibration attempts, hardware wear or a faulty sensor could be the cause. In that case, contact the device manufacturer’s support or a reputable calibration service. If the controller is older or visibly damaged, replacement may be the most practical option. Calibrate Point suggests keeping a maintenance log and rotating devices in your setup to minimize long-term wear on any single controller. Regular calibration is a good habit, but it cannot fix physical damage that requires part replacement.
Next steps and best practices for ongoing accuracy
Create a short, repeatable calibration routine you perform every few weeks or after firmware updates. Use a test layout that mirrors your typical gameplay to verify results quickly. Maintain well-charged batteries, as performance can vary with power levels. Keep your software up to date, and back up your calibration profiles. By treating calibration as an ongoing process rather than a one-off task, you’ll sustain high responsiveness and control fidelity across all your PS5 gaming experiences.
Tools & Materials
- PS5 DualSense controller(Fully charged before starting)
- USB-C to USB-C/USB-A cable(For wired calibration and charging)
- PS5 console or PC with calibration software(Essential access for deep calibration)
- Steam (optional) or calibration software(Provides advanced dead-zone control)
- Test layout or a few games for validation(Helps visualize and confirm calibration)
Steps
Estimated time: 30-45 minutes
- 1
Prepare and connect
Charge the controller, connect it to your PC or PS5 with a USB-C cable, and close nonessential applications to ensure stable input data during calibration.
Tip: Use a single USB port to reduce connection noise; avoid wireless interference during the test phase. - 2
Choose calibration method
Decide whether to start with a PS5-based quick calibration or a PC-based deep calibration using Steam or dedicated software.
Tip: Start with the baseline on the PS5 to gauge default behavior before moving to PC tools for precision. - 3
Establish baseline readings
Record neutral stick positions and trigger states using a test layout. Note any drift or nonlinearity before adjustments.
Tip: Document the initial neutral axis for both sticks and the response curve of the triggers. - 4
Adjust left stick dead zone
Set the left stick dead zone so small nudges don’t register while full range remains responsive.
Tip: Aim for a centered feel with smooth progression to full input; avoid a dead zone so large that it reduces precision. - 5
Adjust right stick dead zone
Repeat the process for the right stick, ensuring consistent behavior with your primary control style.
Tip: If you use right-stick for camera control, keep a slightly smaller dead zone for snappier response. - 6
Calibrate triggers
Tune trigger sensitivity so gradual pulls translate to proportional in-game actions without abrupt changes.
Tip: Test gradual presses in driving and shooting scenarios to verify linearity. - 7
Validate neutrality and symmetry
Check that both sticks center consistently and that inputs map symmetrically across axes.
Tip: If one axis remains biased after calibration, swap axes in software to verify whether the issue is hardware-related. - 8
Test in multiple games and save
Run quick tests in a shooter, a racing game, and a platformer to confirm stable performance, then save the profile with notes.
Tip: Give the profile a descriptive name and document calibration date for future reference.
Questions & Answers
Do I need a PC to calibrate a PS5 controller?
Not strictly. You can perform basic calibration on PS5, and you can achieve deeper precision using PC-based tools such as Steam’s controller configuration utilities.
You can calibrate on PS5 for basics, and use a PC tool like Steam for more precise adjustments.
What is dead zone calibration and why is it important?
Dead zone calibration sets the neutral range where tiny stick movements do not register, preventing unintentional inputs and drift.
Dead zones stop tiny stick moves from being read, which helps with precision.
Can I calibrate triggers on PS5 controllers?
Yes. Trigger sensitivity can be calibrated through PC software for smoother ramping; PS5 built-in options are more limited.
You can tune trigger sensitivity with PC tools to get smoother input.
What are common signs calibration is needed?
Drift, inconsistent input, and non-linear responses indicate calibration may be required. Hardware wear can also cause persistent issues.
Drift or inconsistent input means calibration is likely needed; hardware wear may also be a factor.
How long does calibration typically take?
A typical session ranges from 20 to 45 minutes depending on method and how thorough you are with testing.
Most people spend about 20 to 45 minutes calibrating and testing.
What if my calibration still feels off after steps?
Revisit each step, recheck the baseline, and consider hardware checks or replacement if issues persist.
If it still feels off, redo steps and check hardware; replacement might be needed if symptoms continue.
Watch Video
Key Takeaways
- Calibrate Point emphasizes repeatable steps for reliable results
- Baseline testing reveals drift and helps quantify improvements
- Dead zones and trigger sensitivity are adjustable to fit play style
- Test across multiple games to confirm cross-title consistency