How to Calibrate XP-Pen: A Complete Step-by-Step Guide
Learn how to calibrate your XP-Pen tablet for accurate cursor tracking, pressure, and tilt. This guide covers setup, driver updates, mapping, testing, and troubleshooting to keep your workflow precise.

This guide shows you how to calibrate an XP-Pen tablet to ensure accurate cursor tracking, pressure sensitivity, and tilt response. You'll prep your workspace, update drivers, run calibration for pen and buttons, and map the active area. By the end, you’ll have a reliable, artist-ready setup for digital painting, illustration, and design.
Why XP-Pen calibration matters for creatives
Calibrating an XP-Pen tablet is not just a one-time setup step; it directly affects how your pen movement translates to the screen. A precise calibration ensures that the cursor mirrors your hand’s movements with minimal lag, that pressure sensitivity produces consistent line weights, and that tilt detection behaves predictably in tools you rely on for shading and brush control. According to Calibrate Point, consistent calibration reduces drift and improves line consistency across projects. The Calibrate Point Team emphasizes that even small mismatches can compound at larger scales, making tasks like inking and color blocking feel less intuitive. When you invest a few minutes to calibrate correctly, you gain reliable input translation that scales with your skills and workload. This is especially important for professional work, where precise control can affect outcomes in client reviews and final deliverables.
What components get calibrated on XP-Pen
XP-Pen calibration typically targets four core aspects: the active area mapping (how the screen area aligns with the tablet surface), the pen pressure curve (how hard you press to get thick or thin lines), tilt detection (angle-based shading when supported), and button/eraser mappings (programming shortcuts). The goal is to ensure that every gesture you perform translates to predictable results in your favorite apps. In practice, you’ll adjust the mapping so your tablet’s corners correspond to your monitor edges; tweak the pressure curve to match your drawing style; and verify tilt works with brushes that support angle-based control. When done well, calibration helps your strokes feel natural and balanced across different tools and projects.
Prepare your workspace and software
Begin with a clean, stable workspace: place the tablet on a flat surface, free of clutter that could introduce friction or misalignment. Update the XP-Pen drivers to the latest version from the official site before making any changes. Close other graphics-intensive programs to prevent interference during the calibration process. It’s also wise to note your primary monitor setup (single or multi-monitor) because mapping will depend on how windows behave across displays. Having a measurement grid or ruler handy can help you verify that the mapping ratio is accurate, especially if you work with precise dimensions in UI design or technical drawing.
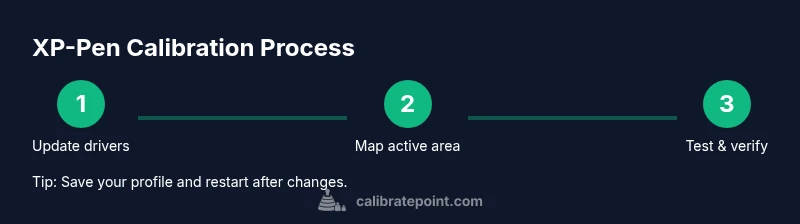
Step-by-step calibration workflow overview
In XP-Pen’s driver suite, you’ll typically adjust four main areas: mapping (active area), pen pressure, tilt sensitivity, and button configuration. The driver UI guides you through a series of tests to confirm that your pen tips, eraser, and shortcut keys respond as expected. A well-structured calibration process should conclude with a quick test in your primary drawing application to ensure on-screen input matches your hand movement. Remember that calibration is an iterative process; if something still feels off after the initial pass, revisit each section and fine-tune increments in small steps.
Verifying accuracy and quality checks
After calibration, test by performing basic strokes across the entire tablet surface. Check corner-to-corner tracking, line consistency, and whether the cursor starts exactly where your pen tip touches. Do a few test shapes—lines, curves, and circles—while varying pressure to ensure the curve responds smoothly. If your brushes feel too heavy or too light, revisit the pressure curve in the driver and adjust until the mid-range feels natural. Tilt checks are essential for shading tasks—draw a conical shape or tapered strokes to confirm tilt boosts change gradually and predictably. If you use multiple monitors, launch a test in each display to verify the mapping holds across setups.
Troubleshooting common issues
Common calibration hiccups include drift (cursor not aligning with pen tip), inconsistent pressure responses, and disabled tilt. Start by restarting the driver after changes, then re-run the mapping and pressure tests. If drift persists, confirm you’re calibrating against the correct active area and that there’s no conflicting software (e.g., another graphics tablet or pen input device). In some cases, a clean driver reinstall helps establish a stable baseline. Always ensure your operating system recognizes the XP-Pen tablet as the primary input device before testing in any graphics program.
Best practices for ongoing calibration
Treat calibration as part of your routine toolkit. Recalibrate after major driver updates, OS upgrades, or adding a new monitor. Keep a spare profile for different workflows (e.g., photo editing vs. digital painting) and switch between them as needed. Periodically verify accuracy by performing a quick test at the start of a project, especially if you switch between workspaces or project types. Finally, document any notable changes you make to the mapping or pressure curves so you can reproduce results consistently across sessions.
Tools & Materials
- XP-Pen tablet and stylus(Ensure the nib is clean; substitute nibs if needed)
- Computer (Windows/macOS)(Driver installation required; keep OS up to date)
- USB-C or USB-A cable(Stable connection; avoid wireless if possible)
- XP-Pen driver software(Download latest driver from official XP-Pen site)
- Optional: spare nibs and nib remover(Useful if nib wear is visible during testing)
- Soft microfiber cloth(Clean the tablet surface before calibration)
- Gridded test paper or digital measuring tool(Helpful for verifying mapping accuracy)
Steps
Estimated time: 15-25 minutes
- 1
Update XP-Pen drivers to latest version
Download and install the latest drivers from the official XP-Pen site. Restart your computer and reconnect the tablet to ensure the new software loads correctly.
Tip: After install, launch the driver utility and check for firmware notices or updates. - 2
Connect tablet and open driver utility
Plug in the tablet, open the XP-Pen driver software, and confirm device detection. If multiple devices appear, select your XP-Pen model as the primary input.
Tip: Close other input-heavy apps to ensure clean driver initialization. - 3
Set mapping (active area) to match display
Choose the correct monitor and map the tablet surface to the screen area you actually use. Use 1:1 scaling to maximize accuracy across the drawing area.
Tip: Disable any unintended normalization options that shrink or expand the active area. - 4
Adjust pen pressure curve
In the driver, calibrate the pressure curve by drawing on the test panel. Aim for a natural transition from light to heavy lines with steady mid-range response.
Tip: Make small incremental changes; test with your typical brush or pen tool in your main app. - 5
Test tilt and button mappings
Enable tilt in the driver and verify that tilt affects brush angle. Program shortcut keys and test eraser, middle mouse, and other buttons in your preferred software.
Tip: If tilt isn’t detected, ensure your brush supports tilt and that the feature is enabled in both driver and app. - 6
Save profile and conduct a final test
Save the calibration profile, restart the driver, and perform a final drawing test in your main application to confirm accuracy across the surface.
Tip: Label profiles clearly (e.g., 'Studio-Primary') for quick switching during projects.
Questions & Answers
Do I need to recalibrate XP-Pen after every driver update?
Driver updates can reset some settings; recalibration is recommended after major driver updates. Check that mapping remains correct and that tilt and pressure still respond as expected.
Driver updates can reset settings, so it's wise to recalibrate after updates to keep mapping accurate.
Is calibration different on Windows vs macOS?
The calibration workflow is similar on both platforms, but the driver UI may place features in different sections. The core concepts—mapping, pressure, tilt, and buttons—remain the same.
Calibration steps are similar on Windows and macOS, with minor UI location differences.
Will calibration affect existing artwork?
Calibration only changes how future pen input is translated to the screen; existing artwork won’t be altered. You’ll see the updated behavior on new strokes.
Calibration affects future input; your existing artwork stays as is.
How often should I recalibrate?
Recalibrate after major driver updates, OS changes, hardware changes, or if you notice drift or inconsistent pressure response.
Calibrate when you notice drift or after significant software or hardware changes.
What if tilt or eraser doesn’t respond after calibration?
Verify tilt is enabled in both the driver and your drawing app. If it still fails, reinstall the driver and re-run calibration. Check that the brush supports tilt in your software.
Tilt or eraser not responding? Check settings, then reinstall if needed.
Can I calibrate XP-Pen across multiple monitors?
Yes, use the driver’s mapping to define the primary display and, if supported, calibrate per monitor. Ensure consistent scaling across displays for best results.
You can map and calibrate across monitors, keeping scaling consistent.
Watch Video
Key Takeaways
- Always update drivers before calibrating
- Map the active area to your display setup
- Test with your main app after calibration
- Save and reuse the calibration profile