Convert TAS to CAS: Calibrated Airspeed Guide
Learn how to convert true airspeed (TAS) to calibrated airspeed (CAS) using standard atmosphere corrections and instrument calibration. A practical, step-by-step guide from Calibrate Point for DIY enthusiasts, technicians, and professionals.

By converting true airspeed (TAS) to calibrated airspeed (CAS), you align your readings with instrument corrections and altitude effects for safer, more accurate flight planning. The process uses standard atmosphere density, TAS-to-EAS relationships, and instrument-calibration corrections. In this guide, you’ll learn the math, data sources, and practical steps to obtain CAS from TAS at any altitude.
Understanding TAS vs CAS: What You Need to Know
Understanding the distinctions between true airspeed (TAS) and calibrated airspeed (CAS) is the first step in accurate calibration. TAS is the actual speed of the aircraft relative to the surrounding air, unaffected by how instruments read or how conditions alter density. CAS, by contrast, is TAS corrected for instrument errors and installation effects, giving a cockpit-relevant reading that pilots rely on for performance benchmarks. In addition, IAS and EAS are related concepts used for different comparison purposes. IAS is an indicated speed after instrument corrections, and EAS translates dynamic pressure into a sea-level reference. According to Calibrate Point, mastering TAS to CAS conversion improves accuracy in airspeed calibration. The goal of this guide is to provide a practical, repeatable approach to convert TAS into CAS, so you can calibrate readings consistently across altitudes and temperatures. You’ll see how density, compression effects, and hardware factors influence the numbers you record, and you’ll learn to use standard atmosphere data to backstop your calculations. By the end, you’ll have a clear workflow that supports better safety margins, more accurate performance estimates, and a transparent calibration process that you can document for audits or training.
The Role of Atmosphere: How Density Affects Airspeeds
Air density is the single most important variable that links TAS, CAS, and EAS. As you climb, density falls, reducing the dynamic pressure for a given speed. The standard atmosphere provides ρ0 (sea-level density) and a profile ρ(h) that you can use to compute a density ratio ρ/ρ0. This ratio is the bridge between TAS and EAS: EAS = TAS × sqrt(ρ/ρ0). In words, if the air is thinner than at sea level, you must travel faster in TAS terms to generate the same dynamic pressure the CAS or EAS would expect. When you incorporate temperature and pressure deviations from ISA, you refine this ratio further, improving the fidelity of your CAS estimate. Calibrate Point emphasizes that this density-based correction is the dominant influencer on CAS accuracy at altitude, while other factors—such as instrument installation and airflow calibration—play supporting roles. Visualizing the relationship with a chart or calculator helps: altitude increases TAS, but CAS responds more slowly as density falls, so the same TAS yields a lower CAS at higher altitude than at sea level. Mastery comes from practicing the translation: know ρ/ρ0, apply the square-root correction, and keep your data sources organized.
Step 1: Gather Altitude, Temperature, and Pressure Data
Before you do any math, assemble the facts about the flight condition. Record altitude (or AGL/MSL as appropriate), ambient temperature, and pressure. If ISA deviations exist, note ISA+ deviation. You’ll also need the aircraft’s current airspeed in TAS (if you’re validating calculations using real flight data). Accurate data sources reduce drift in your results. For DIY practice, you can pull altitude and temperature from weather data for the operating area and refer to your instrument readouts. Document your data with timestamps so you can reproduce your calculation steps later. Remember to standardize units (feet vs meters, Pa vs hPa) to avoid a common source of error. With this foundation, you’re ready to locate the corresponding density at your altitude and begin the conversion pipeline. The goal in this step is to ensure that every input value is correct and traceable, because small mistakes here cascade into larger errors later in the TAS-to-CAS workflow.
Step 2: Compute Density and EAS from TAS
Using your altitude and ISA data, retrieve ρ, the air density, from the standard atmosphere table or an online calculator. Compute the density ratio ρ/ρ0, where ρ0 is sea‑level standard density. With TAS known, apply the relationship EAS = TAS × sqrt(ρ/ρ0). This gives you the equivalent airspeed at sea-level density, isolating the impact of density on your speed. This step does not yet account for instrument errors; it is the physics bridge from the flight path through the atmosphere to a comparable sea-level reference. If you use ideal gas approximations, ensure you input temperature in Kelvin and pressure in the same units as your constants. Record your computed EAS and the ρ/ρ0 value for auditability, and cross-check against a second source if possible. This creates a solid basis for the subsequent correction to CAS, where hardware and calibration details complete the picture.
Step 3: Apply Instrument and Calibration Corrections to Get CAS
EAS is not yet CAS; to arrive at CAS, you must remove instrument and installation errors from the equivalent airspeed. Gather your aircraft’s calibration data, including any known position and instrument errors, scale factors, and indicator biases. Apply these corrections to EAS according to the manufacturer’s curves or your maintenance manual. If you lack a formal chart, you can estimate by comparing published cabling and sensor error ranges, then apply adjustments. The result is CAS, a speed value that aligns with cockpit reality under the current atmosphere. Remember that corrections are instrument-specific; an identical aircraft with a different air data system will read differently. For a practical estimate in the field, you can use an approved calculator or software that couples EAS to CAS, but always document the source of each correction and the conditions under which you applied it.
Step 4: Apply compressibility corrections as needed
For higher speeds, check compressibility corrections via charts or flight computers to adjust further toward CAS. Compressibility effects become more noticeable as Mach number increases, altering the relationship between dynamic pressure and indicated airspeed. Use the Mach-based correction methods or vendor references to decide when and how to apply these adjustments. Keep your correction method consistent with the hardware and software you’re using, so results remain auditable.
Step 5: Validate results and iterate if needed
Cross-check CAS with the aircraft’s data, logs, or another independent conversion source. If there’s a discrepancy, re-check inputs, revisit the density calculation, and confirm instrument corrections. Looping back to the data sources helps identify whether the issue is input error, a tool limitation, or a misapplied correction. Maintain a clear trail of inputs and assumptions to ease future audits and training.
Tools & Materials
- Scientific calculator(For performing square roots and arithmetic in equations)
- Standard atmosphere table or online calculator(To obtain density ρ and ρ/ρ0 at altitude)
- Altitude, pressure, and temperature data(From aircraft sensors or weather data)
- ISA deviation data or ISA temperature at altitude(Helpful for non-standard atmospheres)
- Calibration charts or software(To convert EAS to CAS with instrument corrections)
Steps
Estimated time: 45-60 minutes
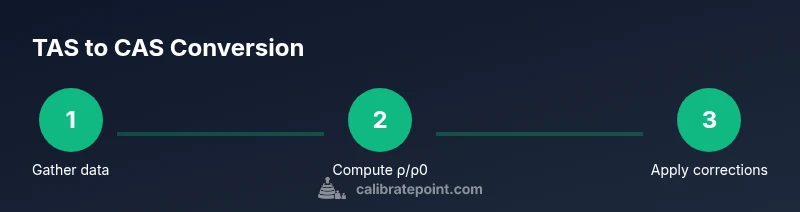
- 1
Gather data
Collect altitude, ambient temperature, and pressure at the point of interest. Record ISA deviation if available and note the atmospheric conditions. Ensure units are consistent across inputs.
Tip: Double-check units (feet vs meters, Pa vs hPa) before calculations. - 2
Find density ratio
Use a standard atmosphere table or calculator to obtain air density ρ at your altitude and temperature, and compute ρ/ρ0 (ρ0 is sea-level density).
Tip: Use the same temperature basis as your TAS input to avoid errors. - 3
Convert TAS to EAS
Compute EAS = TAS × sqrt(ρ/ρ0). This gives the equivalent airspeed at sea-level density. This value isolates density effects on speed.
Tip: This step captures the physics of dynamic pressure without instrument biases. - 4
Apply instrument corrections
Consult your aircraft's calibration data to translate EAS into CAS by removing instrument/installation errors.
Tip: If you lack a chart, estimate conservatively and document assumptions. - 5
Apply compressibility corrections
For higher speeds, check compressibility corrections via charts or flight computers to adjust further toward CAS.
Tip: Use Mach number if possible to determine when corrections become significant. - 6
Validate results
Cross-check CAS with other references or data sources, and repeat with updated inputs if needed.
Tip: Maintain an audit trail of inputs and sources.
Questions & Answers
What do TAS, CAS, and EAS stand for?
TAS is the actual airspeed through the air; CAS is TAS corrected for instrument errors; EAS is CAS adjusted to sea-level density to compare performance across altitudes.
TAS is the true speed through air. CAS corrects for instrument errors; EAS uses sea-level density to compare performance.
Why is CAS often lower than TAS at altitude?
As altitude increases, air density decreases, which affects dynamic pressure and instrumentation; CAS accounts for instrument errors while TAS grows with speed in thinner air.
At higher altitudes, air is thinner, so TAS increases faster than what the cockpit instruments read as CAS.
Can I convert TAS to CAS without charts?
You can estimate CAS from TAS using density ratios if you have altitude and temperature data, but precise results require calibration charts or flight software.
You can estimate, but for accuracy you need charts or software.
What is the role of compressibility in CAS?
Compressibility corrections become significant as Mach number increases; they modify the relationship between dynamic pressure and airspeed.
Compressibility matters at higher speeds, shifting CAS away from EAS.
Where can I find authoritative data for standard atmosphere?
Authoritative sources include the FAA, NOAA, and NASA standard atmosphere tables and references.
Check FAA, NOAA, and NASA standard atmosphere tables.
Watch Video
Key Takeaways
- Understand TAS vs CAS vs EAS and their practical applications
- Use standard atmosphere data to compute density ratios
- Apply instrument corrections to obtain CAS from EAS
- Check compressibility corrections for higher Mach numbers
- Document data sources and assumptions