Probe Calibrate Not Working: Urgent Troubleshooting Guide
Urgent, practical steps to fix probe_calibrate not working. Follow a proven, safe workflow to diagnose power, connector, software, and environmental issues with Calibrate Point's trusted guidance.

Most likely, probe_calibrate not working is caused by a power issue or a loose connection that interrupts calibration signals. Start with a quick power cycle, reseat the probe cables, and verify the reference sensor is responsive. If the problem persists, proceed through the diagnostic flow to isolate software glitches or environmental factors. Calibrate Point recommends a systematic, safe approach to avoid miscalibration.
Immediate checks you can perform before deeper diagnostics
If the probe_calibrate not working, start by ruling out the simplest causes. According to Calibrate Point, many failures originate in the power or connection domain. Ensure the instrument is powered from a stable outlet or battery source, and that the power indicators align with the user manual. Verify that calibration mode is active and that the probe is physically connected to its host, with no loose pins or frayed cables. Inspect the environment for vibration, extreme temperature, or EMI that can corrupt readings. Reseat the probe connectors by unplugging and replugging, ensuring a firm seat. If you have a spare probe or reference sensor, swap in to determine whether the issue is hardware-bound or software-bound. Keep a concise log of each check, the observed indicators, and any abnormal readings. This quick triage often resolves the problem without deeper intervention.
Common causes for probe_calibrate not working
A systematic list helps you avoid chasing ghosts. High-likelihood causes include power instability, battery drainage, or a loose connector that intermittently interrupts signals. Medium-likelihood issues include stale calibration references, corrupted baseline data, or a recently changed environment that shifts measurements. Low-likelihood factors include firmware glitches, outdated software, or incompatible probes. For each cause, frame a targeted remedy: verify power, reseat cables, reset the calibration profile, and re-run the baseline test. Document the change and the result to see if the problem recurs. Remember, many calibration problems are symptoms, not root causes, so confirm by testing with a known reference before concluding.
How calibration references and sensor health affect results
Calibration relies on stable references and healthy sensors. If a reference drift occurs, even a correctly connected probe will report out-of-spec results. Sensor health matters: worn or contaminated probes produce biased measurements. Regular calibration profiles and reference data should be validated against a traceable standard. If your workflow uses automatic drift compensation, ensure the compensation coefficients remain within expected bounds. Compare newer readings with historical baselines; a sudden shift often indicates a degraded reference or sensor fault rather than user error. In practice, keep multiple calibration profiles for different materials or temperature ranges, and tag each run with metadata to simplify audits and troubleshooting later. Calibrate Point emphasizes that reproducibility is the anchor of trust in measurements.
Recalibration workflow: step-by-step safeguards
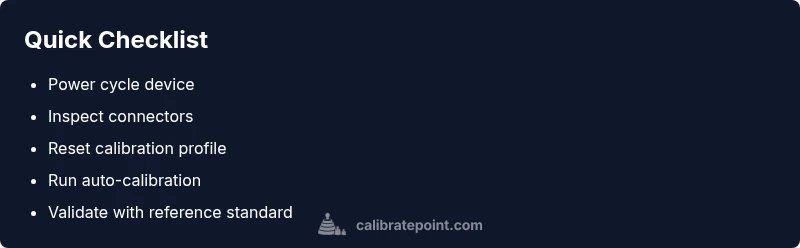
A disciplined recalibration workflow minimizes risk of miscalibration. Start by powering down, inspecting connectors, and ensuring the environment is stable. Power on and perform a full system self-check if available. Reset or reload the baseline calibration data, then run the auto-calibration in a controlled sequence. If the device supports a 'calibration verify' pass, run it with a known standard. Compare results to the documented acceptance criteria and repeat if needed. Save the new profile with a descriptive name and timestamp. Validate with a separate reference material to confirm the calibration holds across tests. Document all values, settings, and outcomes to enable future audits.
Data integrity and environmental factors to monitor
Stay vigilant about data integrity and external influences. Temperature fluctuations, vibrations, electromagnetic interference, and humidity can skew calibration results. Use shielded cables where possible and position the probe away from heat sources or rapidly changing ambient conditions. Keep firmware and calibration software up to date to minimize bug-induced drift. When recording results, capture both the numeric values and the ambient conditions. Implement a version-controlled log system so colleagues can trace changes. If results vary between sessions, investigate environmental drift first, then hardware integrity, and finally software consistency.
Steps
Estimated time: 45-60 minutes
- 1
Prepare workspace and safety
Clear the bench, gather spare cables, and wear safety PPE if required. Verify you have access to the calibration reference materials and the device manual. This preparation prevents missteps later and speeds up recovery.
Tip: Having a clean, labeled workspace reduces the chance of mixing probes or references. - 2
Power down and inspect power supply
Turn off the device, unplug the power source, and inspect for damaged adapters or batteries. Reconnect to a known-good outlet and perform a quick power-on self-test if available.
Tip: Avoid using damaged power cables; a small fault can cascade into calibration errors. - 3
Check connectors and cables
Visually inspect all connector pins for corrosion or wear. Reseat connectors firmly, and gently wiggle to confirm a secure seat. Replace any frayed or cracked cables before proceeding.
Tip: Always disconnect and reconnect one side at a time to prevent shorting. - 4
Reset calibration baseline
Load the default or last known-good calibration profile. If the device supports a reset to factory defaults, perform it and re-initialize the system.
Tip: Document the baseline version before and after reset. - 5
Run auto-calibration (if available)
Trigger the auto-calibration routine in a controlled sequence. Ensure the reference standard is stable and within its valid range during the run.
Tip: Use a single standard per session to minimize cross-contamination of results. - 6
Validate against a known standard
After calibration, measure with a reference standard and compare to expected values. Repeat if necessary to confirm consistency across multiple trials.
Tip: Record both measurement and ambient conditions for audit. - 7
Save and document
Save the new calibration profile with a clear timestamp and notes. Document any deviations or anomalies observed during testing to aid future troubleshooting.
Tip: Keep a change log for future comparisons. - 8
Escalate if unresolved
If results remain out of spec, escalate to a technologist or vendor support with logs, photos of connectors, and a summary of steps taken.
Tip: Do not continue calibrating with out-of-spec results.
Diagnosis: Probe calibrate not working
Possible Causes
- highPower issue (battery or outlet)
- highLoose or damaged connector
- mediumOutdated firmware or software glitch
- lowDirty sensor or contamination
Fixes
- easyPower cycle device and verify stable power supply
- easyInspect, reseat, and replace damaged cables/connectors
- mediumUpdate firmware and reboot; re-run calibration
- easyClean probe according to spec and recalibrate
Questions & Answers
Why does a firmware update sometimes affect calibration results?
Firmware updates can alter calibration algorithms or reset profiles, causing offsets. After updating, re-run calibration and verify compatibility with your reference standards.
Firmware updates can reset calibration offsets. Recalibrate and verify compatibility with your reference materials.
What if basic fixes don’t resolve probe calibration issues?
If basics fail, collect logs, compare against a known-good baseline, and contact support with your diagnostic package. Complex systems may require professional recalibration.
If basics fail, gather logs and contact support with your diagnostic package.
Can environmental factors invalidate calibration?
Yes. Temperature, vibration, and humidity can skew results. Calibrate in a controlled environment and document ambient conditions for each test.
Environmental changes can skew calibration—calibrate in stable conditions and log the environment.
Is it safe for a non-technician to recalibrate?
Basic recalibration is often safe for DIY users with clear instructions. For complex systems or hazardous setups, consult a technician.
Basic recalibration can be safe, but for complex systems, seek a technician's help.
How often should calibration be performed?
Follow manufacturer guidelines and internal SOPs. Regular intervals help catch drift early and maintain accuracy.
Follow manufacturer guidance and your SOPs for calibration frequency.
Watch Video
Key Takeaways
- Start with power and connection checks
- Follow a structured diagnostic flow
- Document every step and result
- Escalate when safety or measurement integrity is at risk