What Causes Calibration Error? A Practical Troubleshooting Guide
Discover the common causes of calibration error and follow a practical, step-by-step guide to diagnose, fix, and prevent future issues with Calibrate Point.

Calibration error typically stems from reference drift or sensor misalignment, accelerated by temperature changes and rough handling. Start with quick checks: verify reference standards, ensure zero and span are stable, and re-run the built-in calibration. If results are still off, follow the diagnostic flow and perform a full tube/sensor check. When in doubt, consult professional calibration services.
What causes calibration error
Calibration error occurs when the measured output deviates from a known standard after a calibration attempt. The root causes span environmental conditions to procedural mistakes. In practice, you’ll often see drift when temperature shifts, reference standards drift, or sensor alignment becomes misconfigured. The phrase what causes calibration error connects the concept to practical steps and urgency.
Common root causes by category
The causes fall into several broad categories. It’s common to see reference drift and worn reference standards as one group. Environmental factors like temperature and humidity can skew readings if the device isn’t properly stabilized. Hardware issues—sensor misalignment, loose connections, or contamination—are another frequent source. Software or procedure problems, such as outdated calibration routines or incorrect parameter selection, also contribute. Finally, handling and maintenance gaps, including rough transport or insufficient warm-up, quietly degrade accuracy over time.
How to reproduce and test: quick verification
To determine if calibration error is present, reproduce a baseline measurement and compare it to a reference standard. Use a control sample or instrument with a certified tolerance and log deviations. Check for repeatability by performing multiple runs under the same conditions. If results vary beyond the expected tolerance, you likely have a calibration error that needs corrective action with documented steps.
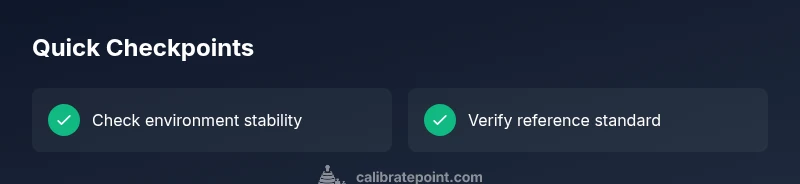
Quick checks you can perform before recalibration
Before recalibrating, perform a quick health check: ensure the device has had sufficient warm-up time, verify power stability, and confirm the environmental conditions match the target specification. Inspect connectors, cables, and fixtures for signs of wear. Validate that the reference standard is within its own calibration window and that zero/span controls are set to known-good values. Document the baseline data to compare against after any adjustment.
Diagnostic framework: symptom to solution
Apply a simple diagnostic framework: 1) identify the symptom (drift, offset, or nonlinear response); 2) hypothesize likely causes; 3) test each hypothesis with a minimal, safe experiment; 4) implement the corrective action and re-test. This flow helps prevent unnecessary adjustments and preserves traceability. Typical symptoms map to distinct fixes, so you can work efficiently and safely.
Step-by-step: fix for the most common cause
- Prepare and safety check: power off, verify environment, and gather traceable references. 2) Stabilize the environment: allow warmth and settle time; avoid drafts. 3) Check the reference: verify the standard’s validity and stability. 4) Calibrate zero: perform a clean zero adjustment and confirm repeatability. 5) Calibrate span: run the full span calibration with a stable reference. 6) Validate: test with a control standard and log results; confirm the device now reads within tolerance.
Steps
Estimated time: 30-45 minutes
- 1
Assess safety and prep
Power down the device, wear appropriate PPE, and clear the work area. Gather the calibration standards and a traceable reference. Verify the instrument is powered after stabilization prior to handling.
Tip: Always have a documented calibration plan before touching equipment. - 2
Stabilize the environment
Ensure the ambient temperature and humidity are within the recommended range. Allow time for all components to reach thermal equilibrium before testing.
Tip: Keep a log of room conditions during calibration. - 3
Check the reference standard
Inspect the reference standard for calibration status and recent stability. If the standard is suspect, replace it with a known-good reference.
Tip: If possible, validate the standard against a secondary reference. - 4
Zero calibration
Perform a clean zero adjustment using the reference standard. Confirm the zero output is stable across multiple readings.
Tip: Document zero values before adjustment. - 5
Span calibration
Run the full span calibration with the stable reference. Record the slope and intercept and check for consistency with prior data.
Tip: Use at least three points across the range. - 6
Validation and documentation
Test with a control standard and compare results to tolerance. Update calibration certificates and maintain a detailed log for audits.
Tip: Store data in a centralized calibration log.
Diagnosis: Measurement results drift or fail to meet tolerance after calibration
Possible Causes
- highTemperature drift or poor thermal stability
- mediumDrift or miscalibration of the reference standard
- lowMechanical misalignment or loose connections
Fixes
- easyStabilize temperature and re-test, ensuring proper warm-up
- mediumRecalibrate using a traceable reference standard and re-check with a control
- mediumInspect for misalignment and secure connections, then re-test
Questions & Answers
What is calibration error and why does it matter?
Calibration error is a discrepancy between a device’s output and a known reference after calibration. It matters because it affects measurement accuracy and traceability, which are critical for quality control and safety.
Calibration error means your device isn’t matching the reference after calibration, which can impact accuracy and traceability.
How can I tell if temperature is affecting calibration?
Temperature shifts can cause drift. Monitor ambient conditions, allow warm-up periods, and confirm readings stabilize when the temperature is constant.
Temperature changes can cause drift; ensure stable conditions and sufficient warm-up.
Should I replace the reference standard if drift is detected?
If drift persists after warm-up and checks, verify or replace the reference standard and re-validate with a control standard.
If drift persists, re-verify or replace the reference standard and re-test.
When is it necessary to involve a professional?
If calibration continues to fail after all checks, or if you suspect hardware damage, consult a certified calibration service.
If it still fails after checks or hardware is suspected to be damaged, seek professional calibration services.
What should documentation include?
Record the reference used, environmental conditions, all readings, adjustments, and the final verification result. This ensures traceability for audits.
Document everything: reference, conditions, readings, adjustments, and final results.
Watch Video
Key Takeaways
- Identify root causes early and avoid unnecessary adjustments.
- Stabilize the environment before calibration.
- Use traceable standards for reliable results.
- Document every step for audits and future recertifications.
- Validate results with a control standard after calibration.