Will Not Calibrate: Urgent Troubleshooting Guide for Instruments
Urgent troubleshooting guide for when an instrument will not calibrate. Step-by-step checks, diagnostic flow, and safety tips to restore accuracy quickly and safely.

Most likely the calibration routine is failing due to power instability, a drifted reference standard, or a sensor fault. Start with quick checks: confirm stable power, verify the reference standard, and reset the device using the manufacturer’s procedure. If the issue persists, follow the step-by-step flow below to isolate causes and apply safe fixes.
What will not calibrate signals in your instrument
According to Calibrate Point, when a measurement tool will not calibrate, it signals that something in the calibration chain has failed. In practice, most faults trace to power stability, a drifted reference standard, sensor faults, or a software glitch. This is not merely a nuisance; it can lead to unsafe readings, wasted batches, or costly downtime if ignored. For DIY enthusiasts and technicians, a disciplined, fast approach is essential. Calibrate Point emphasizes documenting every change and rechecking results to build a reliable calibration history. The keyword will not calibrate should be treated as a warning, prompting a structured diagnostic path rather than a guess. Begin with the simplest checks you can perform safely and incrementally escalate only when you have eliminated the low-hanging issues. This approach minimizes risk, preserves calibration records, and helps you identify the real root cause quickly.
Immediate safety and first checks
Before touching any equipment, ensure you are in a safe environment and PPE is in place. The fastest wins come from verifying power stability, inspecting cabling, and confirming environmental conditions align with the instrument’s specifications. Check that the power supply is within tolerance, the outlet is stable, and no adapter or converter is introducing noise. Next, perform a quick visual inspection for loose connectors, worn cables, or signs of damage. If possible, reset the instrument to its default state using the manufacturer’s documented procedure. Keep a log of the state before/after resets to track changes and reproduce results later.
Core causes to inspect first
Root causes for a will not calibrate scenario typically include power issues, drifted reference standards, sensor faults, and software glitches. The most common offenders are power instability and reference drift, which can invalidate every calibration attempt. Assess each potential cause in order of likelihood and apply fixes that are safe and reversible. If a fix requires disassembly, pause and escalate to a professional if you are unsure. By prioritizing obvious, verify-able issues first, you minimize risk and shorten downtime.
Environmental and hardware sanity checks
Environmental factors like temperature, humidity, vibration, and drafts can subtly influence calibration outcomes. Ensure the instrument is placed on a stable surface, away from direct airflow and heat sources. Verify that thermal management components, shields, and anti-vibration accessories are in good condition. Inspect connectors for corrosion or loose shielding; replace damaged cables before re-running calibration. After addressing the environment, re-check the reference standard and ensure it remains within its valid window. If failures persist, proceed to the next diagnostic phase and collect baseline data for comparison.
Sensor health and reference standards
Sensor degradation or misalignment is a frequent haunting cause when calibration refuses to complete. Check for signs of mechanical wear, contamination, or aging components that can drift readings. Inspect the reference standard for freshness, cleanliness, and proper storage. Verify that the standard’s temperature and humidity are within protocol. If the standard has drifted, replace it with a known-good stock and document lot information. After updating the standard, perform a fresh calibration run to see if results stabilize.
Software, firmware, and data integrity
Software issues and firmware bugs can interrupt calibration workflows or corrupt results. Confirm you are running the official calibration software version recommended by the manufacturer. Apply any available firmware updates and ensure the device resets cleanly afterward. Review any configuration files for unintended changes or corrupted parameters. If a recent software change correlates with the failure, revert to a prior known-good version and reattempt calibration with careful logging.
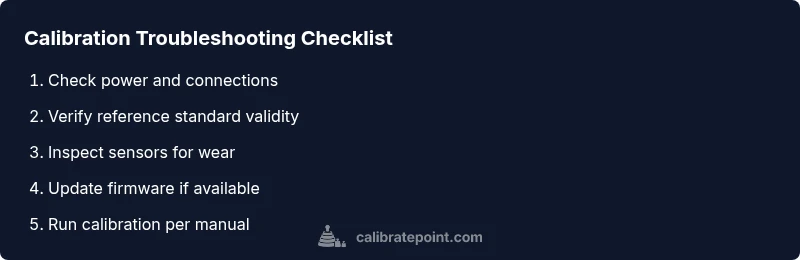
Step-by-step troubleshooting framework (overview)
The framework below provides a structured approach: validate power and environment, confirm reference standard integrity, verify sensor health, update software if needed, run baseline measurements, and execute the official calibration procedure. If any step reveals an anomaly, isolate and document it before moving forward. When the problem remains unresolved after these checks, engage the manufacturer or a qualified service technician to avoid compromising safety or data integrity.
Steps
Estimated time: 60-90 minutes
- 1
Prepare workspace and safety gear
Power down the device, disconnect from the mains, and put on appropriate PPE. Clear the workspace to avoid accidental contact with sensitive components. Confirm you have the manufacturer’s calibration procedure and the reference standard within reach.
Tip: Keep the calibration manual open to the exact page for your instrument. - 2
Check power and cabling
Inspect the power outlet and power cord for damage. Replace any frayed cables and ensure the device is powered from a clean, stable source. Reseat all connectors and verify there is no buzzing or overheating during startup.
Tip: Use a dedicated circuit where possible to avoid noise. - 3
Verify reference standard and date
Confirm the reference standard is within its validity window and was stored per protocol. If the standard has drifted or is expired, replace it and note lot numbers for traceability. Calibrate only with an approved standard.
Tip: Record the standard’s lot number and calibration date. - 4
Reset and re-run a baseline test
Reset the device to factory defaults or the last known good configuration. Perform a baseline measurement to ensure the instrument can reproduce a stable output before applying calibration.
Tip: Document the baseline readings for comparison. - 5
Run the official calibration procedure
Follow the step-by-step calibration protocol exactly as described by the manufacturer. Use correct reference values and measure multiple runs to assess repeatability.
Tip: Do not skip any dwell times or measurement intervals. - 6
Evaluate results and confirm
Compare the post-calibration readings to the target, and check for drift or bias. If results are inconsistent, proceed to advanced checks or professional service.
Tip: Log all results and timestamps for audit trails.
Diagnosis: Calibration process fails or returns inconsistent results; instrument will not calibrate
Possible Causes
- highPower issue or unstable supply
- mediumDrifted or expired reference standard
- mediumSensor fault or degraded component
- mediumSoftware/firmware glitch or misconfiguration
- lowEnvironmental conditions outside spec
Fixes
- easyCheck outlet, replace failing power strip, and use a clean, dedicated supply
- easyVerify reference standard validity and recalibrate with a fresh standard
- mediumInspect sensors, clean or replace as needed
- easyUpdate firmware and reset to factory defaults, then re-enter calibration procedure
- easyRecord environmental conditions and relocate equipment if necessary
Questions & Answers
What does it mean when an instrument will not calibrate?
This usually indicates a fault in the calibration chain—power, reference standard, sensor, or software. Systematically test each area to identify the root cause before proceeding.
An instrument that won't calibrate usually means there's a fault in the calibration chain like power, reference standards, or sensors. Test each area step by step.
Should I recalibrate or replace sensors?
Start with recalibration using a fresh standard and verified procedure. If results remain inconsistent, inspect or replace the suspect sensor.
Start with recalibration using a fresh standard. If issues persist, inspect or replace the sensor.
Do firmware updates affect calibration?
Yes. Firmware updates can fix bugs but may also alter calibration routines. Always back up settings and follow update notes before recalibrating.
Firmware updates can fix bugs or change calibration, so back up settings before updating and then recalibrate.
When should I call for professional service?
If the problem persists after all basic checks and firmware updates, or if you risk warranty issues, contact authorized service. Never attempt unsafe repairs.
If issues persist after basic checks, contact professional service; don’t attempt unsafe repairs.
What safety precautions are essential?
Wear PPE, handle standards carefully, and avoid exposing yourself to energized equipment. Disconnect power before major disassembly and follow lockout procedures.
Wear PPE and disconnect power before major work; follow proper lockout procedures.
Can environmental factors cause calibration failure?
Yes. Temperature, humidity, and vibration outside the recommended range can throw off calibration results and even prevent calibration from completing.
Environmental factors like temperature and vibration can cause calibration failures.
Watch Video
Key Takeaways
- Inspect power and reference standards first
- Follow manufacturer steps exactly
- Document every change and test
- Only proceed to professional service when needed
- Prevent future issues with proper storage and environment