What to Do When Calibration Fails: A Practical Troubleshooting Guide
Urgent, step-by-step troubleshooting for calibration failures. Learn a reliable diagnostic flow, common causes, and fixes to get instruments back in spec quickly.

In most cases, calibration fails due to a simple setup or worn reference. Quick fix: confirm power and cables, recheck the reference standard, and run the calibration routine exactly as the procedure instructs. If it still fails, inspect the sensor for debris or drift, verify environmental conditions, and log results. According to Calibrate Point, documenting every step speeds recovery.
Why Calibration Fails
Calibration is a precision process that relies on stable references, clean sensors, and correct procedure. When anything in the chain drifts, repeats poorly, or is out of spec, you’ll see out-of-tolerance results. Common failure modes include degraded reference materials, dirty sensors, loose connections, environmental drift, and software glitches. According to Calibrate Point analysis, most failures stem from setup issues or drift in the reference. This section explains why failures happen and how to spot the symptoms early, so you can act before costly rework. Expect practical checks you can perform in minutes and escalation steps for tougher cases.
Quick Diagnostic Checklist
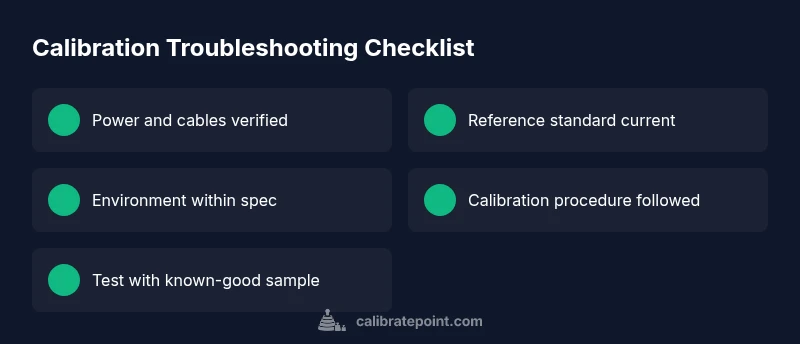
Before diving into deep diagnostics, run a fast, high-yield checklist. Start with the obvious: power, outlets, and secure cable connections. Next, confirm you’re using a valid reference standard and that it’s within its calibration window. Verify the instrument warm-up time and stability, as operating too soon can skew results. Check the environment for temperature, humidity, vibration, and cleanliness—these factors can affect sensors and references. If software prompts arise, ensure you’re on the latest firmware, and review any recent changes or calibrations. Keeping a log of readings, settings, and timestamps helps reveal patterns over time. Finally, perform a controlled test with a known-good sample to establish a baseline and compare against expected values.
Diagnostic Flow in Practice
A structured diagnostic approach saves time when calibration fails. Start by confirming the simplest factors first (power, cables, and basic settings). If the issue persists, validate the reference standard by substituting a known-good artifact or weight. Next, inspect the sensor or probe for fouling, drift, or physical damage. If the problem remains, compare the instrument’s output against a traceable standard to identify drift direction and magnitude. If software or data integrity is suspected, reinitialize the setup, reinstall drivers, or reload the calibration profile. If you get inconsistent results across channels, isolate the faulty channel for targeted fixes. Document every step and time-stamp observations to support audits or audits.
Safety, Warnings, and When to Call a Pro
Calibration work can involve live electrical systems or hazardous references. Always power down and follow lockout/tagout procedures where applicable. Wear appropriate PPE if required by your facility. If you cannot identify or correct drift after basic checks, or if the instrument is out of warranty, contact a certified calibration technician for a formal field calibration. Do not bypass manufacturer safety guidelines or calibration steps.
Prevention: Maintenance Your Calibration Routine Deserves
Establish a routine to inspect references, clean sensors, and verify environmental controls on a regular cadence. Schedule preventive calibrations with traceable standards and maintain a change log for firmware, procedure versions, and operator notes. Use checklists to ensure consistency and reduce human error. Training operators on proper technique minimizes variability and improves long-term stability.
Real-World Scenario: A Common Calibration Failure
In many shops, a typical failure path begins with a loose connection or dirty reference leading to inconsistent readings. By following a disciplined flow—check cables, verify references, ensure environmental stability, and re-calibrate—you can usually recover a failing instrument without replacing parts. Document every step to build a reliable history for audits and future troubleshooting.
Final Verdict: Next Steps for Rapid Recovery
When calibration fails, a methodical, safety-minded approach is essential. Start with basics, validate references, then re-run a controlled calibration. Document all steps, involve supervision if results remain out of spec, and pursue professional calibration if in-house capability is insufficient. The Calibrate Point team emphasizes that disciplined procedure and clear records shorten recovery time and minimize risk.
Steps
Estimated time: 60-90 minutes
- 1
Power down and inspect
Turn off the device, unplug, and visually inspect for damaged cables or loose connectors. Reconnect firmly and power up to test basic operation.
Tip: Check for any signs of wear or heat damage on connectors. - 2
Verify references and warm-up
Confirm the reference standard is current, within calibration window, and properly placed. Allow the instrument to warm up to stable operating conditions before starting.
Tip: Document reference lot numbers and expiration dates for audits. - 3
Run the calibration routine exactly
Follow the procedure step-by-step, without skipping or altering parameters. Use the correct mode and inputs for your scenario.
Tip: Avoid mid-run interruptions; if you must pause, end the run cleanly and restart from the beginning. - 4
Check environmental controls
Measure ambient temperature, humidity, and vibration. If outside the recommended range, wait or adjust conditions before re-calibrating.
Tip: Use a reference thermometer or standard environmental spec to verify. - 5
Test with a known-good sample
Calibrate using a trusted artifact or weight and compare the result to the expected value. Note deviations and repeat if necessary.
Tip: Keep a log of the baseline measurement for future comparisons. - 6
Escalate if drift persists
If drift continues after the above steps, escalate to a supervisor or arrange professional calibration with traceable standards.
Tip: Do not attempt to force a pass by altering tolerances.
Diagnosis: Device shows drift or out-of-spec results after calibration
Possible Causes
- highPower or cable issues
- mediumOutdated firmware or software glitch
- lowDirty or worn reference standards
Fixes
- easyCheck power, outlets, and cable integrity; reseat connectors and power cycle
- easyUpdate firmware or calibration software; re-run the calibration procedure
- mediumReplace reference material or calibration weights as needed; verify traceability
Questions & Answers
What should I check first when calibration fails?
Begin with power, cables, and the reference standard. Ensure the instrument has warmed up and you’re following the official procedure exactly. If the issue persists, move to more in-depth diagnostics.
Start with power and cables, then verify the reference standard and warm-up before deeper checks.
How can I tell if the reference standard is faulty?
Compare readings against a known-good standard, and look for inconsistent results across multiple calibrations. If results deviate beyond tolerance and can't be explained by procedure, consider replacing the standard.
Compare to a known-good standard to confirm fault; replace if readings are inconsistent.
What if the software prompts timeouts during calibration?
Timeouts often indicate communication or firmware issues. Update firmware, restart the software, and check cables. If problems persist, reinitialize the calibration profile or contact support.
Update firmware and verify cables; reinitialize profile if needed.
When should I contact a professional calibrator?
If drift persists after basic checks or if the instrument is critical, non-recoverable, or under warranty, arrange a formal calibration with a certified technician.
Call a professional if drift persists after checks or for critical instruments.
How can I prevent calibration failures in the future?
Establish a routine with traceable standards, environmental control, and operator training. Use checklists and maintain a meticulous log of every calibration.
Create a routine with standards, environment, and logs to prevent failures.
Watch Video
Key Takeaways
- Start with basics: power, cables, references.
- Document every step for traceability and audits.
- Escalate to professionals if drift remains after fixes.
- Prevent future failures with routine maintenance and logs.