zd421 Calibrate: A Practical Step-by-Step Guide
Learn how to calibrate zd421 devices with a clear, repeatable process. This guide from Calibrate Point covers tools, steps, safety, and tips for accuracy.

This guide will teach you how to calibrate zd421 devices using a repeatable workflow that you can reproduce on any bench. You will need a basic calibration kit, reference standards matched to your device, a stable work surface, and a clean environment. Following Calibrate Point’s method, you’ll document measurements and adjust settings safely to ensure reliable results.
What zd421 calibrate means in practice
Calibration is the process of comparing a device against known references and applying adjustments to reduce measurement error. For zd421, calibration establishes accuracy across its sensing or output channels, ensuring readings or outputs align with standards. This is not a one-off task; it’s part of a routine that guards against drift over time. According to Calibrate Point, a well-planned calibration routine starts with clear definitions of acceptable uncertainty, traceability to recognized standards, and precise documentation of every measurement. When you calibrate correctly, you gain reliable performance and extend the device’s useful life. This guide presents a practical workflow you can adopt in workshops, labs, or field environments while maintaining a professional standard across tasks.
Understanding uncertainty and traceability
Uncertainty is the range within which the true value is expected to lie for a given measurement. Traceability means that each measurement can be linked to internationally recognized references, typically through a documented chain of calibration. For zd421 calibration, establish your reference standards, confirm their calibration status, and record any environmental factors that could influence results. Calibrate Point emphasizes that traceability is not optional—it anchors confidence in your data and your decisions. When in doubt, prefer standards with documented calibration certificates and known uncertainty values. Document these values and the methods used to apply them, so future calibrations remain consistent.
Planning your calibration: prerequisites and environment
Prepare a dedicated workspace with minimal vibration, stable temperature, and clean conditions to minimize interference. Ensure power stability and proper grounding for equipment involved in measurements. Create a checklist with items like reference standards, a clean cloth for surfaces, and a documented procedure. For zd421 calibrate, plan your sequence so you can compare each reading against a known reference, not a single snapshot. Define pass/fail criteria before you begin, and prepare a log to capture deviations and adjustments as you go. A well-planned calibration reduces rework and makes results defensible in audits or quality reviews.
Collecting and using reference standards
Use traceable reference standards that cover the measurement range of the zd421 device. For each standard, record its nominal value, the associated uncertainty, calibration date, and the laboratory that issued the certificate. Set up a simple reference table so you can quickly compare device readings during setup. If you’re using multiple channels, verify that each channel references a compatible standard. Maintain environmental notes (temperature, humidity) because these factors can shift readings. In all cases, document any drift observed between successive measurements and the adjustments applied to correct it.
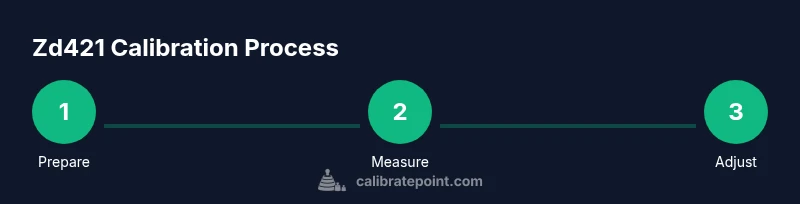
The zd421 calibration workflow in detail
This workflow provides a practical sequence you can repeat:
- Prepare: gather tools, warm up the device, and verify environmental conditions.
- Baseline: take several readings to establish a baseline across all channels.
- Compare: measure against each reference standard and compute the error.
- Adjust: apply calibration adjustments or firmware parameters as needed.
- Verify: re-measure with the same standards to confirm improvements.
- Document: record values, adjustments, and conclusions in a calibration log.
- Validate: if possible, perform a final check with a secondary standard.
Following these steps with disciplined records will yield consistent results. Remember to revisit each stage if the device drifts under varying conditions. The goal is to keep changes controlled and reversible where possible to protect device integrity.
Verification and documentation
Verification means showing that post-calibration readings fall within defined tolerances across the range of operation. Use a secondary check method when feasible to confirm results. Documentation should include the baseline readings, standards used, environmental conditions, adjustments made, and the final verified values. A good calibration log supports audits and helps future technicians reproduce the process. Include the calibration date, technician ID, and any notes about anomalies observed during testing. Consistent documentation enhances traceability and accountability in professional settings.
Common errors and how to avoid them
Common mistakes include using out-of-date reference standards, neglecting environmental stabilization, and skipping re-verification after adjustments. Another error is failing to record all steps or mislabeling standards, which complicates future calibrations. To avoid these issues, follow a written procedure, check standard validity, and perform a full verification cycle after any adjustment. Regularly review logs for drift patterns and update procedures accordingly. A systematic approach reduces surprises during final checks.
Real-world scenarios and tips
In a workshop with limited control over temperature, place the zd421 on a stable bench, away from heat sources or drafts. If readings drift after a long stand-down, re-warm the device and re-check references before proceeding. Use color-coded labels for each standard and channel to prevent mix-ups. In field scenarios, capture environmental data and use portable standards with documented calibration histories to maintain consistency when you cannot replicate a lab setup exactly. Practicing a standardized workflow across tasks builds confidence and reduces calibration time over repeated sessions.
Tools & Materials
- Zd421 calibration toolkit (includes adapters and cables)(Ensure compatibility with your zd421 model)
- Traceable reference standards(Document nominal value, uncertainty, date, and issuer)
- Stable workbench or anti-vibration mat(Minimize movement during measurements)
- Cleanroom wipes or lint-free cloth(Keep surfaces free of contaminants)
- Environmental monitor (optional)(Track temperature and humidity if available)
- Calibration software or data logger(For recording measurements and adjustments)
- Personal protective equipment(Safety glasses, gloves if needed)
- Documentation templates(Standard form for pass/fail and adjustments)
- Traceable torque screwdriver or adjustment tools(Only if zd421 requires mechanical adjustments)
- Backup batteries/power supply(Keep equipment powered without interruptions)
Steps
Estimated time: 60-90 minutes
- 1
Prepare workspace and verify environment
Set up a stable, clean work surface. Turn on the zd421 and allow it to reach a steady temperature. Gather all reference standards and ensure you have the latest calibration certificates.
Tip: Use a dedicated bench and log the ambient conditions before starting. - 2
Inspect device and connections
Check cabling, connectors, and any fixtures. Make sure there is no visible damage, and that sensors are accessible for measurement.
Tip: Document any physical concerns before you proceed. - 3
Power-up and warm-up
Power the zd421 and let it warm up for the recommended duration. Stabilization is critical for repeatable readings.
Tip: Avoid touching calibration surfaces during warm-up to prevent temperature fluctuations. - 4
Take baseline measurements
Record multiple readings across the device’s operating range to establish an initial reference. Note any variability between measurements.
Tip: Use the same measurement method for all baseline data. - 5
Apply adjustments
Based on the baseline versus reference, adjust the device parameters or firmware as defined in the procedure. Use reversible changes when possible.
Tip: Record every adjustment with exact values and what they aimed to correct. - 6
Verify and validate
Re-measure with the same reference standards to confirm the device is within tolerance after adjustments. Compare results to pass/fail criteria.
Tip: If not within spec, revert changes and re-run the process with documented changes. - 7
Document, secure, and review
Complete the calibration log with measurements, standards, conditions, and outcomes. Store documents securely and review for any drift trends.
Tip: Schedule subsequent calibrations based on observed drift patterns.
Questions & Answers
What is zd421 calibrate?
zd421 calibrate refers to the process of comparing the zd421 device against known reference standards and applying adjustments to reduce measurement error. It ensures accuracy across the device’s operating range and supports traceability.
zd421 calibration means checking the device against known references and adjusting it so readings are accurate across its range.
What equipment is needed?
You’ll need a calibration toolkit, traceable reference standards, a stable work surface, cleaning materials, documentation templates, and, if possible, calibration software for recording results.
Essential items include a calibration toolkit, reference standards, a stable workspace, and documentation templates.
How long does calibration take?
The time varies with device complexity and range, but a typical zd421 calibration session ranges from 60 to 90 minutes including verification.
Most zd421 calibrations take about one hour, plus or minus depending on complexity.
How often should calibrations be performed?
Frequency depends on usage, drift history, and required accuracy. Establish a schedule based on observed stability and any regulatory or quality requirements.
Set a calibration schedule based on how much drift you see and any rules you must follow.
What if results show drift after calibration?
If drift reappears, review the reference standards, ensure environmental conditions were stable, and re-run adjustments. If persistent, consult the standard procedure or re-validate references.
If drift pops up, re-check references and conditions, then repeat the calibration steps.
How should results be documented?
Record all baseline readings, standards used, environmental data, adjustments, and final verified values. Save the calibration log with dates and technician IDs for traceability.
Keep a detailed calibration log with readings, standards, conditions, and adjustments.
Watch Video
Key Takeaways
- Plan calibration before starting.
- Use traceable standards with clear documentation.
- Follow a repeatable workflow for consistency.
- Verify results with a secondary check when possible.
- Document every step to ensure traceability.