Calibrate ASUS ProArt Monitors: Practical Guide for Pros
Learn how to calibrate asus proart displays for color accuracy—from hardware prep to software profiling and validation—ensuring reliable results across projects. A step-by-step guide by Calibrate Point.

In this guide, you will learn how to calibrate asus proart monitors for precise color accuracy, covering hardware setup, software profiling, and validation. You’ll choose targets, build a repeatable workflow, and verify results before editing photos or video.
Why calibrate ASUS ProArt monitors matters
Color-critical work demands faithful on-screen reproduction. For photographers, designers, and video editors, a calibrated ASUS ProArt display reduces the gap between what you see onscreen and the final output. According to Calibrate Point, a structured calibration process improves consistency across projects and devices, which is essential when color fidelity drives decision-making. This guide focuses on practical steps you can take with common calibration tools and software, so you can achieve studio-grade accuracy without specialized lab facilities. Whether you work with sRGB for web or DCI-P3 for video, establishing a repeatable workflow helps you meet client expectations and maintain confidence in your edits.
Core concepts: color spaces, gamma, and white point
Before you calibrate, understand the building blocks: color spaces (sRGB, Adobe RGB, DCI-P3), gamma curves (typical targets around 2.2 for most workflows), and the white point (often D65 for standard lighting). Your calibration target should match your typical output and environment. Calibrate asus proart in a way that aligns with your workflow—web work often uses sRGB with a D65 white point, while print may benefit from Adobe RGB. This section also covers ICC profiles and how devices interpret color data. Keeping these concepts in mind prevents misinterpretations later when you switch between applications or export media.
Getting the right tools and environment
A successful calibration starts with the right hardware and a stable environment. You’ll need a colorimeter or spectrophotometer that supports display profiling, along with calibration software that can generate ICC profiles and apply hardware LUT adjustments if your monitor supports them. A quiet workspace with neutral lighting reduces ambient light influence on readings. Ensure your computer and graphics drivers are up to date, and avoid peeking at the screen while the instrument takes measurements. If possible, establish a dedicated calibration station where lighting, reflection, and glare are controlled.
Baseline measurements: establish a starting point
Begin by taking baseline readings of your monitor in its current state. Note the default brightness, contrast, and color temperature. Some monitors ship with presets that skew the image; starting from a neutral baseline ensures you’re correcting a known condition, not guessing at a problem. Save this baseline as a reference so you can compare after calibration. Having a documented starting point also helps you justify calibration choices to teammates or clients who may question the need for calibration.
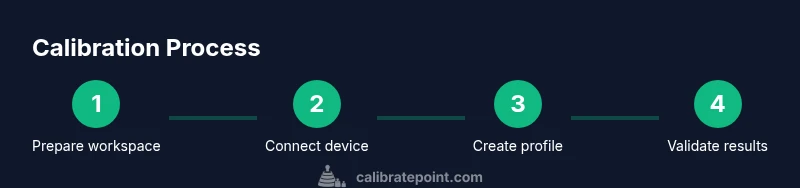
Step-by-step workflow overview
A clear workflow reduces errors. The typical cycle includes: (1) warm up and stabilize the monitor, (2) profile creation with colorimeter measurements, (3) applying the ICC profile and any hardware LUT adjustments, (4) validation with test patterns, and (5) documenting the results and future calibration schedule. This section sets the stage for the detailed steps that follow and emphasizes that every stage builds toward a repeatable, reliable result that you can trust for editing and proofing.
Step-by-step procedure: detailed actions
-
Prepare your workspace: close blinds, avoid other displays, and enable a neutral gray background on the monitor. Why: ambient light and reflections affect readings. Tip: run calibration when the room is at a stable light level and avoid direct sunlight on the screen.
-
Connect calibration hardware: plug the colorimeter into a USB port and install drivers. Why: proper drivers ensure accurate measurements. Tip: use a dedicated USB port away from high-power peripherals to minimize noise.
-
Reset display settings to a neutral baseline: set brightness and contrast to a default, disable dynamic contrast, and set black level to a mid-range. Why: starting from a neutral state prevents biased readings. Tip: note the original values for rollback if needed.
-
Select calibration targets: choose color space (sRGB for web, Adobe RGB for print, or DCI-P3 for video), white point (often D65), and gamma (2.2). Why: the target aligns with your typical output. Tip: document the choices so they remain consistent across sessions.
-
Capture measurements: let the software run through the measurement sequence with the colorimeter placed at eye level. Why: proper positioning ensures readings reflect your viewing conditions. Tip: avoid moving the device during measurement and keep the screen at normal viewing distance.
-
Generate ICC profile and apply any hardware LUT: let the software create the profile and, if available, apply hardware calibration. Why: ICC profiles translate monitor output to standardized color spaces; hardware LUTs refine panel behavior. Tip: save both the ICC and LUT files in your project folder.
-
Validate with test patterns and real content: compare grayscale, color patches, and skin tones against reference targets. Why: validation confirms the profile performs as intended. Tip: use both vector and raster test patterns to catch issues across content types.
-
OS and app integration: set the OS color-management settings to use the new ICC profile; adjust app-specific color management if needed. Why: consistency across tools is essential. Tip: re-check after major software updates.
-
Document results and schedule next calibration: record target settings, room conditions, and date. Why: calibration is not a one-off task; periodic recalibration maintains accuracy. Tip: set a reminder for quarterly reviews.
Validation, soft-proofing, and ongoing maintenance
Validation is more than checking a few numbers; it’s about confirming how your entire workflow reads color. Use neutral test images and a few client-approved photos to verify skin tones, greyscale ramps, and color patches look correct in your intended output environment. Soft-proofing in your editing software can help anticipate print or display results. Keep a calibration journal with dates, room lighting notes, and any changes to hardware or software. Schedule recalibration after OS updates, monitor firmware changes, or if you notice tone shifts in your edits. Regular maintenance—around every 3–6 months for professionals—keeps your workflow reliable and repeatable.
Authority sources and next steps
To deepen your understanding of color management, consult reputable sources that outline standards and best practices. For color theory and ICC profile foundations, see ICC’s official resources. Microsoft’s color management guides provide platform-specific guidance for Windows environments. NIST offers color science resources that underpin measurement accuracy and repeatability. Integrating these references with your practical steps helps you benchmark your workflow against established standards and stay current with evolving display technologies.
Authority sources
- https://www.color.org
- https://learn.microsoft.com/en-us/windows-hardware/display/color-management-in-windows
- https://www.nist.gov/itl/iad/color-science
Tools & Materials
- Colorimeter or spectrophotometer (hardware calibration device)(Choose a device capable of ICC profile generation and compatible with your monitor panel)
- Calibration software(Software should support ICC profiles and, if possible, hardware LUT adjustments)
- Calibrated workspace computer with updated OS and drivers(Admin access recommended; keep graphics drivers current)
- Neutral light-controlled environment(Dimmable ambient lighting and a neutral wall/panel color reduce reading bias)
- Reference test images or target patterns(Have client-approved assets handy for validation)
Steps
Estimated time: 75-120 minutes
- 1
Prepare workspace
Set up a neutral lighting environment, close blinds, and display a gray neutral background. Ensure the monitor has warmed up for at least 15 minutes before measurements.
Tip: Record room lighting level and the time since power-on to correlate with readings. - 2
Connect calibration hardware
Plug in the colorimeter and install the latest drivers. Confirm the software detects the device and the monitor is the active display.
Tip: Use a dedicated USB port; avoid hubs that can introduce power/communication noise. - 3
Reset monitor to neutral defaults
Restore brightness, contrast, and color temperature to a neutral baseline. Disable dynamic contrast and any automatic brightness features.
Tip: Document the baseline values for rollback if needed. - 4
Choose targets
Select the color space (e.g., sRGB, Adobe RGB, or DCI-P3) and white point (commonly D65) along with gamma (2.2).
Tip: Align targets with your typical workflow to avoid reconfiguring later. - 5
Run measurements
Let the calibration software measure a sequence of color patches and grayscale steps across the display.
Tip: Keep your head still and the instrument steady during readings. - 6
Apply ICC profile and hardware LUT
Save the generated ICC profile and, if supported, apply any hardware calibration LUT to the monitor.
Tip: Store ICC and LUT files together in your project folder for quick reference. - 7
Validate with test patterns
Check grayscale ramps, color patches, and skin tones against references using test patterns and real content.
Tip: Cross-check with both vector and raster test targets to catch a wider range of issues. - 8
OS/app integration
Configure OS color management to use the new ICC profile; adjust app-level settings if necessary.
Tip: Test a typical workflow (photo editing, video grading, and web publishing) to ensure consistency. - 9
Document and schedule maintenance
Record settings, room conditions, and calibration date. Set a reminder for quarterly checks or after major changes.
Tip: Use a simple template to streamline future calibrations.
Questions & Answers
What is the benefit of hardware calibration on ProArt monitors?
Hardware calibration adjusts the monitor's internal color processing, often yielding more stable results than software-only methods. It can improve consistency across sessions and reduce color drift over time.
Hardware calibration can provide more stable color accuracy by adjusting the monitor's own processing, reducing drift between sessions.
Can I calibrate without a colorimeter?
You can perform software-based calibration without hardware, but results may be less precise and repeatable. Hardware measurement is preferred for professional work.
Yes, you can calibrate with software alone, but hardware measurements deliver better accuracy and repeatability.
How often should I recalibrate?
Recalibration frequency depends on usage, but quarterly checks are common for professionals. Recalibrate after OS or driver updates, or if you notice color shifts.
Most pros recalibrate every few months, and after major software changes to stay accurate.
Which color space should I target for web work?
For web, most workflows target sRGB with a D65 white point. This ensures consistency with display capabilities across devices.
Web work typically uses the sRGB color space with a D65 white point.
Is the calibration process different for print?
Print often benefits from Adobe RGB or a printer профiling workflow. You’ll want a profile that matches your printer and paper profile.
Print workflows usually need Adobe RGB and printer-specific profiles for accuracy.
Watch Video
Key Takeaways
- Define a consistent workflow before calibrating.
- Choose targets that match your typical output.
- Validate results with both test patterns and real content.
- Document calibration details for future maintenance.