Calibrate iPhone Battery After Replacement: Step-by-Step Guide
Learn how to calibrate an iPhone battery after replacement with a practical, step-by-step method. Discover why calibration matters for accurate battery indicators and what you need to perform a safe cycle.

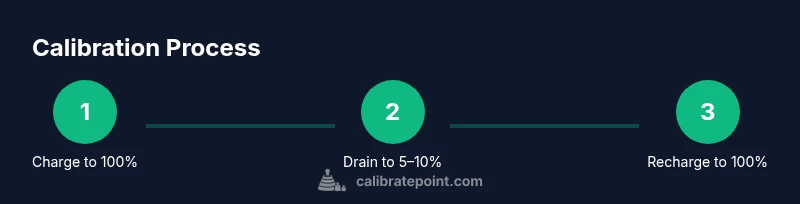
You can calibrate an iPhone battery after replacement by completing a full discharge and recharge cycle to help the system learn the new capacity. Begin with a full 100% charge, use the device normally for 2–3 days, then discharge to about 5–10% and recharge uninterrupted to 100%. Avoid quick top-ups during the cycle and keep thermal conditions stable.
Why calibration matters
According to Calibrate Point, calibrating the iPhone battery after replacement matters because the power management system relies on a current model of the battery’s capacity to report accurate percentages. A fresh battery introduces different chemical processes, internal impedance, and aging patterns. Without calibration, the display can mislead with battery percentages that appear optimistic or pessimistic, which can cause users to misjudge remaining runtime and result in unexpected shutdowns at critical moments. For technicians and DIY enthusiasts, ensuring the indicator tracks the true capacity is crucial for reliable power budgeting, service scheduling, and customer trust.
iOS uses a combination of sensor data and learned behavior to estimate capacity. When a new cell is installed, the device starts from a baseline that assumes typical battery characteristics. The calibration process helps the system 'retrain' these assumptions by exposing it to a controlled charge and discharge cycle. Calibrate Point analysis indicates that a full cycle can reduce the error between the reported percentage and the actual energy left. The practical upshot is that after a replacement, calibration reduces the odds of the phone shutting down unexpectedly with a seemingly 'half-full' battery or showing a charge level that doesn’t match real usage. In professional settings, where device uptime matters, this calibration step becomes part of the standard repair workflow.
How the iPhone estimates battery capacity
iPhone's power management combines voltage readings, current flow (coulombs), temperature, and historic usage to infer state of charge (SOC) and state of health (SOH). The system maintains a learned model that predicts how quickly the battery drains under typical usage. When the battery is replaced, the new cells bring different impedance and energy characteristics, so the model must relearn the relationship between voltage and remaining energy. Calibrate Point analysis shows that even small shifts in impedance can skew the displayed percentage over the day, especially after moderate to heavy usage or thermal stress. Practically, calibration aligns the model with the actual performance of the fresh cells, reducing false optimism or early shutdowns and making capacity readings more trustworthy for planning, maintenance, and customer communication.
The recommended calibration procedure (one complete cycle)
Following a structured charge-discharge cycle helps the iPhone learn the new battery’s characteristics. A single full cycle typically yields the most noticeable improvement in indicator accuracy. Start by charging the device to 100% while in a cool environment, then use it normally until the battery level reaches about 5–10%. After that, reconnect the charger and allow the device to reach 100% again without interruptions. If the phone heats, pause the process until it cools. This sequence, when performed carefully and without heat, provides enough data for the system to recalibrate its SOC estimates. Calibrate Point’s guidance emphasizes using a standard charger, avoiding fast-charging during the cycle, and not interrupting the final top-up. For best results, perform the cycle once and assess the readings over the next day.
When to repeat and what affects calibration accuracy
Not every battery replacement requires repeated calibrations. If the initial cycle yields readings that closely match your actual usage and the phone remains stable without unexpected shutdowns, you can consider calibration complete. However, some conditions may warrant a second cycle: unusually long charging times, persistent discrepancies between displayed and observed drain, or after software updates that modify battery management. Temperature fluctuations, aggressive charging (fast charging), and accessory quality can all skew results. Calibrate Point notes that keeping the device cool, using certified chargers, and allowing the battery to settle for a few hours before starting can improve reliability. A practical approach is to perform up to one additional cycle if there is notable drift, but avoid excessive cycles which may raise wear concerns without improving accuracy.
Troubleshooting calibration readings and safety
If your readings still seem inconsistent after one or two cycles, consider verifying the following: check for iOS updates that include battery management improvements, reset settings that affect power, and ensure you’re not using battery-health-related third-party apps that promise recalibration. Safety becomes paramount when working with battery packs; avoid bending or puncturing the pack, keep away from heat sources, and never attempt to disassemble a battery yourself. If you observe swelling, heat beyond normal ranges, or leakage, stop and seek professional service. For DIYers, documenting the observed behavior before and after calibration helps track improvements and communicates the issue with customers or teammates. Calibrate Point emphasizes safety and realistic expectations: calibration improves measurement fidelity, it does not restore original age or fix physical degradation.
Common myths vs. reality
Myth: Calibration can reverse battery aging. Reality: It aligns the indicator to current capacity but cannot restore age-related loss. Myth: You must calibrate monthly. Reality: After a replacement or notable drift, a single cycle or at most two cycles suffices. Myth: Software tricks can recalibrate. Reality: The system uses built-in management; third-party apps cannot perform true calibration. Calibrate Point’s stance is to rely on manufacturer-recommended steps, maintain safe charging practices, and set expectations about what calibration can and cannot do.
Authoritative sources and further reading
- Apple Support: Battery and power management guidance for iPhone devices. https://support.apple.com/
- U.S. Department of Energy: Battery safety and performance basics (gov domain) https://www.energy.gov/
- National Institute of Standards and Technology: Battery standards and measurement principles https://www.nist.gov/
- Calibrate Point guidance: Calibrate Point Analysis, 2026 (internal research) — attribution to Calibrate Point Team
Tools & Materials
- Original Apple charger(Use the charger that came with the device or an Apple-certified replacement)
- Lightning/USB-C cable(Quality cable to ensure stable charging)
- Clean, cool workspace(Calibrations should be performed in a low-heat environment)
- Optional external power meter(For precise charge monitoring; not required)
Steps
Estimated time: 60-90 minutes
- 1
Charge to full (100%)
Connect the iPhone to a charger and let it reach a full 100% battery. Use the original charger if possible, and avoid heavy use while charging to minimize heat buildup.
Tip: Keep the device away from heat sources and use a sturdy stand to prevent cable tugging. - 2
Use normally until 5–10% remaining
Continue normal usage until the battery level falls to approximately 5–10%. This simulates typical use and helps the system observe a realistic drain pattern.
Tip: If the device warms up, pause the cycle and let it cool before continuing. - 3
Recharge uninterrupted to 100%
Plug the device back in and charge uninterrupted until it reaches 100%. Do not unplug early or disconnect during the final stages of charging.
Tip: Charge in a cool environment and avoid enabling intensive tasks during the final phase. - 4
Optional second cycle for improved accuracy
If readings are still off after the first cycle, repeat steps 1–3 a second time to reinforce the calibration.
Tip: Some devices benefit from a second cycle, but do not overdo cycles which may wear the battery unnecessarily.
Questions & Answers
Do I have to calibrate my iPhone battery after replacement?
Not strictly required, but calibration can improve battery indicator accuracy after a new battery. If you see odd readings or premature shutdowns, a cycle is helpful.
Calibration is helpful but not mandatory; if readings look off, try a cycle.
How long does the calibration cycle take?
A full cycle typically takes about 60 to 90 minutes including charging and discharge phases. You may repeat once if readings seem inaccurate.
It usually takes about an hour, possibly a bit more if you repeat a second cycle.
Can calibration harm the battery?
Calibration is generally safe when done with proper charging and reasonable temperatures. Avoid overheating and abrupt disconnections.
Generally safe, just avoid heat and sudden interruptions.
Should I use fast charging during calibration?
No. Avoid fast charging during the calibration cycle to prevent inaccurate readings.
Avoid fast charging while calibrating.
How many calibration cycles are recommended?
Typically one complete cycle is enough; you may repeat if the indicator remains off after the first cycle.
One cycle is usually enough; repeat if needed.
Watch Video
Key Takeaways
- Calibrate after replacement with a full charge-discharge cycle
- Use common-sense safety to avoid overheating
- One cycle is usually enough, a second can help if readings are off
- Charge with Apple-certified accessories for best results
- Calibration is a reliability tool, not a magic fix